
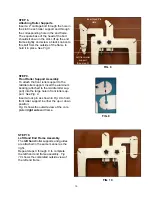


19
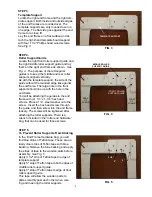
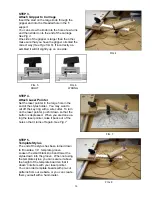
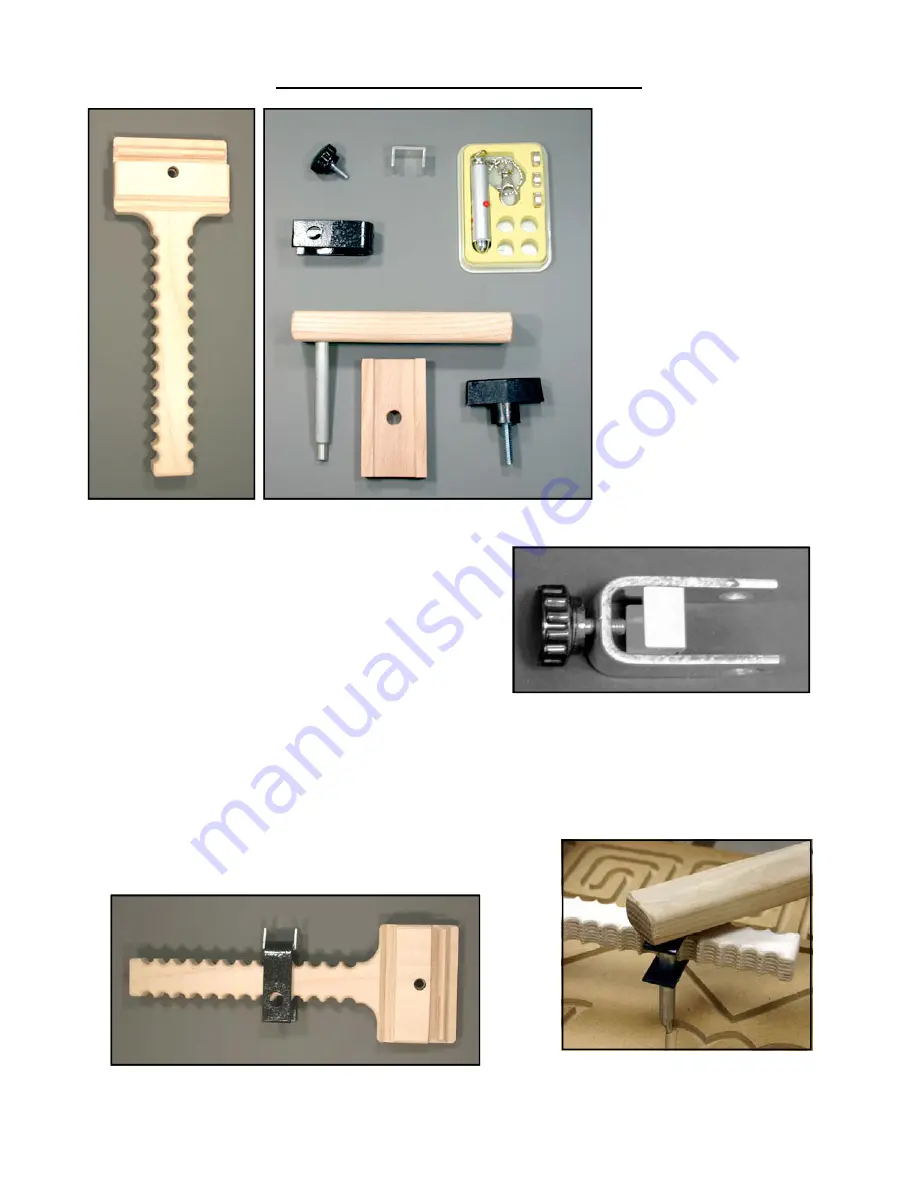
FIG. 3
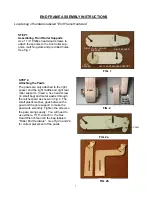
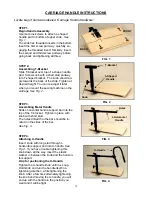
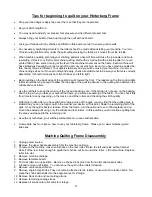
POINTER PACKAGE INSTRUCTIONS
Parts: Part
#
A Wood T-support
1201
B Wood gripper
1200
C Wood stylus holder
1202
D Black Bar Knob
3116
E Small black knob
3077
F Laser Pointer
3078
G Metal stylus fastener 3079
H Metal U-shape
3080
C
D
E
G
H
F
B
A
FIG. 1
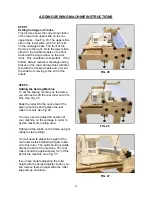
STEP 2.
Attach Stylus Holder
Slide the stylus fastener (with the u-shaped
piece inside) onto the T-support
(See Fig. 2)
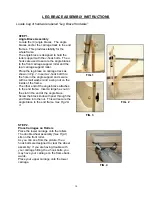
and insert the stylus thru the large holes
(See
Fig. 3)
. Tighten the black knob until the stylus
fastener is holding the stylus securely. The
metal U-shaped piece protects the side of the
wood from the end of the knob.
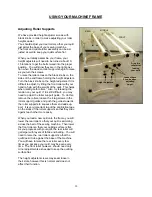
STEP 1.
Assembling Stylus Fastener
Thread the small black knob into the stylus
fastener.
Place the U-shaped metal piece into the stylus
fastener as shown in
Fig 1.
FIG. 2