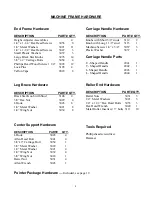
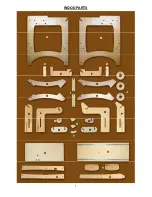
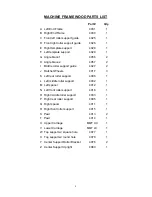

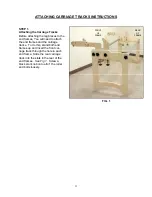

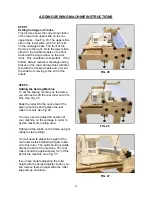

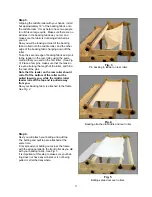

18
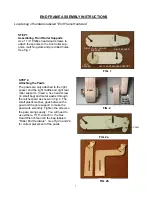
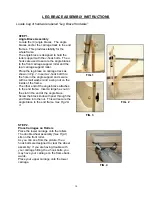
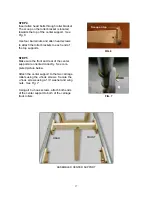
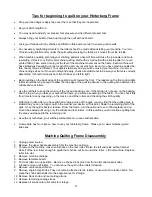
STEP 1.
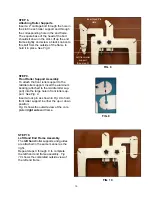
Begin Handle Assembly
Use machine screws to attach L-shaped
handle part to bottom of upper slide.
See
Fig. 1.
The slide has threaded inserts in the bottom.
Insert the first screw part way, carefully en-
gaging the threaded insert. Similarly, insert
the second and third screw part way before
going back and tightening all three.
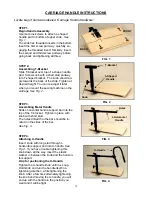
STEP 2.
Assembling T-Bracket
Slide T-bracket over top of L-shape handle
part. Screw knob with a short stud partway
into T-shaped bracket. The knob should an-
gle towards the back of the slide. Tighten at
desired height. You can re-adjust it later
when you mount the sewing machine on the
carriage.
See Fig. 2.
FIG. 1
BACK
FRONT
FIG. 2
T-Bracket
Knob
L-Shaped
Handle
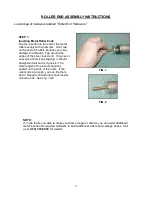
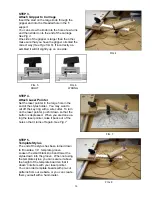
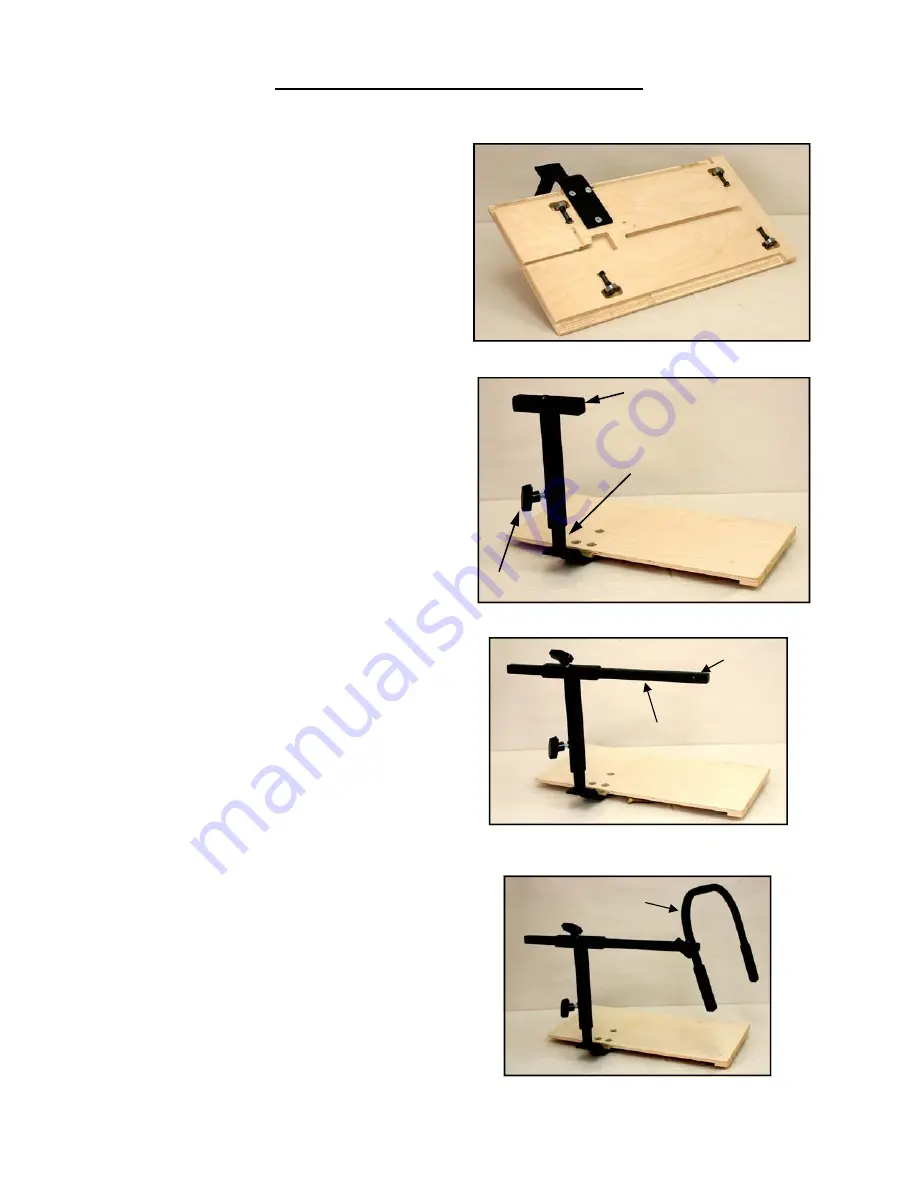
STEP 4.
Attaching U-Handle
Insert knob with long stud through
I
-
horizontal support, and into U-handle. S
ee
Fig 4.
If you have trouble tightening this
knob down all the way, insert the plastic
washer in between the knob and the horizon-
tal support.
A tip for positioning the U-Handle:
Tighten the U-handle knob until it is snug
Hold knob and turn the handle itself in a
tightening direction, while tightening the
knob. After a few tries alternately tightening
the knob and moving the U-handle, you will
end up with the handle in the position you
want and it will be tight.
CARRIAGE HANDLE INSTRUCTIONS
Locate bag of hardware labeled “Carriage Handle Hardware”
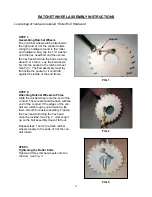
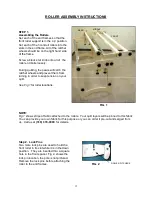
STEP 3.
Assembling Metal Handle
Slide
I-
horizontal handle support bar into the
top of the T-bracket. Tighten in place with
knob with short stud.
The holes drilled thru the bar should be lo-
cated on the sides of the bar.
See Fig. 3.
I
-Horizontal
Handle
Holes
FIG. 3
FIG. 4
U-Handle


