


Network Video Recorder User Manual
65
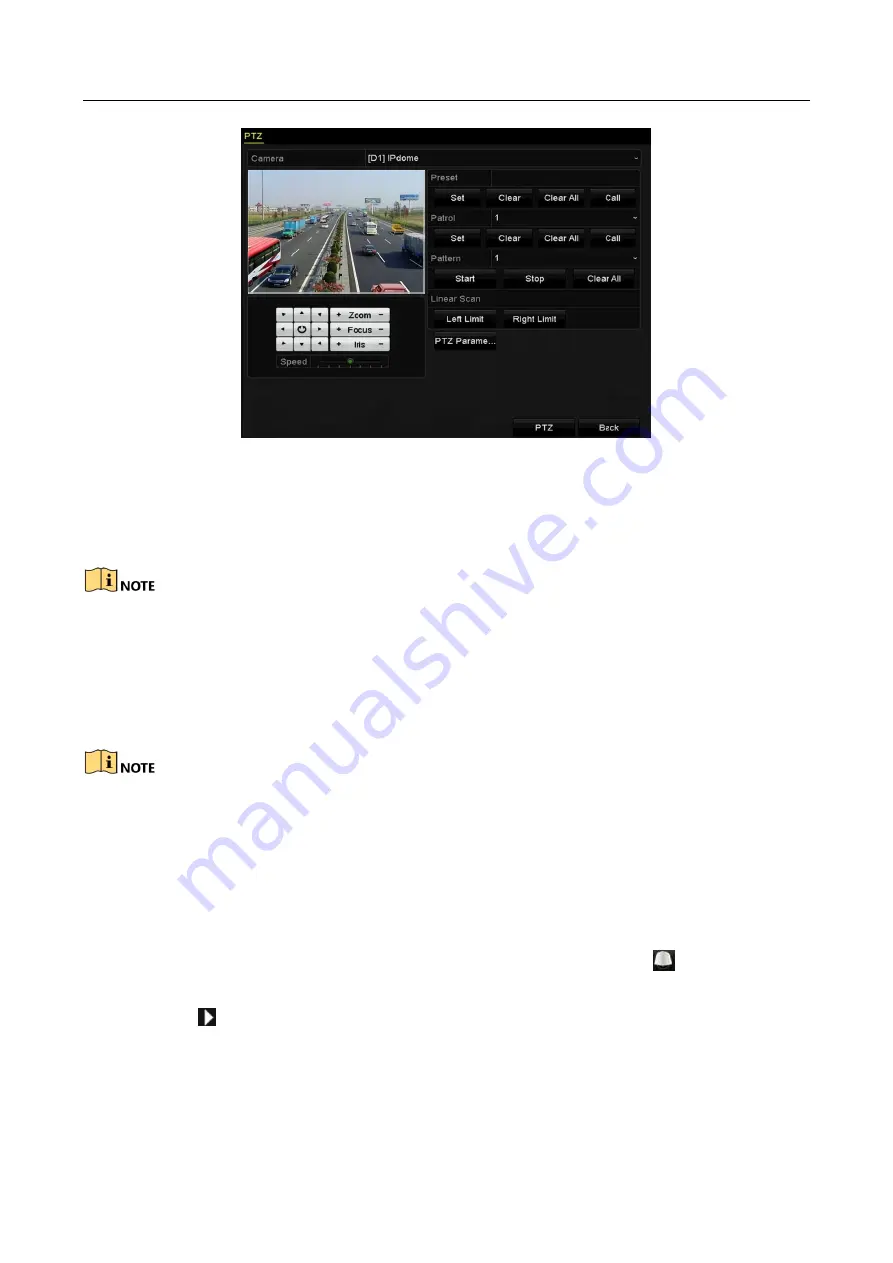
Figure 4-10
PTZ Settings
Step 2
Use the directional button to wheel the camera to the location where you want to set the
limit, and click the Left Limit or Right Limit button to link the location to the corresponding
limit.
The speed dome starts linear scan from the left limit to the right limit, and you must set the left
limit on the left side of the right limit, as well the angle from the left limit to the right limit should
be no more than 180º.
4.2.8 Calling Linear Scan
Before operating this function, make sure the connected camera supports the linear scan and is in
HIKVISION protocol.
Purpose:
Follow the procedure to call the linear scan in the predefined scan range.
Step 1
Click the button PTZ in the lower-right corner of the PTZ setting interface;
Or press the PTZ button on the front panel or click the PTZ Control icon
in the quick
setting bar to enter the PTZ setting menu in live view mode.
Step 2
Click the
button to show the one-touch function of the PTZ control.
Содержание DS-7600NI-KI/W Series
Страница 1: ...Network Video Recorder User Manual UD07157B ...
Страница 49: ...Network Video Recorder User Manual 48 Figure 2 40 Bind IP Camera Step 5 Click OK ...
Страница 54: ...Network Video Recorder User Manual 53 Figure 3 6 Information ...
Страница 96: ...Network Video Recorder User Manual 95 Figure 6 8 Smart Settings ...
Страница 127: ...Network Video Recorder User Manual 126 Figure 8 18 Copy Settings of Alarm Output ...
Страница 193: ...Network Video Recorder User Manual 192 Step 4 Click the Apply button to save the settings ...
Страница 226: ...Network Video Recorder User Manual 225 ...


