2.
Select the
Schedule
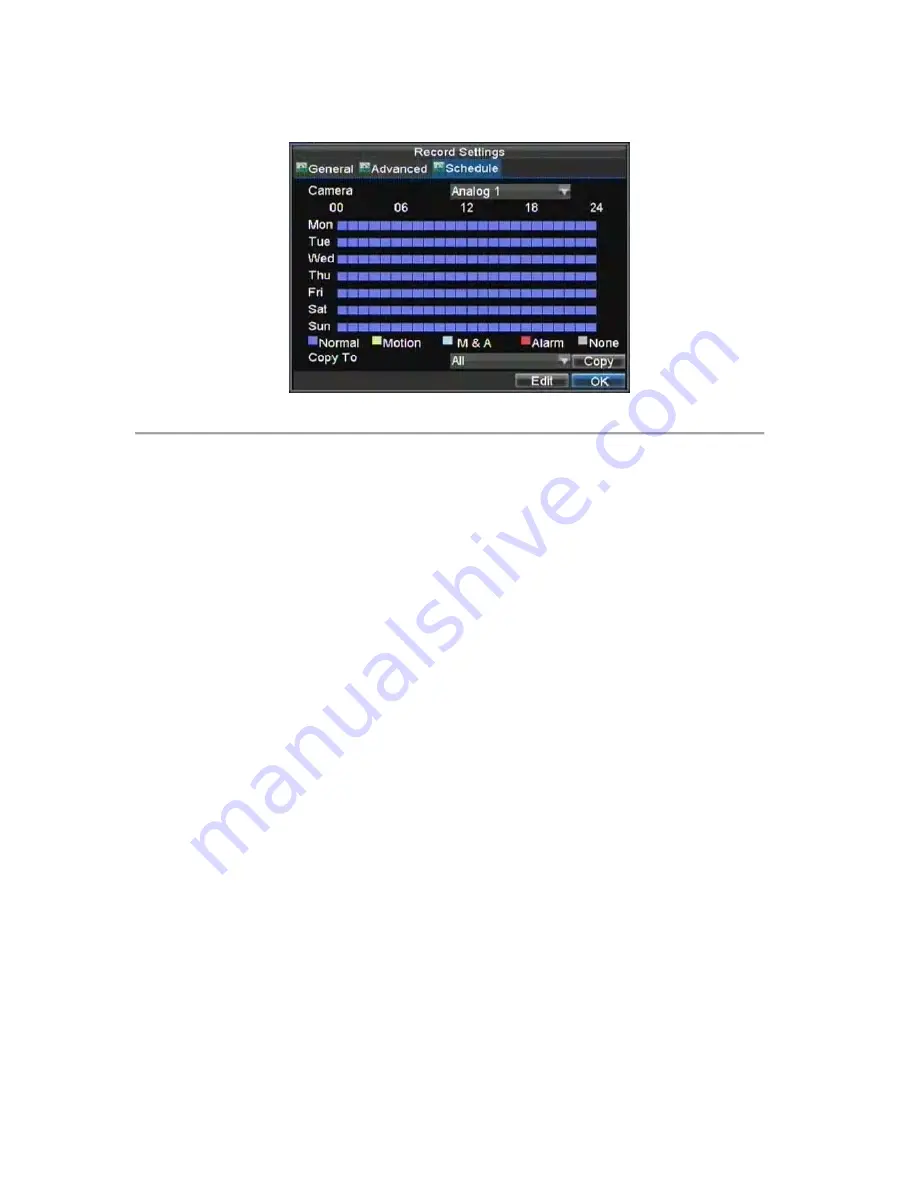
tab to open the Schedule menu, shown in Figure 4.
Figure 4. Schedule Settings
3.
Select Camera to edit schedule for.
4.
Click the Edit button.
5.
Click and check
Enable Schedule
.
6.
Select the day you would like to setup the schedule for or select All Week to record the entire week.
7.
Select to record the entire day by clicking
All Day
or at different time periods. Up to 8 time periods
can be scheduled. It is important to note that time periods cannot be overlapped.
8.
Select recording
Type
. Recording type can be based on time and triggered by motion detection and/or
alarm. Motion detected and alarm triggered recordings are further explained in
Configuring Alarms
.
9.
Click the OK button to finish configuration.
10.
Repeat steps 3-9 for other cameras or copy settings from one schedule to the next under the
Copy To
section.
11.
Click OK to finish and save the schedule settings.
Note:
Event
encoding parameters will take effect when motion detection or alarm happens.
Normal
encoding
parameters will take effect when there are no events happening.
Starting
a
Manual
Recording
A manual recording can be started at any time. To start a manual recording:
1.
Press the REC/SHOT button on the front panel or in the Main menu to bring up the Manual Record
menu (shown in Figure 5).
31
alarm shop
Содержание DS-7300HFI-S Series
Страница 1: ...DS 7300HFI S Series DVR USER S MANUAL Version 3 1 0 alarm shop ...
Страница 7: ...C H A P T E R 1 Introduction 6 alarm shop ...
Страница 17: ...C H A P T E R 2 Getting Started 16 alarm shop ...
Страница 24: ...C H A P T E R 3 Live Preview 23 alarm shop ...
Страница 29: ...C H A P T E R 4 Record Settings 28 alarm shop ...
Страница 38: ...C H A P T E R 5 Playback 37 alarm shop ...
Страница 43: ...Figure 7 Digital Zoom Area Selection 42 alarm shop ...
Страница 44: ...C H A P T E R 6 Backup 43 alarm shop ...
Страница 49: ...C H A P T E R 7 Alarm Settings 48 alarm shop ...
Страница 59: ...C H A P T E R 8 Network Settings 58 alarm shop ...
Страница 67: ...C H A P T E R 9 PTZ Control 66 alarm shop ...
Страница 73: ...path that was defined until Stop Pattern is clicked 6 Click OK to save and exit from menu 72 alarm shop ...
Страница 74: ...C H A P T E R 1 0 Camera Management 73 alarm shop ...
Страница 78: ...C H A P T E R 1 1 HDD Management 77 alarm shop ...
Страница 84: ...C H A P T E R 1 2 DVR Management 83 alarm shop ...
Страница 95: ...Figure 17 Log Search Export Menu 7 Click Cancel to exit out of menu 94 alarm shop ...
Страница 96: ...C H A P T E R 1 3 Appendix 95 alarm shop ...


