41
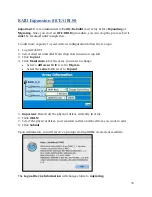
This option will enable rebuilding to ignore bad sectors and attempt to make your data
accessible. It is important to backup immediately after backup is complete and replace
or repair the disks with bad sectors.
Critical array becomes disabled when faulty disk was removed
If this is the case, check to make sure you removed the correct disk. When you remove
the wrong disk from a critical array, the array status may become disabled. Data is
inaccessible for disabled arrays, follow these steps to restore the previous state:
1.
Shut down your PC.
2.
Shut down the RS6314A Enclosure.
3.
Place all disks back to original configuration.
4.
Boot up PC.
5.
Once array is back to critical status, identify the correct disk and replace it.
Disabled Arrays
If two or more disks in your array go offline due to an error or physical disconnection
your array will become
disabled
.
To recover a disabled array, using the ‘Recover Tab’ will yield the best results. To
utilize the
Recover
tab, you will need to insert the
exact
physical drives that are listed
on the recover list. The goal of using recover is to get the RAID status back to
critical/normal, allowing you to access and back up your data.
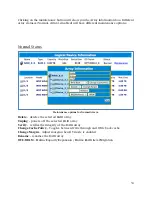
Example: RAID 5 Disabled Array:
Recover with RAID Maintenance
1.
Log in to WebGUI.
2.
Click
Maintenance
for the array that is disabled.
3.
Click
Recover.
Recover RAID with Recover Tab
Before using the Recover tab to recover your array, check to see if the RAID array is
listed in your
Recover List
. Once you have confirmed the RAID array is there, proceed
to delete the disabled array.
1.
Log in to WebGUI.
2.
Click
Maintenance
for the array that is disabled.
3.
Click
delete,
to delete the disabled array.
4.
Click
Recover
Tab.
5.
Select the RAID configuration you just deleted.
Содержание RocketStor 6414TS
Страница 1: ...1 RocketStor 6414TS User Manual January 15th 2016 Revision 1 5 HighPoint Technologies Inc ...
Страница 13: ...13 7 Navigate to where you saved the driver files 8 Click OK ...
Страница 16: ...16 5 Follow the on screen instructions of the installer 6 Reboot computer for changes to take effect ...
Страница 27: ...27 Disk Utility for Mac 2 In Disk Utility select the Volume you created on the right then click the Erase tab ...

