background image


                                                                                                                                                                                                  8     

13. 

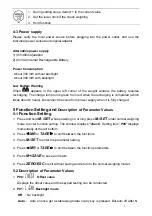
P12: 

 Filtering setting

:

 1

2

3

Set the filtering level in which the stable indication turns on. The higher the setting, the 

slower stabilization time


14. 

P13


Precondition for zeroing or taring setting: 

stable, auto, always 

stable


Taring or zeroing can be not action without stable indication after pressing the key 

TARE

 or 

ZERO


always

Taring or zeroing can be action without stable indication after pressing the key 

TARE

 or 

ZERO


auto

      Press key TARE or ZERO, but it works only when get the stable indication.   

15. 

P14

 Zero-Offset function.


ON   

display the previous weight when powering on again 

OFF

  not display the previous weight when powering on again


16. 

P15

 Initialization 

Press 

M-/SET 

then press 

M+/SAVE

 to start initialization and the window display


RESET.


6.Calibration 

Note:

 Before calibration, please set the unit first. The unit used in calibration must be the one 

that has been set before (

P02: 

)

. During the calibration procedure, press 

ZERO/ESC


to return to normal weighing mode without saving.   

Here we take 3kg/1g as an example 

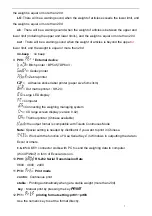
1.  Press and hold 

TARE

 while powering on. Do not release it till the window displays “

CAL

”. 

2.  With no load on the weighing pan, press

 TARE

 to start zero point calibration.

 “

”is             

blanking at the left bottom. 

3.  Wait till the window displays the first calibration value. “

”appears at the left bottom.


Note:

 The first calibration value is default. With the same capacity, the last first calibration 

point value can be recorded. If the capacity has been changed, the default value is 1/3 of 

full load. If you need to change the value, do as the following: Press 

M-/SET

to enter the 

value setting. Press


/MR 

or


TARE/


to move leftwards or rightwards. 

Press

+/PRINT/HI

 or 

HOLD/LO/-


to change the value. Press


M+/SAVE


to save.


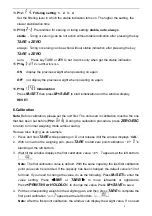
4.  Put the corresponding weight on the weighing pan, and then press 

TARE

 to complete the 

first point calibration. “

”appears at the left bottom. 


Note: 

After the first point calibration, the window can display the weight value. If no need 

Содержание CYD-W8+-15K

Страница 1: ... 4 2 Front Panel 4 2 1 LCD display 4 2 2 Keyboard 4 3 Power Supply 2 3 3 4 5 5 Function Setting and Description of Parameter Values 5 1 Function Setting 5 2 Description of Parameter Values 5 5 6 Calibration 8 7 Operation 7 1 weighing 7 2 manual tare preset tare 9 9 7 3 check weighing 7 4 Simple Counting 7 5 Accumulation Accumulation Display and Accumulation Clearing 7 6 Printer initialization by t...

Страница 2: ...ater or other liquids Service should be performed by authorized personnel only 3 Before Using the Product 3 1 Unpacking and Checking Open the package and check the instrument for transport damage Immediately inform your dealer if you have complaints or if parts are missing The package should contain Scale body Weighing pan Adaptor User manual 3 2 Installing Components 1 Before using the scale remo...

Страница 3: ...th prominent 31mm high digits and LED backlight z Software filtering design and adjustable weighing displaying speed according to different environments z Easy operation with big keys and high weighing resolution z Single point calibration and linear calibration available z RS 232 serial communication interface and Relay port optional PC printer relay Model CYD W8 3K CYD W8 6K CYD W8 15K CYD W8 30...

Страница 4: ... minus Tare Symbol points at NET when manual Tare or preset are actions are done UW Under simple counting mode Symbol points at UW when unit weight is lower than 4 5 of scale division Unit weight is too small for ensuring accurate quantity calculations Charge Lamp Red battery is charging Green battery is fully charged HI LAMP ON The weight on the weighing pan is greater than the upper limit OK LAM...

Страница 5: ...hin 2 of max capacity 2 Exits from certain operation without save 1 Long press to enter function setting 2 Deletes accumulation records 3 Delete the present accumulation record for the sake of wrong accumulation operation under the accumulation mode 1 Adds the indicated weight into accumulation memory 2 During editing save and return to the higher option 1 Select the former parameter in the same l...

Страница 6: ... Function Setting 1 Press and hold M SET while powering on or long press M SET under normal weighing mode to enter function setting The window displays check Setting item P00 displays momentarily at the left bottom 2 Press MR or TARE to shift between the functions 3 Press M SET to enter the parameter setting 4 Press MR or TARE to shift between the function parameters 5 Press M SAVE to save and ret...

Страница 7: ...vailable that is you could add article after hold the first value HoLd 4 Press key HOLD LO to hold Press any key to release Sub menu for Hold 3 INF default infinity 10 20 50 100 200 500 1000 2000 5000 10000 20000 50000 H current hold value R hold value range d division W actual weight Keep to hold the value when W H R d or the scale will exit the hold function The scale will cancel the hold functi...

Страница 8: ...ze 5cmx3cm Dot matrix printer SH 24 Large LED display Computer Connecting the weighing managing system CX large screen display version 0 02 Thermal printer Chinese available the output format is compatible with Toledo Continuous Mode Note Special setting is needed by distributor if you want to print in Chinese Work with the function of Use Serial Keys in Windows in outputting the data to Excel or ...

Страница 9: ... has been set before P02 During the calibration procedure press ZERO ESC to return to normal weighing mode without saving Here we take 3kg 1g as an example 1 Press and hold TARE while powering on Do not release it till the window displays CAL 2 With no load on the weighing pan press TARE to start zero point calibration is blanking at the left bottom 3 Wait till the window displays the first calibr...

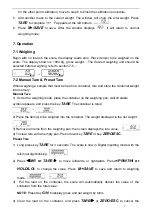
Страница 10: ...er the weighing mode place the container on the weighing pan wait till stable symbol appears and press the key TARE The container is tared 2 Place the item s to be weighed into the container The weight displayed is the net weight 3 Remove all items from the weighing pan the screen displays the tare value 4 To clear tare with an empty pan Press down key TARE or key ZERO ESC Preset Tare 1 Long press...

Страница 11: ...y PRINT HI to increase setting values and key HOLD LO to decrease setting value 3 To save the upper limit and return to weighing mode press key M SAVE Note Place the sample on the weighing pan if the sample weight is under the lower weight range while over or equal 20d the LOW lamp will light up If the sample is within the lower and upper weight range while over or equal 20d the OK lamp will light...

Страница 12: ...weighing pan Press key M SAVE at the appearance of is displayed momentarily before the display reverts to the weight of the item Remove the item and the display goes back to zero before the next accumulation can register The maximum is 99 pieces display the latest 10 accumulation events in details Accumulation Display Press key MR to display the accumulation data Press key MR or TARE to check a to...

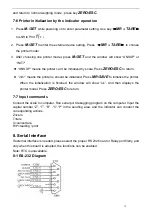
Страница 13: ...eans the printer is should be initialized Press MR SAVE to initialize the printer When the initialization is finished the window will show ok And then displays the printer model Press ZERO ESC to return 7 7 Input commands Connect the scale to computer Run serial port debugging program on the computer Input the capital number Z T R C P in the sending area and the indicator can conduct the correspon...

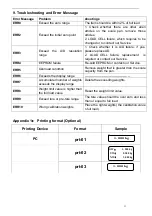
Страница 14: ...f yes please replace AD 2 LOAD CELL failure replacement is required or contact our Service ERR4 EEPROM failure Re sold EEPROM or contact our Service ERR5 Overload condition Remove weight that is greater than the scale capacity from the pan ERR6 Exceeds the display range ERR7 Accumulated number of weights exceeds the display range Delete the exceeding weights ERR8 Weight limit value is higher than ...

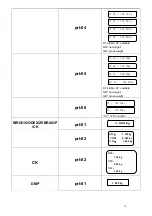
Страница 15: ...t 06 ST is the prefix BIRCH GODEX ZEBRA GP CK prt 01 prt 02 CK prt 02 DMP prt 01 ST GW 100 00 kg UT NW 200 00 kg UT GW 100 00 kg ST NW 200 00 kg ST GS 100 00kg US NT 200 00kg US GS 100 00kg ST NT 200 00kg 1 000 kg G W 1 500 kg T W 0 500 kg N W 1 000 kg G W 1 48 kg T W 0 00 kg N W 1 48 kg 1 000 kg ST 100 00kg k ST 100 00kg k ...

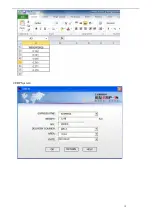
Страница 16: ...uction Connect the scale with PC and set the parameter of external device as EXCEL on the scale then you could export the weighing data to PC in the form of EXCEL With this function you could record accumulate average data statistical analysis the testing data which we could call it as scale computer data management function Note pls enable Use Serial Keys function in the computer Hardware connect...

Страница 17: ...ptions enter General option choose Use Serial Keys and press Settings In the dialog box Settings for SerialKeys set the corresponding Serial port and Baud rate which should be same as Baud rate in scale 3 Test if Serial Keys works well Open a Text Document and press the Print buotton on the scale The Serial Keys works well if pc exports the weighing data to Text ...

Страница 18: ...ast User Switching function will disable Use Serial Keys in the computer Note Start Control Panel User Account Fast User Switching function 2 The data export requires only GND RX TX three lines while some wire include nine lines including usb 9 25pin adapter which may cause abnormal function Note cut other useless line to check if these three lines work well ...

Страница 19: ...how on the position where the mouse cursor in With one USB port you could connect scale to computer easily 二 Precaution 1 Close the input method program before connecting 2 Ensure the decimal point digit is same as the parameter setting of scale if use EXCEL file in computer For Example Scale shows Total Weight 1 000KG Unit Weight 0 001g Total 1000PCS EXCEL Setting the decimal point digit should b...

Страница 20: ...19 2 ERP System ...
Отзывы: