EN
8
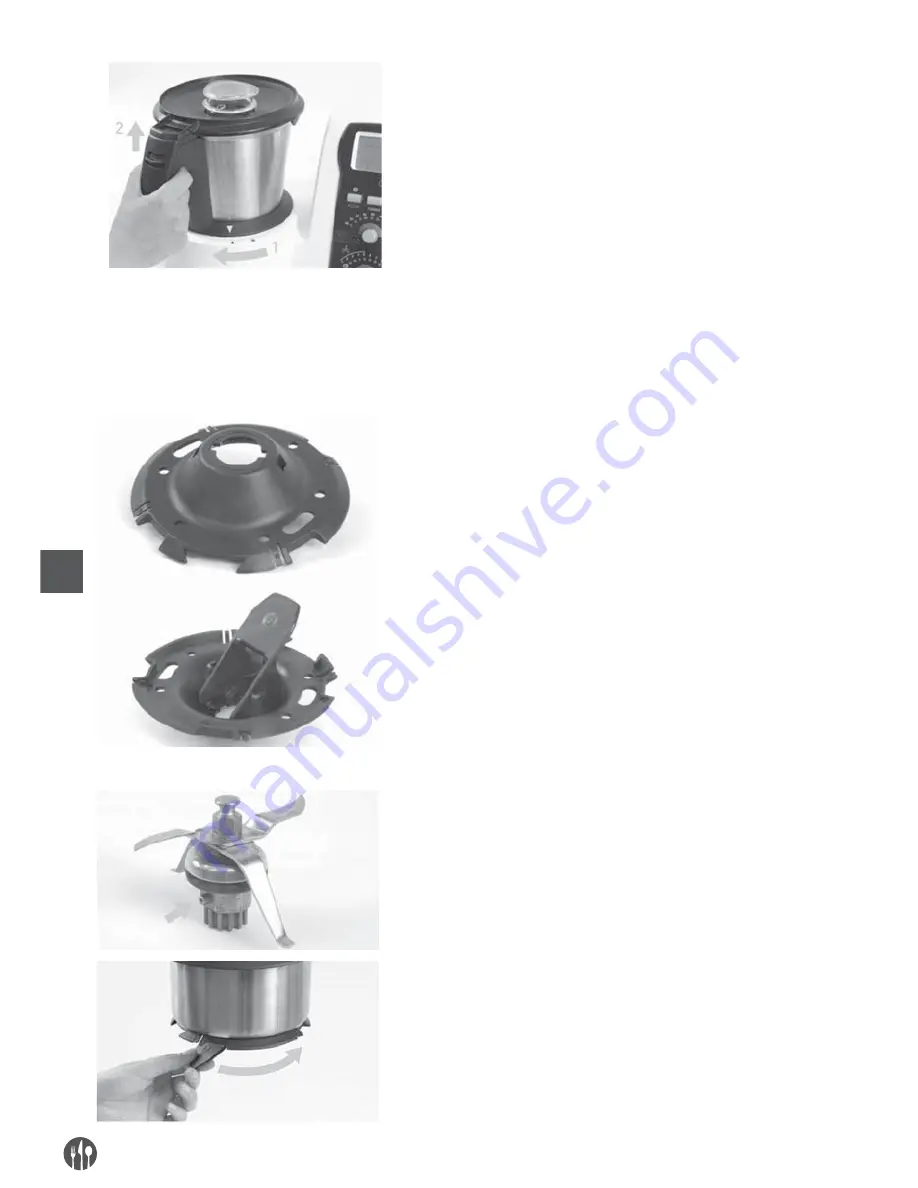
To remove the jug: Hold the jug by its handle and turn
in an anti-clockwise direction up to the limit (both ar-
rows coinciding) and lift the jug (Image 19).
Important. For safety purposes, the jug should not
be covered or uncovered when fixed to the central
unit (the arrow at the lower end of the jug should co-
incide with the lock on the central unit. Image 18-2).
Do not force. If forced safety elements may be bro-
ken. In order to cover or uncover the jug it is neces-
sary to detach it from the central unit by turning it
clockwise until the limit (the arrow at the lower end
of the jug should coincide with the lock on the cen-
tral unit. Image 19.1). Do not activate the heating
function with the jug empty.
JUG SUPPORT WITH BLADE-FIXING FLANGE
(Images 20 and 21)
The jug support is:
1. Fixing the blades to the jug.
2. Fixing the jug to the central unit.
3. Supporting the jug when it is hot on all types of sur-
face, without causing burns.
BLADES
(Image 22)
The blades have two side pivots on their base which
are to centre and fix them correctly to the jug (Image 22).
To remove the blades from the jug: Move the blade-fix-
ing flange 180º to the open position and pull the jug
support away, as indicated by the arrows (Images 23
and 24).
image 23
image 22
image 21
image 20
image 19


