background image

17

The required torque can be preselected in 20 settings with 

the torque preselection ring (3). With the correct setting, the

insert bit is stopped as soon as the screw is screwed flush 

into the material or when the set torque is reached.

Select a higher setting when driving out screws, or set to 

the symbol “Drilling”.

The safety clutch is deactivated in the “Drilling” position.

The 3 LEDs of the battery charge-control indicator (9) flash 

rapidly when the battery temperature is not within the 

operating temperature range of -10º to +70

O

C (14ºF to 

158ºF).

Setting the Torque

Gear Selection, Mechanical

Adjusting the Speed

Fully automatic spindle locking(Auto-lock)

Run-on Brake

Battery charge-control Indication

Gear 1:

Actuate the gear selector (4) only when the tool is 

at a standstill.

Two speed ranges can be used with the gear selector (4).

Temperature Dependent Overload Protection

When used as directed, the power tool cannot be subject 

to overload. When the load is too high or the allowable 

battery temperature of 70

O

C (158ºF) is exceeded, the 

electronic control switches off the power tool until the 

temperature is in the optimum temperature range again.

The 3 LEDs of the battery charge-control indicator (9) 

flash rapidly when the battery temperature is not within

the operting temperature range of -10 to +70

O

C (14ºF to 

158ºF) and/or when the overload protection has actuated.

Protection Against Deep Discharging

Operating Instructions

The Li-ion battery is protected against deep discharging 

by the “Electronic Cell Protection (ECP)”. When the battery 

is empty, the tool is switched off by a protective circuit: 

the inserted bit no longer rotates.

Apply the power tool to the screw only when it is switched 

off. Rotating tool inserts can slip off.

Soft Grip

The gripping surface (soft grip) (5) reduces the danger of 

slipping and thereby improves the grip and handling of 

the tool.

At the same time, the rubber coating provides a 

vibration-reducing effect for increased comfort for the 

operator.

Tips

Cleaning and Maintenance

After longer periods of working at low speed, allow the 

drill to cool down by running it for approx. 3 minutes at 

maximum speed with no load.

For drilling in metal, use only perfectly sharpened HSS 

(high-speed steel) drill bits. 

Before screwing larger, longer screws into hard materials, 

it is advisable to predrill a pilot hole with the core diameter 

of the thread to approx. 2/3 of the screw length.

Place the direction of rotation direction switch (7) into the 

middle position before carrying out any tasks on the tool,

e.g. changing bits or maintenance, or before transporting 

or storing the tool. Accidental operation of the On/Off 

switch (8) may result in injury.

Always pull the battery charger (12) out of the mains 

socket and remove the battery pack before you clean or 

maintain the device.

The cordless drill/driver is maintenance-free.
1)    Always keep the tool clean, dry and free of oil or 

       grease.

Low speed range (0-400 RPM); for screwdriving or 

working with a large drilling diameter.

Gear 2:

High speed range (0-1300 RPM); for working with a small 

drilling diameter. If the gear selector (4) cannot be fully 

engaged, lightly rotate the driver spindle with the drill bit 

by twisting the drill chuck.

The speed of the switched on power tool can be variably 

adjusted, depending on how far the On/Off switch (8) is 

pressed.

Light pressure on the On/Off switch (8) results in a low 

rotational speed. Further pressure on the switch results 

in an increase in speed. 

When the On/Off switch (8) is not pressed, the drill spindle 

and thus the tool holder are locked.

This enables screws to be screwed in, even when the 

battery is empty and allows for the tool to be used  as a 

screwdriver.

When the On/Off switch (8) is released, the chuck brakes 

to a stop, thus preventing the run-on of the tool.

When driving in screws, wait until the screw is screwed in 

flush with the material and then release the On/Off switch 

8. By doing so, the head of the screw does not penetrate 

into the material.

The battery charge-control indicator (9) consists of three

green LEDs, and indicates the charge condition of the 

battery for a few seconds when the On/Off switch (8) is

pressed halfway or fully.

LED

Continuous lighting 3 x green
Continuous lighting 2 x green
Continuous lighting 1 x green
Slow flashing 1 x green

Capacity

≥66%
34-66%
11-33%
≤11%

CAUTION!

!

Содержание 5959003

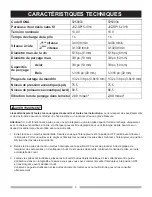
Страница 1: ... V Li Ion 5959004 Consignes de sécurité Installation Fonctionnement Entretien Safety Instructions Installation Operation Maintenance ATTENTION Avant d utiliser cette perceuse lisez ce guide et suivez toutes les règles de sécurité et consignes d utilisation ATTENTION Before using this drill read this manual and follow all its Safety Rules and Operating Instructions ...

Страница 2: ...2 ...
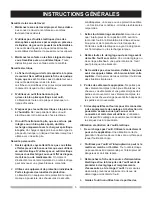
Страница 3: ... un bloc piles séparé doit être rechargé uniquement avec le chargeur spécifique à la pile Un chargeur pouvant être approprié pour un certain type de pile peut créer un risque d incendie lorsqu il est utilisé avec une autre pile 1 Evitez la mise en marche accidentelle Assurez vous que l interrupteur est à la position OFF arrêt avant d insérer le bloc piles Porter un outil avec le doigt sur l interr...

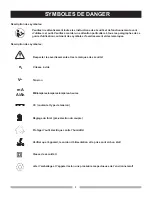
Страница 4: ... à tous les paragraphes de ce guide d utilisation contenant des symboles d avertissement et desremarques Respecter les avertissements et les remarques de sécurité CC courant et type de tension Réglage du foret pré sélection du couple Protéger l outil électrique contre l humidité Vérifier que l appareil le cordon d alimentation et la prise sont en bon état Classe de sécurité II Jeter l emballage et...

Страница 5: ... pile intégrée ou un bloc piles séparé doit être rechargé uniquement avec le chargeur spécifique à la pile Un chargeur approprié à un certain type de pile peut provoquer un risque d incendie lorsqu il est utilisé avec une autre pile Sécurité personnelle 1 Restez vigilant soyez attentif à ce que vous faites et faites preuve de bon sens lorsque vous utilisez un outil électrique N utilisez pas un out...

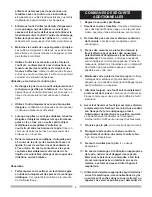
Страница 6: ...en tenant compte des conditions de travail et des travaux à effectuer Utiliser l outil pour des travaux autres que ceux pour lesquels il a été conçu pourrait entraîner une situation dangereuse 1 Sécurisez la pièce travaillée Une pièce maintenue avec des dispositifs de serrage ou un étau est plus stable que lorsqu elle est maintenue avec la main 2 Ne travaillez pas avec des matériaux contenant de l...

Страница 7: ...nt lequel l outil de coupe peut entrer en contact avec un fil électrique caché Le contact avec un fil sous tension peut mettre sous tension les parties métalliques de l outil exposées et provoquer un choc électrique à l utilisateur 14 Tenez l outil fermement Un couple de réaction élevé peut survenir brièvement lorsque vous vissez et dévissez des vis 8 Ne posez aucun objet sur le chargeur cela pour...

Страница 8: ...dans vos yeux rincez vous abondamment les yeux avec de l eau claire pendant au moins 10 minutes et contactez immédiatement un centre médical Informez l équipe médicale que le liquide est une solution d hydroxyde de potassium à 25 35 5 N essayez jamais d ouvrir le bloc piles pour quelque raison que ce soit Si le boîtier des piles se casse ou se fissure arrêtez immédiatement d utiliser les piles et ...

Страница 9: ...upteur marche arrêt 8 Arrêt L interrupteur de sens de rotation 7 s utilise pour inverser le sens de rotation de l outil Toutefois il n est pas possible de l actionner lorsque l interrupteur marche arrêt 8 est enclenché Inversion du sens de rotation Utilisez uniquement des piles au lithium ion d origine avec les tensions énumérées sur la plaque signalétique de votre outil L utilisation d autres pil...

Страница 10: ... chargeur 12 de la prise d alimentation et retirez le bloc piles avant de nettoyer ou de réparer l outil La perceuse tournevis sans fil ne nécessite pas d entretien 1 Maintenez toujours l outil propre exempt d huile ou de graisse 2 Nettoyez l outil immédiatement après avoir fini de l utiliser 3 Ne laissez aucun liquide pénétrer dans l outil Utilisez un chiffon humide pour nettoyer le boîtier 4 N u...

Страница 11: ... separate battery pack must be recharged only with the specific charger for the battery A charger that may be suitable for one type of battery may create a risk of fire when used with another battery 1 Avoid accidental starting Make sure the switch is in the locked OFF position before inserting the battery pack Carrying a tool with your finger on the switch or inserting the battery pack into a too...

Страница 12: ...se pay particular attention to all sections of this User Guide that carry warning symbols and notices Observe caution and safety notes DC current and voltage type Drill setting torque Preselect Protect electrical power tool from moisture Check that the device mains lead and plug are in good condition Safety class II Dispose packaging and appliance in an environmentally friendly way SAFETY SYMBOLS ...

Страница 13: ...esignated battery pack The use of any other batteries may create a risk of fire 3 Do not expose power tools to rain or wet conditions Water entering a power tool will increase the risk of electric shock 4 A battery operated tool with integral batteries or a separate battery pack must be recharged only with the specified charger for the battery A charger that may be suitable for one type of battery...

Страница 14: ...tool e g maintenance bit change etc as well as during transport and storage set the rotational direction switch to the centre position Unintentional actuation of the On Off switch can lead to injuries 7 Do not open the battery Danger of short circuiting 8 Protect the battery against heat and continuous sun irradiation and fire There is danger of explosion 9 Do not short circuit the battery There i...

Страница 15: ...h the charger There is a danger of electric shock 5 To allow the battery pack to cool down after charging do not place it in a hot environment such as a metal shed or open trailer left in the sun 6 The charger is not intended for any use other than charging the exact type of rechargeable battery pack as supplied with the charger Any other use may result in the risk of fire electric shock or electr...

Страница 16: ...move the battery 11 press the battery unlocking button 6 and pull the battery out of the power tool toward the rear Pic C The battery is equipped with a NTC temperature control which allows charging only within a temperature range of between 0O C 32ºF and 45O C 113ºF A long battery WARNING contact with metal objects The battery pack may be short circuited causing damage to the battery pack burns o...

Страница 17: ...eed allow the drill to cool down by running it for approx 3 minutes at maximum speed with no load For drilling in metal use only perfectly sharpened HSS high speed steel drill bits Before screwing larger longer screws into hard materials it is advisable to predrill a pilot hole with the core diameter of the thread to approx 2 3 of the screw length Place the direction of rotation direction switch 7...

Страница 18: ...ian at our toll free service line at 1 866 599 5916 Ext 2 from 8 AM to 6 PM Monday to Friday Eastern time RONA reserves the right to repair or replace the defective tool at its discretion Normal wear and tear including accessory wear is not covered under guarantee The product is guaranteed for 36 months if used for normal trade purposes Any guarantee is invalid if the product has been overloaded o...

Отзывы: