background image

IMPORTANT SAFETY INSTRUCTIONS        

COPYRIGHT NOTICE

AMX© 2015, all rights reserved. No part of this publication may be reproduced, stored in a retrieval system, or transmitted, in any form or by any 

means, electronic, mechanical, photocopying, recording, or otherwise, without the prior written permission of AMX. Copyright protection claimed 

extends to AMX hardware and software and includes all forms and matters copyrightable material and information now allowed by statutory or judicial 

law or herein after granted, including without limitation, material generated from the software programs which are displayed on the screen such as 

icons, screen display looks, etc. Reproduction or disassembly of embodied computer programs or algorithms is expressly prohibited.

LIABILITY NOTICE

No patent liability is assumed with respect to the use of information contained herein. While every precaution has been taken in the preparation of this 

publication, AMX assumes no responsibility for error or omissions. No liability is assumed for damages resulting from the use of the information 

contained herein. Further, this publication and features described herein are subject to change without notice.

AMX WARRANTY AND RETURN POLICY

The AMX Warranty and Return Policy and related documents can be viewed/downloaded at www.amx.com.

1.

READ these instructions.

2.

KEEP these instructions.

3.

HEED all warnings.

4.

FOLLOW all instructions.

5.

DO NOT use this apparatus near water.

6.

CLEAN ONLY with dry cloth.

7.

DO NOT block any ventilation openings. Install in accordance with the manufacturer's instructions.

8.

DO NOT install near any heat sources such as radiators, heat registers, stoves, or other apparatus (including amplifiers) that 

produce heat.

9.

DO NOT defeat the safety purpose of the polarized or grounding type plug. A polarized plug has two blades with one wider than the 

other. A grounding type plug has two blades and a third grounding prong. The wider blade or the third prong are provided for your 

safety. If the provided plug does not fit into your outlet, consult an electrician for replacement of the obsolete outlet.

10. PROTECT the power cord from being walked on or pinched, particularly at plugs, convenience receptacles, and the point where 

they exit from the apparatus.

11. ONLY USE attachments/accessories specified by the manufacturer.

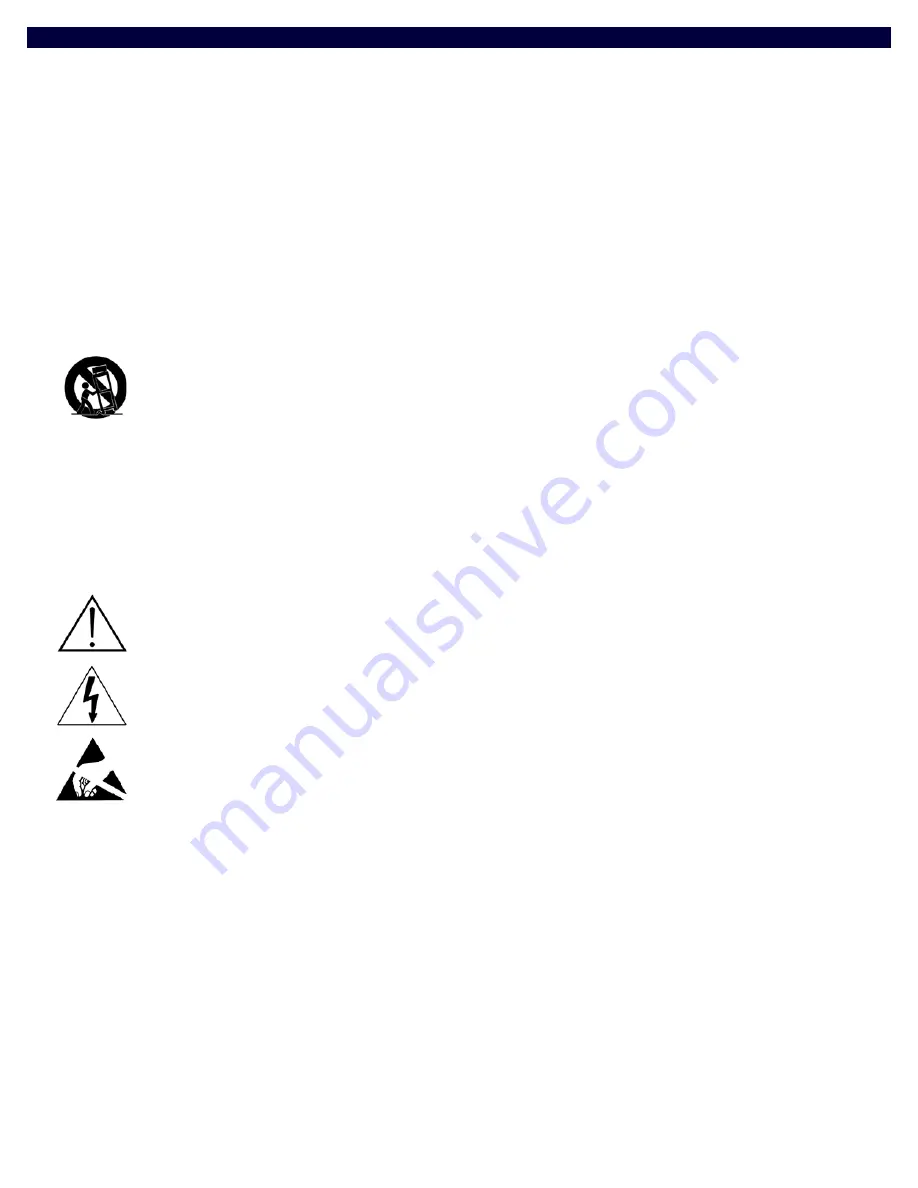
12. USE ONLY with a cart, stand, tripod, bracket, or table specified by the manufacturer, or sold with the apparatus. When a cart is 

used, use caution when moving the cart/apparatus combination to avoid injury from tip-over.

13. UNPLUG this apparatus during lightning storms or when unused for long periods of time.
14. REFER all servicing to qualified service personnel. Servicing is required when the apparatus has been damaged in any way, such as 

power-supply cord or plug is damaged, liquid has been spilled or objects have fallen into the apparatus, the apparatus has been 

exposed to rain or moisture, does not operate normally, or has been dropped.

15. DO NOT expose this apparatus to dripping or splashing and ensure that no objects filled with liquids, such as vases, are placed on 

the apparatus.

16. To completely disconnect this apparatus from the AC Mains, disconnect the power supply cord plug from the AC receptacle.
17. Where the mains plug or an appliance coupler is used as the disconnect device, the disconnect device shall remain readily operable. 
18. DO NOT overload wall outlets or extension cords beyond their rated capacity as this can cause electric shock or fire. 

The exclamation point, within an equilateral triangle, is intended to alert the user to the presence of important operating and maintenance 

(servicing) instructions in the literature accompanying the product.

The lightning flash with arrowhead symbol within an equilateral triangle is intended to alert the user to the presence of uninsulated "dangerous 

voltage" within the product's enclosure that may be of sufficient magnitude to constitute a risk of electrical shock to persons.

ESD Warning: The icon to the left indicates text regarding potential danger associated with the discharge of static electricity from an outside 

source (such as human hands) into an integrated circuit, often resulting in damage to the circuit.

WARNING: 

To reduce the risk of fire or electrical shock, do not expose this apparatus to rain or moisture.

WARNING: 

No naked flame sources - such as candles - should be placed on the product.

WARNING: 

Equipment shall be connected to a MAINS socket outlet with a protective earthing connection.

Содержание AMX NETLINX NX Series

Страница 1: ...HARDWARE REFERENCE MANUAL NETLINX NX SERIES INTEGRATED CONTROLLERS NX 1200 NX 2200 NX 3200 NX 4200...

Страница 2: ...pinched particularly at plugs convenience receptacles and the point where they exit from the apparatus 11 ONLY USE attachments accessories specified by the manufacturer 12 USE ONLY with a cart stand...

Страница 3: ...ipment into an outlet on a circuit different from that to which the receiver is connected Consult the dealer or an experienced radio TV technician for help Approved under the verification provision of...

Страница 4: ...Case Sensitive File System 8 USB Program Port 8 USB Firmware Upgrade 8 USB Program Download 8 USB Logging 8 Copy and Clone Configuration 9 Difference in DEFINE_PROGRAM Program Execution 9 External SD...

Страница 5: ...RIAL LEDs 26 RELAYS LEDs 26 IR SERIAL LEDs 26 I O LEDs 26 IRRX LED 26 IRRX Port 27 Rear Panel Components 27 Serial Ports 27 RS 232 Ports 27 RS 232 422 485 Ports 28 Relay Ports 29 Relay Connections 29...

Страница 6: ...NPUT PWR Connector 35 Preparing Captive Wires 35 Wiring a Power Connection 35 Installation of the USB Gadget Serial Driver for Windows 8 x 32 64 Bit Operating Systems 37 Overview 37 Disabling Driver S...

Страница 7: ...e NX 1200 2200 3200 4200 Integrated Controllers when the information applies to all NX series controllers FIG 1 displays the NX series controllers FIG 1 NX series controllers The NX Series NetLinx Int...

Страница 8: ...nk local range Wired 802 1X Support The X Series controllers support wired 802 1X an IEEE Standard for Port based Network Access Control ID Pushbutton Functionality The X Series controllers include ne...

Страница 9: ...NX 3200 and NX 4200 is for future use Until firmware is available that supports the use of an external SD card it is recommended that the card slot be left empty Redundant Power Source NX 4200 only T...

Страница 10: ...iscovery enabled NX 2200 NetLinx Integrated Controllers Name FG Features NX 2200 Controller FG2106 02 1 RS 232 RS 422 RS 485 serial port 3 RS 232 only serial ports 4 Relays 4 IR Serial ports 4 Digital...

Страница 11: ...mware for the on board Master Verify you are using the latest version of NetLinx Studio 4 0 available for download from www amx com Port Numbers The following table lists the port numbers on the NX 12...

Страница 12: ...ellow Blinks when the Controller receives data from button pushes strings commands channel levels etc Serial LED red yellow 2 sets of LEDs light to indicate that RS 232 ports 1 2 are transmitting or r...

Страница 13: ...ED indicates the state of the AxLink port LAN 10 100 Port 1 RJ 45 connector provides Ethernet communication This is an Auto MDI MDI X enabled port which allows you to use either straight through or cr...

Страница 14: ...blinks when the RJ 45 cables to port 1 is connected and terminated correctly The LED also blinks when receiving LAN data packets Serial LEDs red 2 sets of four LEDs each of which light to indicate th...

Страница 15: ...ICSLAN interface USB Port 1 Type A USB port for connecting a mass storage device for loading tkn files reading or writing configuration files and log files or updating the firmware on the unit ID Pus...

Страница 16: ...d Blinks when the Controller transmits data sets channels On and Off sends data strings etc INPUT yellow Blinks when the Controller receives data from button pushes strings commands channel levels etc...

Страница 17: ...n 1 black ID pushbutton used during boot to revert to factory configuration or factory firmware Also used after boot to toggle IP mode between Static and DHCP LAN 10 100 Port RJ 45 connector provides...

Страница 18: ...t of device specifications is listed below FIG 5 displays the NX 4200 FIG 5 NX 4200 front and rear panels The NX 4200 s on board Master also provides the ability to update installed control card firmw...

Страница 19: ...when receiving Ethernet data packets STATUS green Blinks to indicate that the system is programmed and communicating properly OUTPUT red Blinks when the Controller transmits data sets channels On and...

Страница 20: ...DHC Slot 1 SDHC card slot for future use Configuration DIP Switch The Configuration DIP Switch allows you to set boot time operations see the Configuration DIP Switch on page 32 for more information I...

Страница 21: ...d For serial and IR ports an error condition is only checked at the time the port is used so unused serial and IR ports will not generate errors AxLink bus errors are checked at boot time Mounting the...

Страница 22: ...ons Refer to the Wiring and Connections section on page 23 for more detailed wiring and connection information Verify that the terminal end of the power cable is not connected to the power supply befo...

Страница 23: ...nit turns off and the integrated LED changes to amber Pressing the button momentarily while the unit is off turns it on and returns the integrated LED to green NOTE The power button does not switch of...

Страница 24: ...reater than the PoE power capacity Voltage Fault The PoE voltage is out of range Front Panel Display Items Item Name Description Hostname The host name of the Master System Number The system number of...

Страница 25: ...These LEDs appear on all models of NX series controllers FIG 12 displays the General Status LEDs for each NX series controller FIG 12 General Status LEDs Link Act Lights green when the link is up and...

Страница 26: ...ed to indicate that the corresponding relay port is active The light toggles off when the relay port is not engaged There are eight RELAY LEDs on the NX 3200 and NX 4200 The NX 2200 has four RELAY LED...

Страница 27: ...els Serial Ports The NX series controllers each feature device control serial ports that support either RS 232 or RS 232 RS 422 and RS 485 communication protocols Each port supports the following spec...

Страница 28: ...amming chapter of the NX Series Controllers WebConsole and Programming Guide for more information on disabling RS 422 and RS 485 on these ports These ports support most standard RS 232 RS 422 and RS 4...

Страница 29: ...he NX 2200 I O Ports The I O ports port 22 on all NX series controllers are 6 pin 3 5 mm mini Phoenix male connectors used for connecting logic level outputs The NX 3200 and NX 4200 each features 2 se...

Страница 30: ...h FIG 25 displays the IR SERIAL ports for each NX series controller FIG 25 IR SERIAL connector male NOTE The maximum baud rate for ports using DATA mode is 19200 Also DATA mode works best when using a...

Страница 31: ...e when connecting AxLink devices to the central controller IMPORTANT The NX Series controllers CANNOT be powered via the AxLink port The 12V pin on the AxLink connectors are designed only for voltage...

Страница 32: ...ows Switch for Program Run Disable Switch for Boot from External SD Card only applicable to the NX 3200 and NX 4200 NOTE The Configuration DIP Switch is located on the front panel of the NX 1200 and n...

Страница 33: ...p If the LAN port is configured such that its address space overlaps with the ICSLAN network the ICSLAN network will be DISABLED DHCP Server The ICSLAN port has a built in DHCP server This DHCP server...

Страница 34: ...dress to its default and deleting the NetLinx program CAUTION Pressing the ID pushbutton for 20 seconds restores the factory firmware image on the controller Do not press the pushbutton significantly...

Страница 35: ...he AC input power is lost or if the internal power supply fails the NX 4200 will immediately switch to the 12V DC power input without interruption When AC power is restored the NX 4200 will switch bac...

Страница 36: ...36 Hardware Reference Guide NX Series NetLinx Integrated Controllers Wiring and Connections...

Страница 37: ...on the front panel of the NX Series Controllers Manually installing this driver require you to Disable Driver Signature Verification when installing unsigned drivers The procedures below describe how...

Страница 38: ...elect the General section Win 8 0 users can skip to step 6 FIG 42 displays the PC Settings options FIG 42 PC Settings 4 When the Control Panel opens select the Update recovery option FIG 43 displays t...

Страница 39: ...r Click on the Restart now button FIG 45 displays the Advanced startup page FIG 45 Advanced Startup page 7 Once your PC has rebooted select the Troubleshoot option FIG 46 displays the Choose an option...

Страница 40: ...you will see a list of startup settings that you can change Press F7 to select the Disable driver signature enforcement setting FIG 47 displays the Startup Settings screen FIG 47 Startup Settings scr...

Страница 41: ...the NX controller see FIG 48 The Windows 8 X Operating System should automatically start searching for the driver on the PC FIG 48 PROGRAM Port After Windows finds the driver a Windows Security dialog...

Страница 42: ...sc NetLinx Studio 4 USBGadgetDriver From the Windows Control Panel select Hardware and Sound then select the Device Manager option You can manually update the driver by performing the following steps...

Страница 43: ...ot assume responsibility for errors or omissions AMX also reserves the right to alter specifications without prior notice at any time The AMX Warranty and Return Policy and related documents can be vi...

Отзывы: