background image

17

Playing DVD Discs

Changing the Camera Angle

Some discs contain multiple angles of a particular scene or sequence. If
the disc only has one angle, this feature won’t work.

1. While a disc is playing, press STATUS on the remote (the Banner

Display appears).

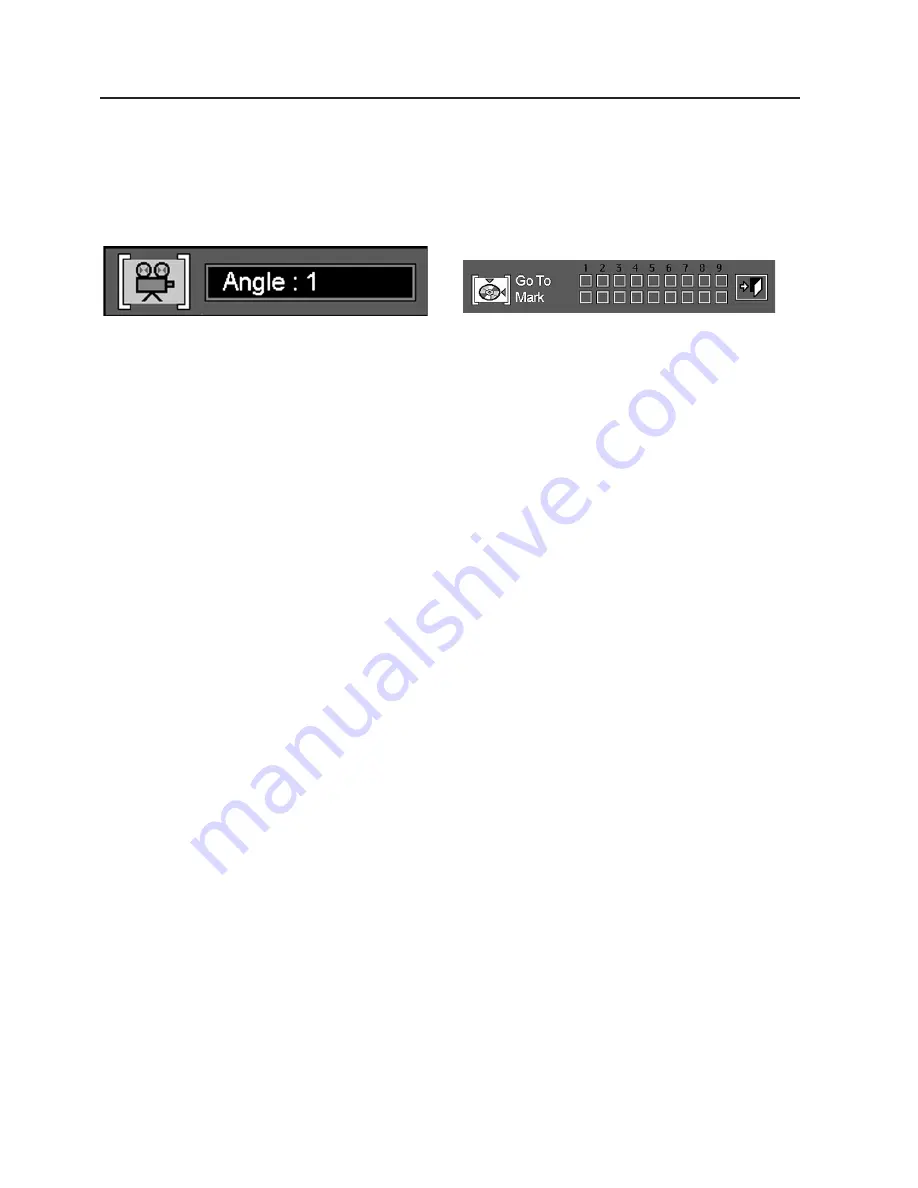
2. Press the ARROW (LEFT OR RIGHT) until the Camera Angle icon is

highlighted, and press ENTER (the Angle menu appears).

3. Press ENTER or ANGLE on the remote to change angle.

4. To make the Banner Display disappear from the screen, press CLEAR

or STATUS on the remote.

• Shortcut: The Angle menu can be called anytime, regardless of whether

Banner Display is on or not, by pressing the ANGLE button on the
remote, pressing repeatedly will change the angle (if disc was created
with multiple angles).

Using Bookmarks

The bookmark feature lets you mark a point on the disc that you can go
to quickly. You can store up to 9 bookmarks.

1. While a disc is playing, press STATUS on the remote.

2. Use the ARROW (LEFT OR RIGHT) on the remote until the Mark icon is

highlighted and press ENTER (the Bookmark menu appears).

3. When you reach the scene you want to mark, press ENTER. To add any

mark, move the cursor (yellow frame) with the ARROW (DOWN) to the
”Mark” check line, then move it to the next free frame with the
ARROW (RIGHT) and press ENTER when the scene you want to mark
is reached.

4. Press CLEAR or STATUS on the remote to make the Banner Display 

disappear from the screen.

Recalling a Bookmarked Scene

1. While playing a disc, press STATUS on the remote (the Banner Display

appears).

2. Press the ARROW (LEFT OR RIGHT) on the remote until the Bookmark

icon is highlighted.

3. Press ENTER.

4. Press the ARROW (UP) on the remote to move to the ”Go To” parts of

the Bookmark menu.

5. Use the ARROW (LEFT OR RIGHT) on the remote to select the book-

marked scene you want to activate.

6. Press ENTER go to the bookmark.

7. To make the Banner Display disappear from the screen, press CLEAR

or STATUS on the remote.

Clearing a Bookmark

The bookmark is cleared each time a disc is removed from the player or
when the power is turned off completely (not to Standby only).

If all 9 bookmarks are in use, you can still mark new scenes, but the pre-
vious bookmarks will be erased.

Содержание DVD 10

Страница 1: ...DVD10 Digital Versatile Disc Player USER S MANUAL 10 Power for the digital revolution...

Страница 2: ...ication in the event of theft MODEL NUMBER SERIAL NUMBER Table of Contents Page 2 Safety Information 3 Features and Accessories 4 Front Panel 5 Remote Control 7 Front Panel Information Display 8 Rear...

Страница 3: ...layer information and access to many major functions of this unit Programming of up to 9 scenes in memory markers Parental lock settings to prevent play of discs unsuitable for some audiences DVD only...

Страница 4: ...4 Front Panel 1 MAIN POWER ON OFF 2 POWER ON OFF Standby 3 OPEN CLOSE 4 STOP 2 1 5 DIMMER 6 PLAY PAUSE 7 SEARCH REV FWD 8 SKIP PREV NEXT...

Страница 5: ...6 STATUS 7 TITLE 8 RETURN 9 SUBTITLE ON OFF 10 ARROWS 11 ENTER 12 MENU 13 PLAY 14 SEARCH REV 15 SEARCH FWD 16 OPEN CLOSE 17 PAUSE 18 STOP 19 PREV NEXT 20 SLOW REV FWD 21 RANDOM 22 STEP REV FWD 23 NUMB...

Страница 6: ...EARCH3 R SEARCH1 15 FWD SEARCH Allows you to search forward through a disc while it is in play mode Each time you press this button search speed changes as below DVD F SEARCH1 F SEARCH2 F SEARCH3 F SE...

Страница 7: ...uminates during repeat playback 5 Illuminates during intro scan playback 6 Illuminates during program playback 7 Illuminates to indicate type of disc that is playing 8 Illuminates and spins during sea...

Страница 8: ...The SCART cable carries both audio and video signals of the external unit These signals will be routed through the SCART connector of the DVD to the TV when the DVD player is turned on 7 SCART OUT TV...

Страница 9: ...separate video output connector separates the color C and luminance Y signals before transmitting them to the TV set in order to achieve a sharper picture Use the S video cable optional when con nect...

Страница 10: ...as shown below Note With multiple video sources your Audio Video device can be used for selecting the video signal and routing it to the TV Connect the video or S video output of the DVD10 whatever i...

Страница 11: ...SCART connector for the TV provides the composite video signal as well as the direct RGB signal delivering the best video performance possible To view RGB video on your TV the RGB compatible SCART co...

Страница 12: ...new batteries If the remote control unit is not going to be used for a long time remove the batteries Otherwise leakage may lead not only to mal function but also to skin burn Wipe away any leakage in...

Страница 13: ...cap from the optical digital audio output and connect the cable firmly so that the configurations of both the cable and the connector match Keep the dust protection cap and always reattach the cap whe...

Страница 14: ...rch To scan through the disc when you re playing it use the Picture Scan fea ture 1 Press SEARCH FWD or REV while playing a disc 2 Press repeatedly to increase speed to 2 times 4 times 8 times or 16 t...

Страница 15: ...le For example there might be four movies on one disc each movie might be considered a title 1 During disc playback press STATUS on the remote 2 Press the appropriate ARROW button s on the remote to h...

Страница 16: ...nguage Preferences menu within Setup menu tem porarily Shortcut You also can choose the audio language track any time by pressing AUDIO on the remote control regardless of whether the Banner Display i...

Страница 17: ...con is highlighted and press ENTER the Bookmark menu appears 3 When you reach the scene you want to mark press ENTER To add any mark move the cursor yellow frame with the ARROW DOWN to the Mark check...

Страница 18: ...hile a disc is playing press A B on the remote when you want to choose a scene as the beginning point the Repeat A B Display appears 2 Press A B again to choose a scene as the end point Repeat A B set...

Страница 19: ...Chapter to be deleted When it is highlighted grey press CLEAR or select DELETE icon on the Program Edit Display and press ENTER Selected Value deletes Insert Chapter Inserting chapters is possible onl...

Страница 20: ...ARROW UP or DOWN on the remote to select specific Audio Language 4 Press ENTER 5 Press PLAY to resume normal playback or RETURN to delete Set Up Menu display You can exit the Audio menu at any time by...

Страница 21: ...umber of language code see table on page 32 into the first digit by pressing ARROW UP or DOWN on the remote then ENTER or ARROW right and enter the other 3 digits in the same way The code can also be...

Страница 22: ...ve free access 4 Press ENTER The rating menu will disappear and rating level selected will be indicated in the Set Up Menu If any password was memorized see next page rating menu is avail able only af...

Страница 23: ...ain menu and the incorrect password in the lower Confirm Password menu part appearing after the upper is passed 8 After the correct password is entered in all menus press ENTER the main password menu...

Страница 24: ...he remote to enter the actual password and press ENTER again Password Display appears 4 Press ARROW UP or DOWN on the remote to select Change Password and press ENTER Enter Password Display appears ag...

Страница 25: ...NU DISPLAY 2 Press ENTER or ARROW right Enter Password Display appears 3 Press the ARROW UP or DOWN or NUMBER 0 9 on the remote to enter the current password and press ENTER again Password Display app...

Страница 26: ...ith some 4 3 TV set to 16 9 format discs with 4 3 format may be played compressed vertically With those discs the TV must be set to 4 3 format To select TV Aspect follow these steps 1 Press ARROW UP o...

Страница 27: ...ck by pressing the Audio button on remote see page 16 that will deliver PCM signal to the digital output DTS Choose this setting if you connected a receiver or decoder to your DVD player with Dolby Di...

Страница 28: ...n your TV and tune it to the appropriate Video Input Channel To Load and Play an Audio CD Make sure that you have properly connected the DVD player 1 Press OPEN CLOSE on the front of the DVD player or...

Страница 29: ...disc that you can go to quickly You can store up to 9 bookmarks Entering Bookmarks 1 While a disc is playing press STATUS on the remote to see the Banner Display if not already on 2 Use the ARROW RIGH...

Страница 30: ...ill be repeated Note that Repeat Track is not available with Program play A B Repeat Play 1 While a disc is playing press A B on the remote when you want to choose a beginning point the Repeat A B Dis...

Страница 31: ...te to select the Track to be deleted until it s highlighted grey and press CLEAR or select DELETE icon on the Program Edit Display and press ENTER Selected Track will be deleted Insert Track Inserting...

Страница 32: ...arwanda Kirghiz Kirundi Korean Kurdish Laothian Latin Latvian Lettish Lingala Lithuanian Macedonian Malagsy Malay Malayalam Maltese Maori Marathi Moldavian Mongolian Naru Nepali Norwegian Occitan Oriy...

Страница 33: ...w Flutter Below Measurable Limits AC Power 220 240 V 50 Hz Power Consumption 20 Watts On Dimensions WxHxD 440x108x330 mm Weight 7 Kg All specifications subject to change without notice Harman Kardon a...

Страница 34: ...250 Crossways Park Drive Woodbury New York 11797 www harmankardon com Harman Consumer International 2 route de Tours 72500 Ch teau du Loir France 2000 Harman Kardon Incorporated Part 0000 DVD10 OM...

Отзывы: