background image

21

ENGLISH

INSTALLATION

You are now ready to begin installing the AVR. Before beginning to connect 
the various components to the receiver, turn off all devices, including the 
AVR 760/AVR 660, and unplug their power cords. 

Don’t plug in any of the 

power cords until you have finished making all of your connections.

The receiver generates heat. Select a location that leaves several centimeters 
of space on all sides. Avoid completely enclosing the receiver inside an 
unventilated cabinet. Place components on separate shelves rather than 
stacking them directly on top of the receiver. 

Never block the AVR’s ventilation 

slots on the top and side panels. Doing so could cause the AVR to overheat, with 
potentially serious consequences

. Some shelf surface finishes are delicate. Try 

to select a location with a sturdy surface finish.

Maintain at least 7 cm of free space behind the receiver for free airflow to the 
fan.

Almost all of the following installation steps are optional, depending on your 
system. Skip any step that does not apply to your system.

Step one – connect Source Devices 

Leaving all AC power cords unplugged, connect the source devices to the AVR 
using the audio and video inputs you assigned in Table 2.

Step tWo – connect tV

Connect the system-best video input on the TV to the corresponding video 
monitor output on the AVR.

Step tHree – connect Loudspeakers

After you have placed your loudspeakers in the room as explained on page 
18, connect each speaker to its color-coded terminal on the AVR. Maintain 
proper polarity by connecting the negative terminal on the speaker (usually 
colored black) to the negative terminal on the AVR (also colored black); and 
the positive terminal on the speaker (usually red) to the positive terminal on 
the AVR (color varies by channel; see Table 1 on page 15).

If you have a subwoofer, connect its line-level or LFE input to the purple 
Subwoofer 1 Output. An optional second subwoofer may be connected to the 
Subwoofer 2 Output.

NOTE

: If the subwoofer only has speaker-level inputs, after you have 

configured the AVR using EzSet/EQ II technology as described on page 
26, connect the subwoofer’s left and right speaker input terminals to the 
AVR’s Front Left and Front Right Speaker Outputs, then connect the front 
left and right main speakers to the subwoofer’s left and right speaker 
output terminals. Consult the owner’s manual for the subwoofer for specific 
installation instructions.
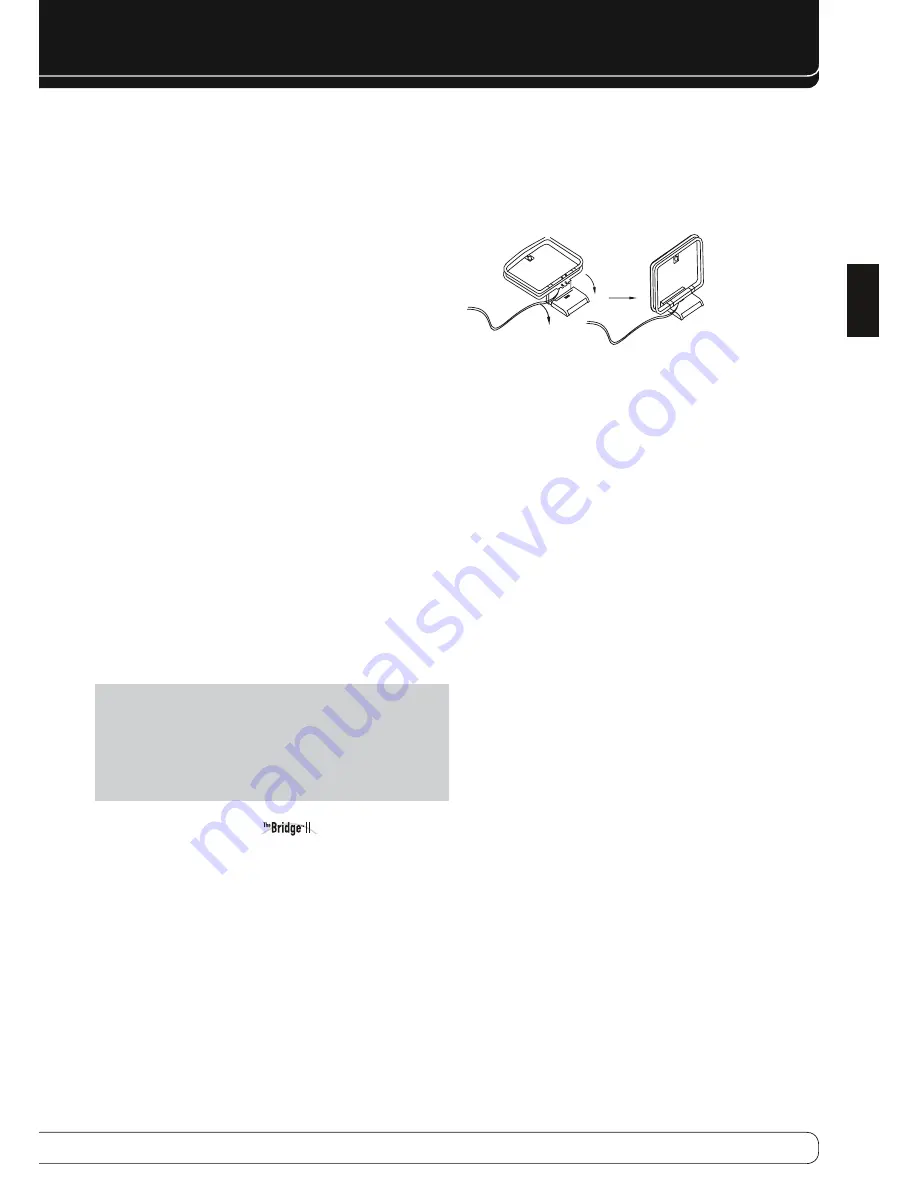
Step four – connect 

 Dock

To enjoy content stored on a compatible iPod (not included), connect The 
Bridge II dock (included) to its proprietary connector.

Step fIVe – connect fm antenna

Connect the included FM antenna to the 75-ohm FM antenna terminal. 

Step SIX – connect am antenna

Assemble the included AM antenna (see Figure 17) and connect it to the AM 
and Ground antenna terminals. The antenna is not polarized, and either lead 
may be connected to either terminal.

Figure 17 – AM Antenna Assembly

Step SeVen – not active for aVr 760/aVr 660

Step eIGHt – connect uSB Device

To play MP3 or WMA audio files or JPEG still-image files stored on a USB 
storage device, connect the device to the front-panel USB Port, using a cable 
or connector that is attached to the device or provided by you. 

Step nIne – connect aVr to Internet

To use the AVR’s internal Internet Radio tuner to listen to MP3 or WMA audio 
streams, connect the Network Jack to the Ethernet port on a router or modem 
that has Internet access, a home network, or directly to a PC. You may need 
to contact your Internet service provider (ISP), or the manufacturer of your 
router, to obtain the information necessary to set up the network connection. 
See pages 33 and 34.

Step ten – connect remote Ir Inputs and 

outputs

The AVR 760/AVR 660 is equipped with a Remote IR Input, a Zone 2 Input 
and both full-carrier and stripped Remote IR Outputs to facilitate use of your 
system with a remote control in a variety of situations.

When the AVR 760/AVR 660 is placed inside a cabinet or facing away from the 
listener, connect an external IR receiver, such as the optional Harman Kardon 
HE 1000, to the Remote IR Input jack. For multizone operation, connect an 
optional IR receiver, keypad or other control device to the Zone 2 IR Input for 
remote control of the AVR 760/AVR 660 (and any sources connected to the 
AVR’s Remote IR Output) from the remote zone. Signals transmitted through 
the Zone 2 IR Input will control source selection and volume for the main or 
remote zone, depending on the setting of the remote’s Zone Selector. If a 
source device is shared with the main listening area, any control commands 
issued to that source will also affect the main room.

Содержание 660

Страница 1: ...AVR 760 AVR 660 AUDIO VIDEO RECEIVER OWNER S MANUAL Basic Functions...

Страница 2: ...er supply cord shall remain readily operable 17 Do not expose batteries to excessive heat such as sunshine fire or the like 18 The lightning flash with arrowhead symbol within an equilateral triangle...

Страница 3: ...e finish cleaning materials used and normal heat and vibration caused by the use of the product or other factors We recommend that caution be exercised in choosing an installation location for the com...

Страница 4: ...30 Dolby Volume 31 Mute Function 31 Sleep Timer 31 Audio Effects 31 Video Modes 31 Headphones 31 Source Selection 32 Using the Tuner 32 RDS Functions 33 USB Playback 33 Internet Radio 34 Network Play...

Страница 5: ...nd their operation If you have any questions about this product its installation or its operation please contact your Harman Kardon retailer or custom installer or visit the Web site at www harmankard...

Страница 6: ...o composite AVR 760 only A BUS port Headphone Ease of Use EzSet EQ II automated setup microphone supplied Full color user interface and setup menu generated in high definition video Text based on scre...

Страница 7: ...n to access the AVR s main menu Info Settings Button Press this button to directly access the AVR s Source Info submenu which contains the settings for the current source Resolution Press this button...

Страница 8: ...type of audio and one type of video connection Note The AVR s menus refer to these jacks as the Optical Front Coaxial Front Composite Front S Video Front and Analog Front inputs EzSet EQ II Microphone...

Страница 9: ...erial Port This bi directional port may be used to control the AVR 760 AVR 660 using an RS 232 serial control link to a compatible computer or programmable remote control system Due to the complexity...

Страница 10: ...1 2 and 3 Video Inputs Use these jacks to connect your video capable source components e g VCR DVD player cable TV box to the receiver Use only one type of video connection for each source Composite...

Страница 11: ...te s LCD Display NOTE Four of the sources do not have dedicated Source Selectors Source A Source B Source C and Source D To select one of these sources first press the AVR Settings Button then press t...

Страница 12: ...eo display or TV See the Advanced Functions Manual for more information Surround Modes Press to directly access the Surround Modes submenu Scroll to the lines for the Surround Mode categories Auto Sel...

Страница 13: ...1 mode the Zone Indicator will turn green the power volume and mute controls will only affect the main listening area To control operation for the remote zone press the Zone Selector so that the Zone...

Страница 14: ...ne system where the surround back channels power loudspeakers located in another room Many people expect the surround speakers to play as loudly as the front speakers Although all of the speakers in t...

Страница 15: ...ed subwoofers that contain their own amplifier Usually a line level nonamplified connection is made from the receiver s Subwoofer Output to a corresponding jack on the subwoofer as shown in Figure 3 T...

Страница 16: ...digital audio cable Figure 6 Optical Digital Audio Analog Audio Analog connections require two cables one for the left channel white and one for the right channel red These two cables are often attach...

Страница 17: ...igure 11 S Video Component video separates the video signal into three components one luminance Y and two sub sampled color signals Pb and Pr that are transmitted using three separate cables See Figur...

Страница 18: ...back left and right speakers are placed 150 degrees from the center speaker or directly facing the opposite side front speaker See Figure 16 C 90 150 90 150 30 30 SBR SBL FR FL SL SR SUB 1 SUB 2 Green...

Страница 19: ...type NOTE You may match any device type to any source The device type is only relevant for programming control codes into the handheld remote and as explained on page 25 you may reassign any Source Se...

Страница 20: ...ital audio recordings To make analog recordings assign either the Analog 3 or 4 Audio Inputs to the recorder as both have recording outputs It is not necessary to connect TiVo or Video Recorder device...

Страница 21: ...ht Speaker Outputs then connect the front left and right main speakers to the subwoofer s left and right speaker output terminals Consult the owner s manual for the subwoofer for specific installation...

Страница 22: ...ltaneously with multizone operation However the benefit is achieved with the expense of an additional component i e the amplifier Connect the remote room s speakers directly to the B Surround Back Zon...

Страница 23: ...te receivers the Harman Kardon DMC 1000 digital media center and TVs It is also preprogrammed to operate your iPod when docked in The Bridge II To access the functions for a particular device switch t...

Страница 24: ...emote to time out then the device type reassignment will not take effect To learn individual key codes If some functions do not work correctly you may reprogram individual keys from the device s origi...

Страница 25: ...to rename a device or a key and press the OK Button Use the 4 KL Buttons to select the device either to rename the device itself or a key function used by that device and press the OK Button The curr...

Страница 26: ...rtant steps in setting up a home theater system is to calibrate the receiver to match the loudspeakers optimizing sound reproduction Until recently most receivers required manual calibration and confi...

Страница 27: ...position These settings affect each source independently Leave this submenu at its default settings and return to it later if your system requires fine tuning See the Advanced Functions Manual for mo...

Страница 28: ...Output the two devices will communicate with each other and the AVR will automatically select the best available video output resolution If the display is connected to the AVR s Component Video Outpu...

Страница 29: ...e AVR will automatically switch to the analog audio input This can be useful for older cable television systems that broadcast channels in both analog and digital audio If an analog audio connection w...

Страница 30: ...tening volumes One concern of the typical home theater listener is that volumes can vary widely for different programs played by a source e g television commercial advertisements are often much louder...

Страница 31: ...play It is recommended that you leave the settings at their defaults See the Advanced Functions Manual for detailed information Headphones Plug the 1 4 inch plug on a pair of headphones into the jack...

Страница 32: ...system is capable of transmitting a wide variety of information in addition to the initial station call sign that appears when a station is first tuned In normal RDS operation the display will indica...

Страница 33: ...the Slideshow Speed setting Each press of the OK Button changes the speed Slow Medium or Fast Internet Radio With its network connection the AVR 760 AVR 660 opens a world of MP3 and WMA format stream...

Страница 34: ...l audio signals are available for recording Proprietary 2 formats such as Dolby Digital and DTS may not be recorded using the digital audio connections Use the analog audio connections to make an anal...

Страница 35: ...e System Settings menu described in the Advanced Functions Manual Restore the Now Playing screen to view by pressing either of the M N Buttons NOTE It is strongly recommended that you use the screen s...

Страница 36: ...uses only two speakers As described in the Advanced Functions Manual you may select Analog Bypass mode for a pure analog signal when analog audio inputs are in use Turn off the Tone Control setting in...

Страница 37: ...Input is monaural There is no surround information from mono sources Incorrect configuration Check speaker configuration Stereo or Mono program material The surround decoder may not create center or r...

Страница 38: ...UX Coax Front Analog Front Composite Front not used for audio only devices Recorder Source D Coaxial 2 input and Coaxial Output Analog 4 inputs and outputs Composite OR S Video 2 input and output iPod...

Страница 39: ...Medium Low Medium Medium Medium Medium Low Medium Record Out Analog Analog Analog Analog Analog Analog Analog Analog Video output resolution may vary for HDMI connections Table A2 Source Setting Defa...

Страница 40: ...istortion Mono Stereo 0 2 0 3 Stereo Separation 40dB 1kHz Selectivity 400kHz 70dB Image Rejection 80dB IF Rejection 90dB AM Tuner Section Frequency Range 520 1720kHz Signal to Noise Ratio 45dB Usable...

Страница 41: ...r U S Patent s 5 451 942 5 956 674 5 974 380 5 978 762 6 226 616 6 487 535 7 212 872 7 333 929 7 392 195 7 272 567 and other U S and worldwide patents issued and pending DTS is a registered trademark...

Страница 42: ...8500 Balboa Blvd Northridge CA 91329 www harmankardon com 2009 Harman International Industries Incorporated All rights reserved Part No CQX1A1393Z...

Отзывы: