


-D2 -52
7-4
CAP FRAME option
7_4 N312
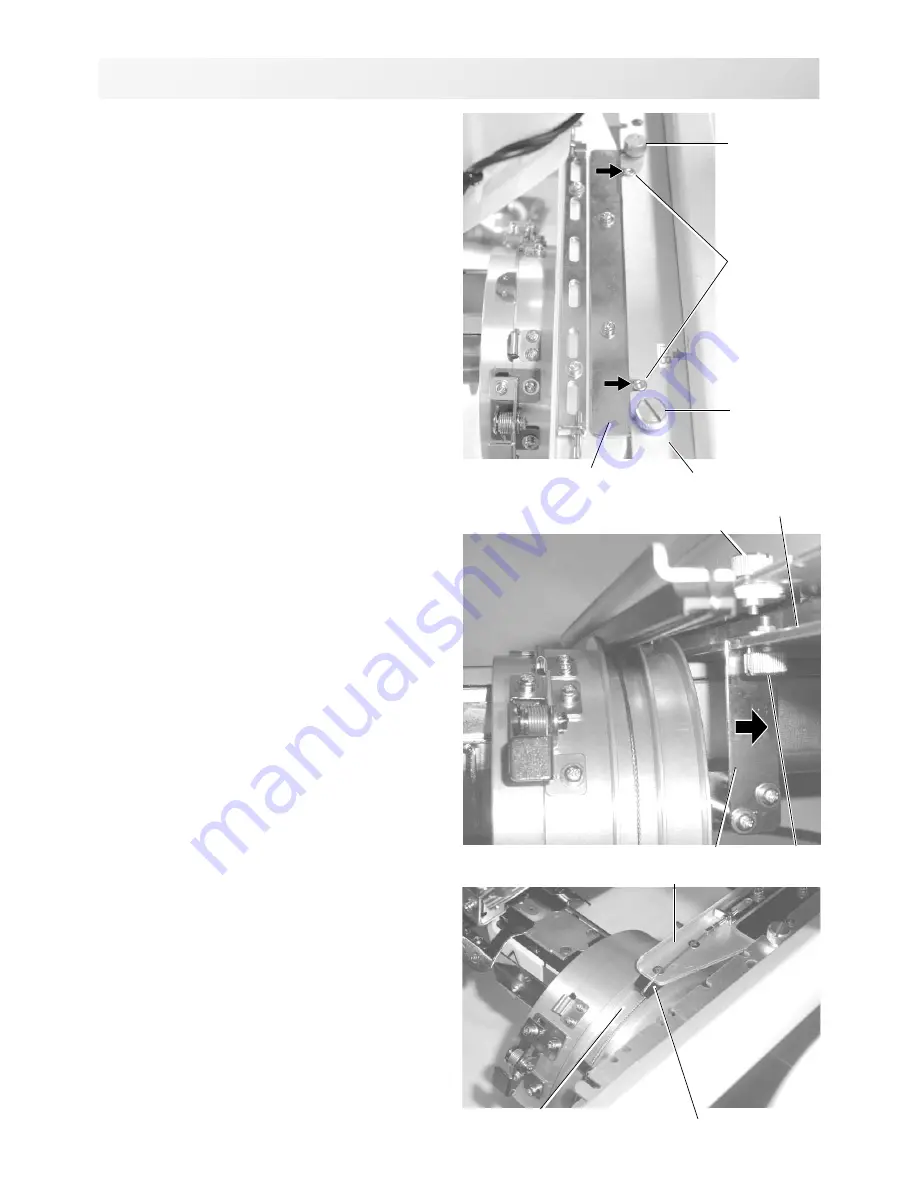
6. Temporally fix both left and right fixing Drive
frame connecting bracket with knob screws.
Push Drive frame connecting bracket to the
carriage side (direction of the arrow in the
picture on the right.) so that position pins fit
slots of connecting plate.
Fix firmly drive frame connecting bracket
and connecting plate with the knob screws.
7. Fix firmly X carriage base with both left and
right lower knob screws while pushing left
and right fixing brackets in the direction of
the arrow.
8. Move the rail bracket completely right and
left to confirm that the rails are in the
grooves of the rotary cylinder.
Grooves of rotary cylinder
Rail
Rail bracket
Knob screw
Fixing bracket
X carriage base
Knob screw
Positioning pin
Knob screw
Knob screw
Connecting plate
Drive frame connecting bracket
Содержание HCD2
Страница 1: ...D2N401 11 Computerized Single Head Embroidery Machine INSTRUCTION BOOK HCD2...
Страница 2: ......
Страница 86: ...D2 69 11 1b PATTERNS IN MEMORY 5_B M201 5 Press Repeat steps 3 and 5 to unlock Press to return to Menu mode...
Страница 91: ...D2 74 6 Press The pattern name will be changed 11 5b PATTERNS IN MEMORY 11_5 M401 Press to return to Menu mode...
Страница 159: ...D2 133 20 6 FRAME CONFIRMATION 20_5 N101 11 Press Press to return to Drive mode...
Страница 176: ...D2 151 6 Press 7 Press 8 Press The machine will be rebooted The setting is fixed 22 2 OTHER SETTINGS 22_1 M201...
Страница 205: ...SJ 81 Those fonts are created by www i cliqq com 26 3 BUILT IN FONT LIST 26_3 N401...