English _
21
!
NETWORK CONNECTION AND SETUP
network connection and setup
You can set up the network settings according to your network configurations.
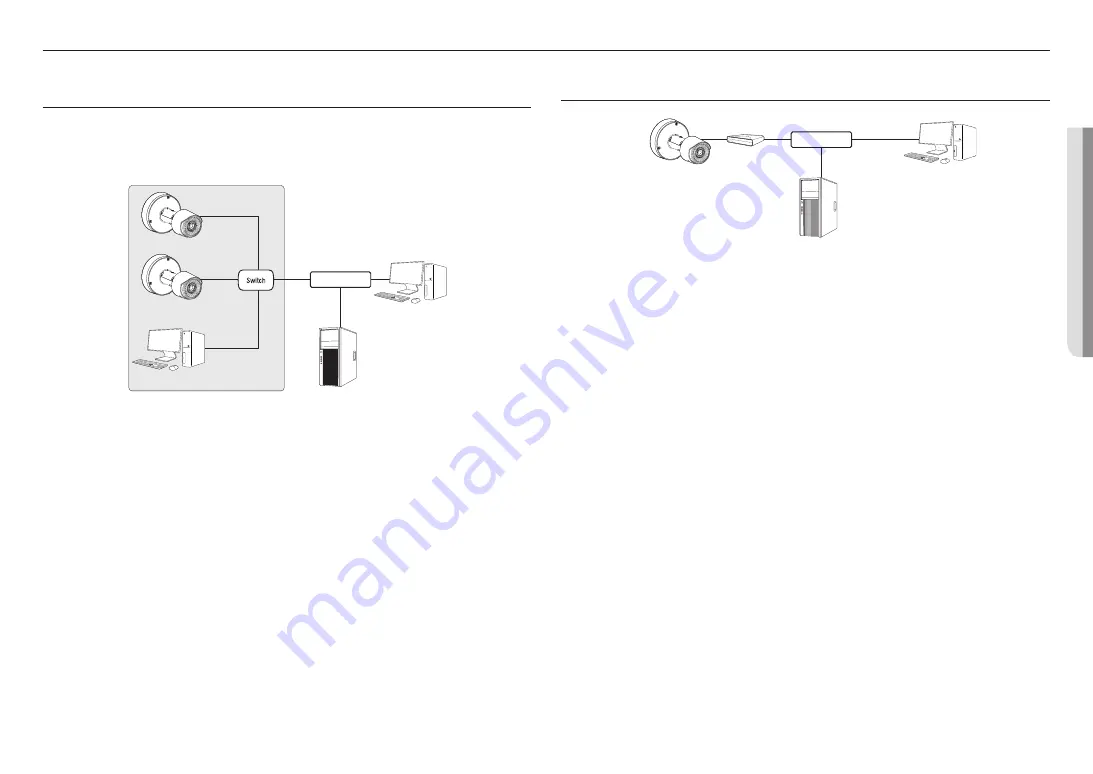
CONNECTING THE CAMERA DIRECTLY TO LOCAL AREA NETWORKING
Connecting to the camera from a local PC in the LAN
1.
Launch an Internet browser on the local PC.
2.
Enter the IP address of the camera in the address bar of the browser.
<Local Network>
Camera
Camera
Local PC
INTERNET
External Remote PC
DDNS Server
(Data Center, KOREA)
M
`
A remote PC in an external Internet out of the LAN network may not be able to connect to the camera installed in the intranet
if the port-forwarding is not properly set or a firewall is set.
In this case, to resolve the problem, contact your network administrator.
`
By factory default, the IP address will be assigned from the DHCP server automatically.
If there is no DHCP server available, the IP address will be set to 192.168.1.100.
To change the IP address, use the Device Manager.
For further details on Device Manager use, refer to “
Using Device Manager
”. (Page 22)
CONNECTING THE CAMERA DIRECTLY TO A DHCP BASED DSL/CABLE
MODEM
Camera
External Remote PC
DDNS Server
(Data Center, KOREA)
DSL/Cable Modem
INTERNET
1.
Connect the user PC directly with the network camera.
2.
Run the Device Manager and change the IP address of the camera so that you can use the web browser
on your desktop to connect to the camera.
3.
Use the Internet browser to connect to the web viewer.
4.
Move to [
Setup
] page.
5.
Move to [
Network
] – [
DDNS
] and configure the DDNS settings.
6.
Move to [
Basic
] – [
IP & Port
], and set the IP type to [
DHCP
].
7.
Connect the camera, which was removed from your PC, directly to the modem.
8.
Restart the camera.
M
`
For information on how to set DDNS, refer to the online help of Web Viewer.
`
For information on how to set the IP format, refer to the online help of Web Viewer.
Содержание TNO-C3010TRA
Страница 30: ......


