36
ISE SETUP (HI 5222 only)
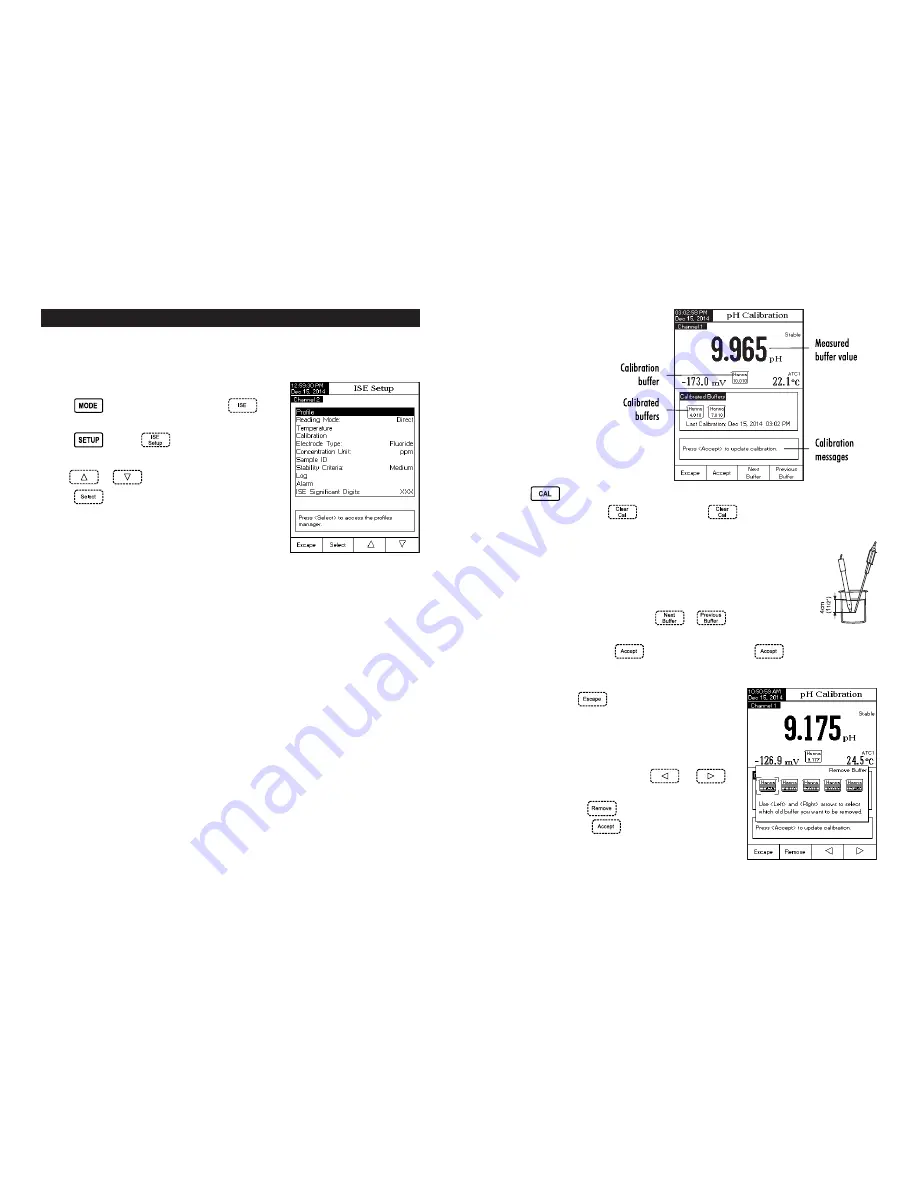
The ISE Setup menu allows the user to set the parameters regarding ISE measurement and calibration. These
parameters can be set specifically for each channel. The settings will be applied only to the active channel.
Accessing ISE Setup
• Press
while in
Measure
mode and then
to
select ISE range for the desired channel.
• Press
and then
to access ISE Setup menu.
To access an ISE Setup option:
• Use
or
to highlight the desired option.
• Press
to access the selected option.
The following is a detailed description of the ISE Setup option
screens.
Profile
- See pH Setup section.
Reading Mode
This option allows the user to select the desired reading mode: Direct, Direct/AutoHold, Known Addition, Known
Subtraction, Analyte Addition and Analyte Subtraction. Four of these Reading Modes are collectively known as
Incremental Methods (see ISE Theory section for details). Direct measurements and Direct/AutoHold measurements
are also available.
Direct
Direct measurements are analogous to taking pH measurements. The ISE is calibrated in Ion standards and
sample measurements are made directly. The ISE’s manual should be consulted for tips and practices of making
Direct measurements. The Ion concentration can be read directly from the instrument.
Direct/AutoHold
Direct/AutoHold measurements are made similar to Direct measurements. The advantage of using AutoHold is a
measurement that has not reached equilibrium will not be used. Only after the chosen stability criteria has been
met will the meter go into the AutoHold mode. Using AutoHold removes the subjective nature of stability.
Known Addition
In the Known Addition method, a sample is measured with an ISE before and after the addition of a known volume
of a standard. The mV difference is then used to calculate the concentration of the Ion in the original sample.
45
• Press
. If the instrument was calibrated before and calibration was not cleared, the old calibration
can be cleared by pressing
. After 10 seconds,
will no longer be available.
Note:
It is very important to clear calibration history when a new electrode is used because most errors
and warning messages that appear during calibration depend on calibration history.
• Immerse the pH electrode and the temperature probe approximately 4 cm (1.5”) into
a buffer solution of your choice (pH 1.68, 3.00, 4.01, 6.86, 7.01, 9.18, 10.01,
12.45 or a custom buffer) and stir gently. The temperature probe should be close to
the pH electrode.
• Select the pH calibration buffer used with
or
. The “
Please wait...
”
message will appear on the LCD until the reading is stable or the buffer is validated.
• If the pH buffer is validated,
will appear on the LCD. Press
to update calibration. The
calibration buffer will be added to the Calibrated Buffers section.
• Immerse the pH electrode and the temperature probe into the next buffer solution and follow the above
procedure or press
to exit calibration.
Notes:
• The new added calibration point will replace an old
one if the difference between them is ±0.2 pH.
• If the existing stored calibration is full (five calibration
points), a pop-up menu will be displayed on the LCD
in which you can select with
or
keys the buffer you want to replace with the current
buffer. Press
to delete the selected buffer
and then press
to update calibration with the
new buffer.
pH Calibration screen description


