6
1
Checking Timing Belt Tension
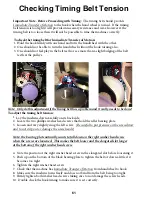
Important Note - Before Proceeding with Timing: The timing belt should provide
Immediate Transfer of Motion
to the hook when the hand wheel is turned. If the timing
belt tension is too tight it will provide unnecessary resistance and wear; however if the
timing belt is too loose then it will not be posssible to time the machine correctly.
To check the timing belt for Immediate Transfer of Motion:
1. Hold the hook firmly with one hand and turn the handwheel with the other.
2. One should not be able to turn the handwheel without the hook turning also.
3. One should not feel play in the belt teeth or see more than a slight bulging of the belt
teeth at the pulleys.
Note: Only do this adjustment if the timing belt has a problem and it really needs to be done!
To adjust the timing belt tension:
1. Lay the machine down carefully on its back side.
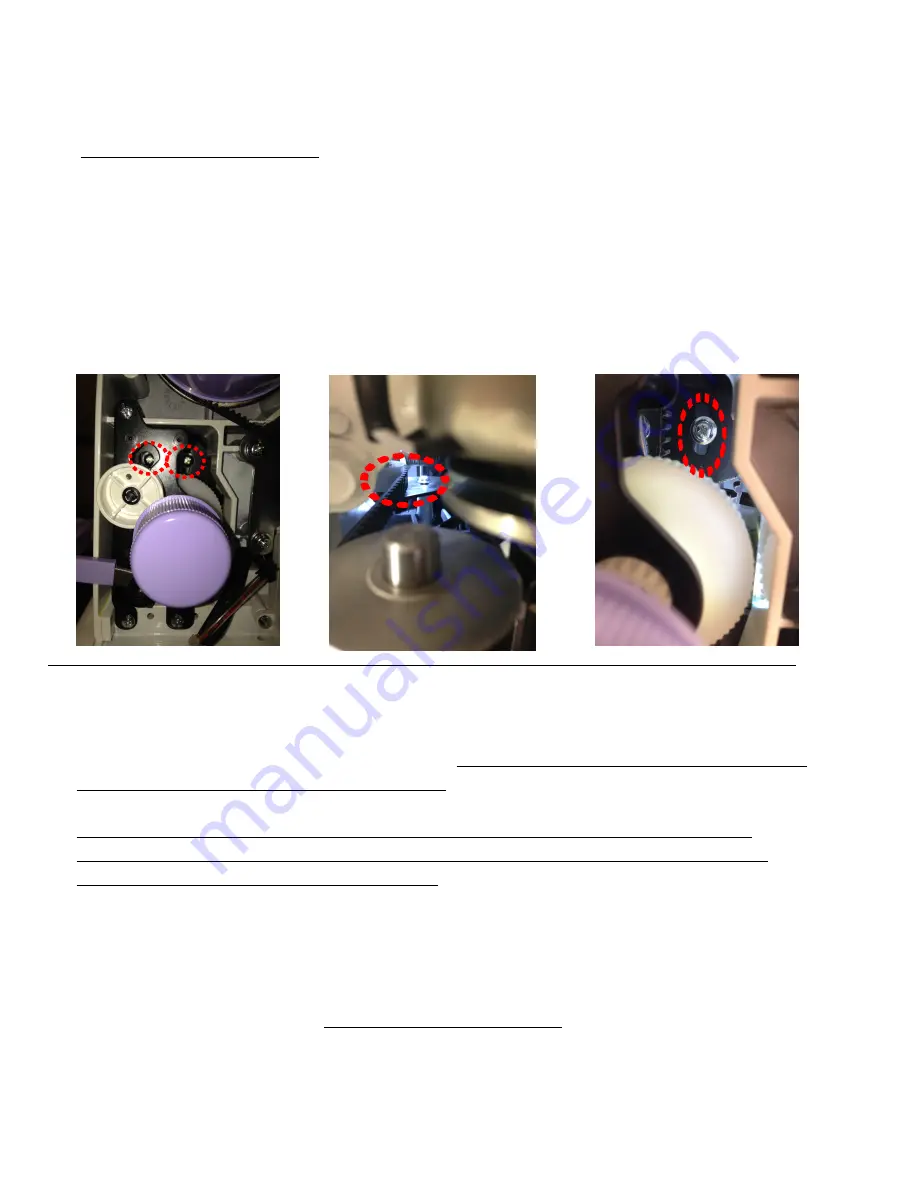
2. Locate the two phillips washer head screws that hold the idler bearing plate.
3. Loosen and very slightly snug the left screw.
(Be careful to put pressure on the screwdriver
and to not strip out or damage the screw heads)
Note: the bearing plate naturally wants to fall down on the right washer head screw
when the screws are loosened. This makes the belt looser and the elongated slot longer
at the bottom of the right washer head screw.
4. Note the position of the right washer head screw in the elongated slot before loosening it.
5. Push up on the bottom of the black bearing plate to tighten the belt or down a little if it
becomes too tight.
6. Tighten the right washer head screw.
7. Check that the machine has
Immediate Transfer of Motion
from handwheel to hook.
8. Make sure the machine turns freely and does not bind from the belt being too tight.
9. Firmly tighten both washer head screws taking care to not damage the screw heads.
10. Double check the hook timing to make sure it is set correctly.
Содержание HQ STITCH 510
Страница 1: ...HQ Stitch 510 SERVICE MANUAL 10 11 16...
Страница 6: ...HQ Stitch 510 Lubrication 4...
Страница 12: ...Oil Put a drop of oil on the following 4 The felt at the top of the needle bar bushing under top cover 10...
Страница 13: ...Oil Put a drop of oil on the following 5 The take up lever crank at the three orifices under top cover 7 11...
Страница 23: ...Grease Put a small amount of grease on the following 15 The thread cutter linkage under bottom cover 21...
Страница 24: ...Grease Put a small amount of grease on the following 16 The thread cutter linkage under bottom cover 22...
Страница 51: ...IDENTIFYING ELECTRONIC COMPONENTS CONNECTIONS 49...


