33
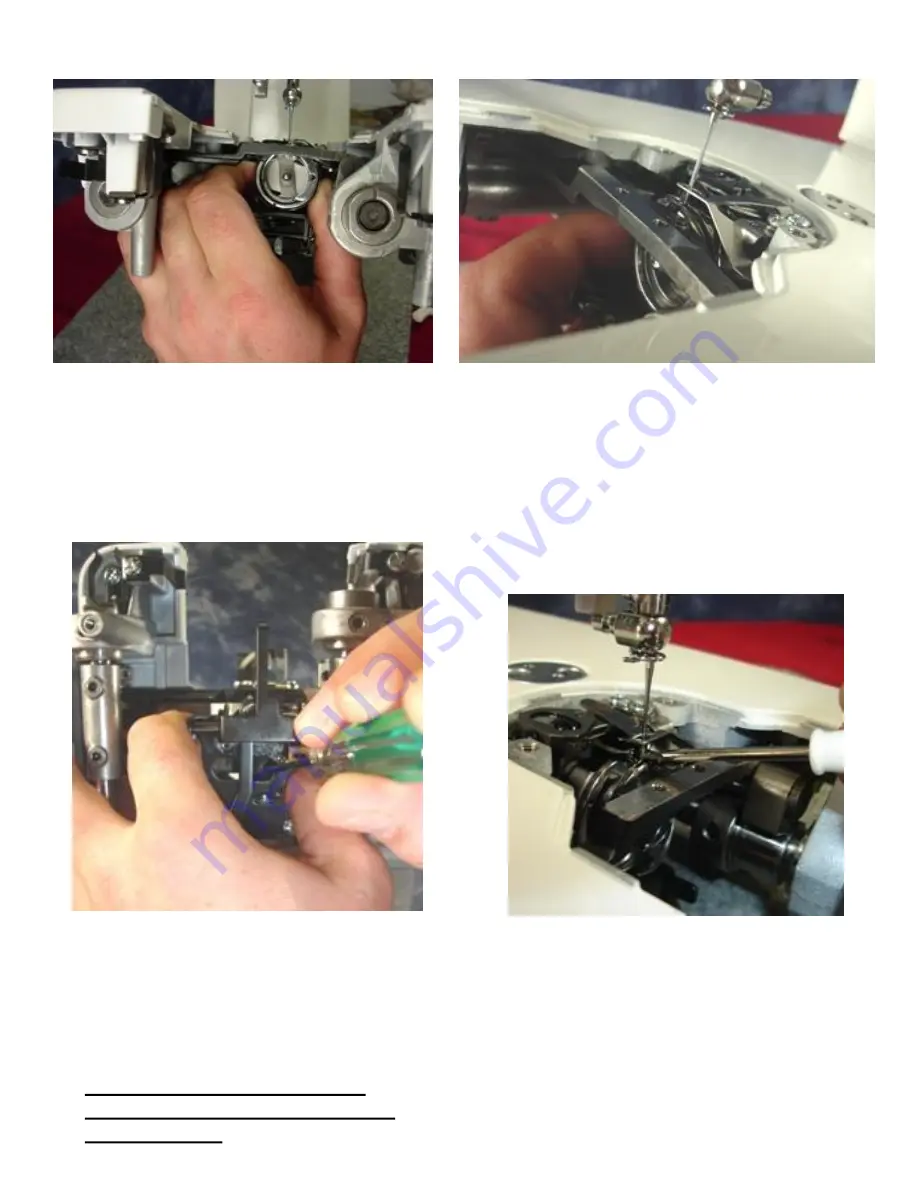
5. Hold the hook race towards the front to
make sure that the outer part is still locked
in the hook stopper. Line the tip of the
hook up with the right side of the needle.
6. As you hold the hook race towards the
hook stopper and once you have lined up
your timing you must also adjust the
clearance of the hook to the needle. The tip
of the hook should pass behind the needle
with a clearance of 0
– 0.
05mm.
7. While holding your timing in place
along with the clearance, tighten one
of the screws on the hook race to
hold the position. Best way to do this
is to have the machine somewhat
standing up on the right hand side.
Note
– you may find a custom
sized carpet covered wood block
handy for this!
8. To test clearance, take a
screwdriver and push against the
needle lightly when the hook is
behind it. The needle should not
bend back. Once you have double
checked you timing and clearance,
tighten the remaining two screws.
NEEDLE TO HOOK TIMING & CLEARANCE
(5 of 5)
Содержание HQ STITCH 510
Страница 1: ...HQ Stitch 510 SERVICE MANUAL 10 11 16...
Страница 6: ...HQ Stitch 510 Lubrication 4...
Страница 12: ...Oil Put a drop of oil on the following 4 The felt at the top of the needle bar bushing under top cover 10...
Страница 13: ...Oil Put a drop of oil on the following 5 The take up lever crank at the three orifices under top cover 7 11...
Страница 23: ...Grease Put a small amount of grease on the following 15 The thread cutter linkage under bottom cover 21...
Страница 24: ...Grease Put a small amount of grease on the following 16 The thread cutter linkage under bottom cover 22...
Страница 51: ...IDENTIFYING ELECTRONIC COMPONENTS CONNECTIONS 49...


