
39
!
"
#
!
"
#
$
%
$
Panel Saw
K3 basic/K3 winner/K3 e-classic
Making adjustments and preparations
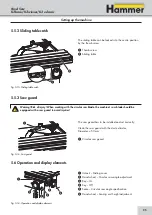
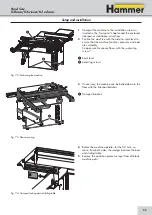
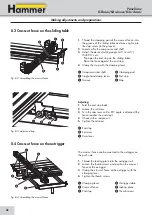
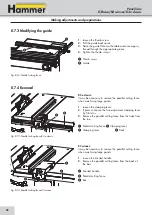
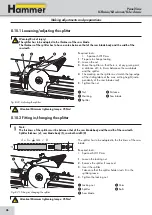
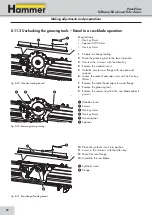
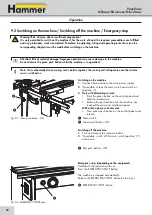
Fig. 8-5: Adjust the crosscut fence
Pivoting:
1.
Loosen the clamping lever and thumb screws.
2.
Pivot the crosscut fence to the desired position. Fold
the end stop back if necessary, so as to be able to
pivot the crosscut fence over it.
3.
Clamp the clamping lever in place and tighten the
thumb screws.
4.
Loosen the thumb screws, move the fence profile and
retighten the thumb screws in order to compensate
the length of the scale when the fence is pivoted.
90°-Position:
1.
Loosen the clamping lever and thumb screws.
2.
Tilt the crosscut fence, until it stops against the end
stop.
3.
Clamp the clamping lever in place and tighten the
thumb screws.
!
Clamping lever
"
Crosscut fence
#
End stop
$
Thumb screws
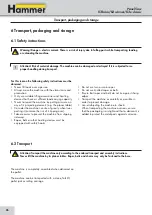
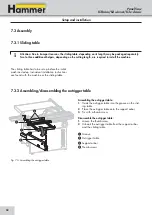
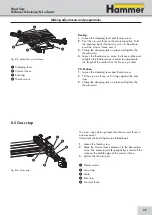
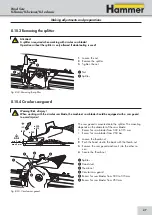
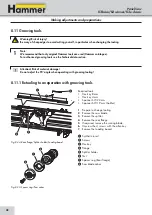
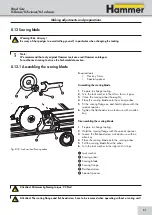
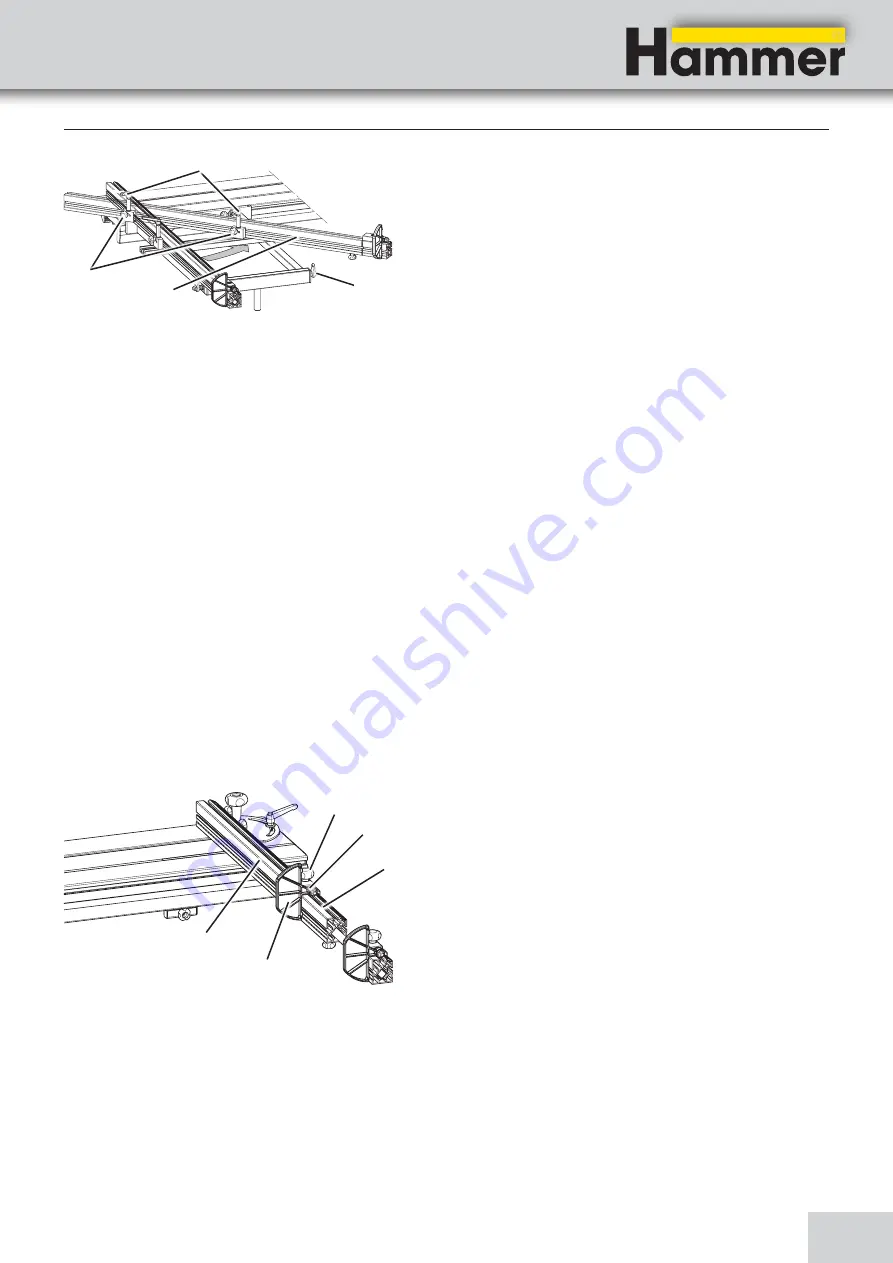
8.5 Cross stop
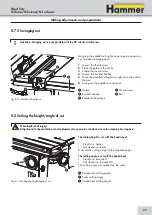
Fig. 8-6: Cross stop
The cross stop can be pushed onto the crosscut fence in
one movement.
If required, the end stop can be folded back.
1.
Loosen the thumb screw.
2.
Move the crosscut fence extension to the desired po-
sition. The measurement (Rip capacity) is read off the
scale on the profile edge of the crosscut fence.
3.
Tighten the thumb screw.
!
Thumb screws
"
Cross stop
#
Scale
$
End stop
%
Crosscut fence
Содержание K3 e-classic
Страница 76: ...76 Panel Saw K3 basic K3 winner K3 e classic...
Страница 77: ...77 Panel Saw K3 basic K3 winner K3 e classic...
Страница 78: ...78 Panel Saw K3 basic K3 winner K3 e classic...
Страница 79: ...79 Panel Saw K3 basic K3 winner K3 e classic...


