


49
!
$
^
/
(
$
"
#
%
Panel Saw
K3 basic/K3 winner/K3 e-classic
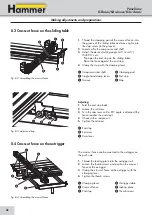
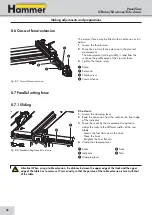
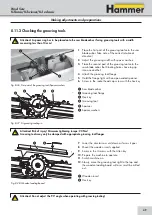
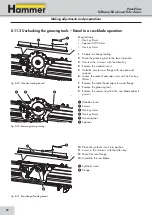
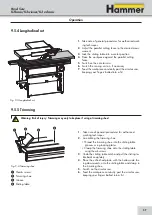
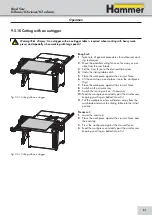
1.
Place the first part of the grooving tool onto the saw
blade arbor. Take note of the correct rotational
direction!
2.
Adjust the grooving width with spacer washers.
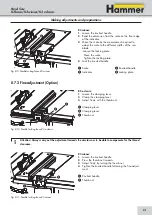
3.
Place the second part of the grooving tool onto the
saw blade arbor. Both tooling halves have to grip
into one another!
4.
Attach the grooving tool flange.
5.
Hold the flange tight with an open-ended spanner.
6.
Screw in the socket head cap screw with the hex key.
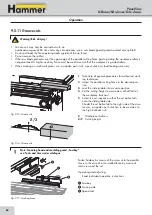
!
Saw blade arbor
"
Grooving tool flange
#
Hex key
$
Grooving tool
%
Spanner
&
Spacer washers
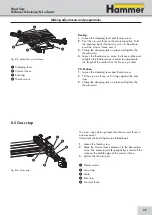
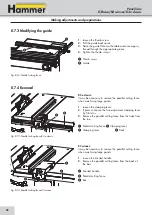
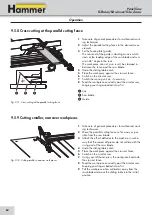
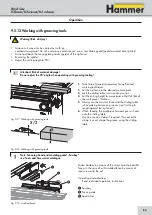
7.
Lower the circular saw unit down as far as it goes
8.
Mount the wooden insert supplied.
9.
Screw in the 4 screws with the Allen key.
10.
Prepare the machine to operate.
11.
Switch machine on.
12.
Slowly, move the grooving tool right to the top and
the wooden loading board will as a result be milled
out.
/
Wooden insert
(
Hex key
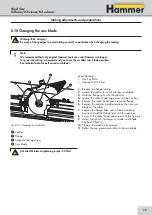
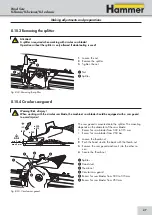
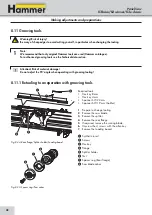
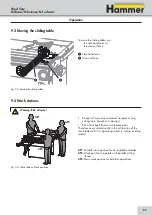
Making adjustments and preparations
8.11.2 Chucking the grooving tools
Attention! A spacer ring has to be placed onto the saw blade arbor if using grooving tools with a width
measuring less than 10 mm!
Fig. 8-26: First part of the grooving tool/Spacer washers
Fig. 8-27: Fit grooving tooling in
Fig. 8-28: Wooden loading board
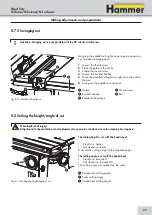
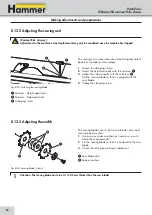
Attention! Do not adjust the 90° angle when operating with grooving tooling!
Attention! Risk of injury! Minimum tightening torque: 20 Nm!
Grooving tools may only be clamped with appropriate grooving tool flanges.
Содержание K3 e-classic
Страница 76: ...76 Panel Saw K3 basic K3 winner K3 e classic...
Страница 77: ...77 Panel Saw K3 basic K3 winner K3 e classic...
Страница 78: ...78 Panel Saw K3 basic K3 winner K3 e classic...
Страница 79: ...79 Panel Saw K3 basic K3 winner K3 e classic...


