


38
d
Bedienungsanleitung
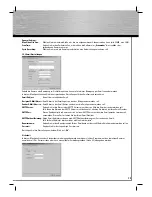
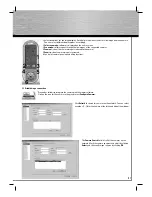
NNetwork type:
Here, you can select whether you want to give the camera a static IP address or whether it should be
assigned a dynamic IP address from the DHCP server on your network.
IP address:
Enter the camera’s IP address here. Please note: the IP camera has to fi t the network address of your
existing
network.
Subnet mask:
Enter the subnet mask here. Please note: the subnet mask has to match the subnet mask of your network.
Gateway:
Enter the gateway address of your network.
Primary DNS:
Enter the address of the DNS server.
Secondary DNS:
Enter the address of an alternative DNS server: if the primary DNS server is not accessible, the camera
falls back on the secondary server.
Video port:
Displays the port used by the camera for transmitting the live image on the network. If there is a fi rewall in
your network, you might have to enable the port in the fi rewall. If the camera is to be accessible via the
internet, this port in the fi rewall has to be confi gured for internet access.
HTTP port:
Enter the network camera’s HTTP port. If you need to change the port from
“80”
, enter the port after the
IP address of the IP camera so you can open the web interface using Internet Explorer.
Example:
Port 90
IP address:
192.168.2.3
Address in address bar: http://192.168.2.3:90
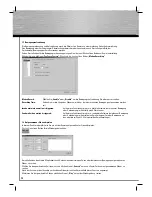
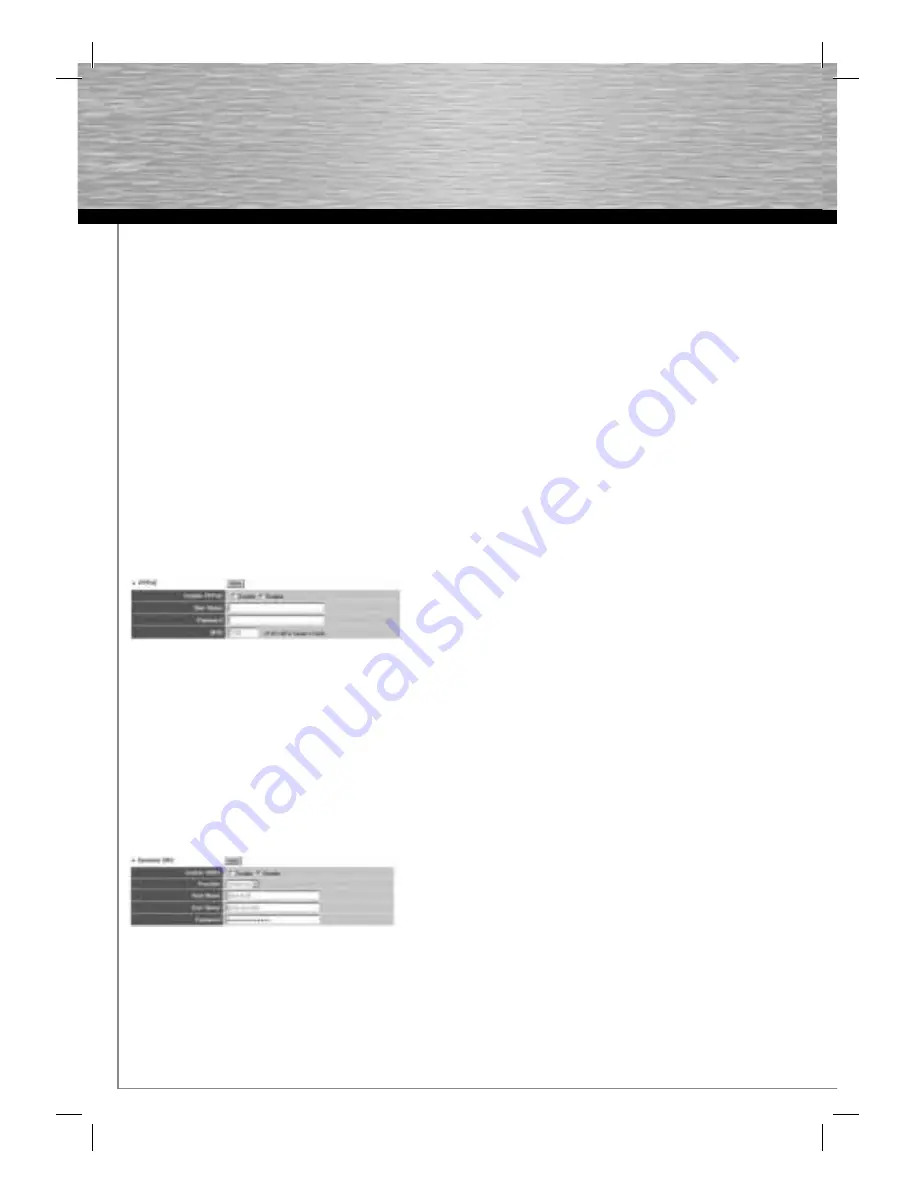
2.4.2 PPPoE
If you want to run the camera on a separate DSL connection with a modem, you can activate the PPPoE function in this menu item.
Select
Activate or Deactivate
to turn the PPPoE function on or off.
Then enter the
User name
and
Password
for the desired internet connection.
The
MTU
(Maximum Transmission Unit) is available from your internet provider.
Click
Apply
to confi rm and save your settings.
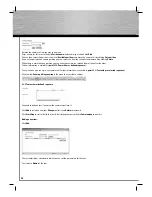
2.4.3 Dyn DNS
If your internet service provide does not provide you with a static IP address for your internet connection, this function helps you
ascertain the IP address of the internet connection and of the camera. This allows you to access the camera if you are not on your
home network.
Before you start the installation, you need a user account at dyndns.org
(http://www.dyndns.org).
Turn on dynamic DNS:
For activating or deactivating the service.
Provider:
dyndns.org is the default setting.
Domain name:
Enter the domain name of your DynDns user account.
User name:
Enter the user name for your DynDns account.
Password:
Enter the password for your DynDns account.


