background image

00053103/08.09

All listed brands are trademarks of the corresponding companies. Errors and omissions excepted, 
and subject to technical changes. Our general terms of delivery and payment are applied.

Hama GmbH & Co KG

D-86651 Monheim/Germany

www.hama.com

Die Konformitätserklärung nach der R&T TE  

Richtlinie 99/5/EG fi nden Sie unter www.hama.com

See www.hama.com for declaration of  

g

conformity according to R&T TE Directive 99/5/EC guidelines

La déclaration de conformité à la directive  

f

R&T TE 99/5/CE se trouve sur www.hama.com

La declaración de conformidad según la  

e

directiva R&T TE 99/5/CE la encontrará en www.hama.com

De conformiteitsverklaring conform de  

o

R&T TE-richtlijn 99/5/EG vindt u onder  www.hama.com

La dichiarazione di conformità secondo la  

i

direttiva R&T TE 99/5/CE è disponibile sul sito 
www.hama.com

Konformitetsförklaring enligt R&T TE riktlinje  

s

99/5/EG fi nner du på www.hama.com

Radio- ja telepäätelaitteita koskevan   

m

direktiivin 99/5/EY mukainen vaatimustenmukaisuusvakuutus löytyy 
osoitteesta www.hama.com

Overensstemmelseserklæringen i henhold til R&T TE-retningslinierne  

j

fi nder du under  HYPERLINK „http://www.hama.com”

Deklaracja zgodności według dyrektywy  

q

R&TTE 99/5/EG dostępna na stronie internetowej www.hama.com 

A megfelelőségi követelmények megegyeznek  

az R&TTE Irányelvek 99/5/EG ajánlásaival www.hama.com

Prohlášení, o shodě podle směrnice  

c

R&TTE 99/5/EG, naleznete na www.hama.com

Prehlásenie o zhode podľa R&TTE smernice  

v

99/5/EG nájdete na www.hama.com

Τη δήλωση συμμόρφωσης σύμφωνα με την  

k

οδηγία 99/5/EΚ περί R&TTE θα τη βρείτε στη διεύθυνση www.hama.com

Заявление о соответствии товара нормам R&TTE 99/5/EG см. на веб-узле 

www.hama.com

R&T TEDirektifi  99/5/EG’ye göre uygunluk beyanı için www.hama.com  

t

adresine bakınız.

Declaraţia de conformitate conform directivei 99/5/UE din R&TTE o găsiţi la  

r

www.hama.com

Software: (D) (GB)
(D)   Dieses Gerät darf nur in den folgenden Ländern betrieben werden:
(GB)  The operation of this device is only allowed in the following countries:
(F) 

Cet appareil ne peut être utilisé que dans les pays suivants:

(E) 

Este aparato se puede utilizar sólo en los países siguientes:

(I) 

L’uso di questo apparecchio é ammesso soltanto nei seguenti Paesi:

(NL)   Dit apparaat mag alleen gebruikt worden in de volgende landen:
(DK)   Dette apparat må kun benyttes i følgende lande:

(PL)   Urządzenie sprzedawane jest tylko w następujących krajach:
(H)   Ez a készülék a következő országokban üzemeltethető:
(CZ)  Tento přístroj se smí používat pouze v následujících zemích:
(SK)  Toto zariadenie sa môže používať len v týchto krajinách:
(S)   Denna apparat får endast användas i följande länder:
(FIN)  Tätä laitetta saa käyttää vain.
(GR) 

Αυτή η συσκευή επιτρέπεται να λειτουργεί μόνο στις παρακάτω χώρες:

(D) (A) (CH) (GB) (F) (B) (NL) (E) (DK) (S) (H) (PL) (CZ) (SK) (GR) (FIN) (L) (IRL)

Содержание WLAN IP-Camera

Страница 1: ...y q R TTE 99 5 EG dost pna na stronie internetowej www hama com A megfelel s gi k vetelm nyek megegyeznek h az R TTE Ir nyelvek 99 5 EG aj nl saival www hama com Prohl en o shod podle sm rnice c R TTE...

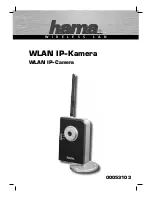
Страница 2: ...WLAN IP Kamera WLAN IP Camera W I R E L E S S L A N 00053103...

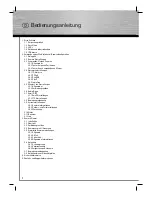
Страница 3: ...ngsaufbau 2 6 Audio Video 2 7 Email FTP 2 7 1 Email Einstellungen 2 7 2 FTP Einstellungen 2 8 Bewegungserkennung 2 9 Systemeinstellungen 2 9 1 Kamera Informationen 2 9 2 Datums und Zeiteinstellungen 2...

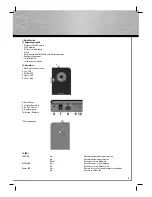
Страница 4: ...luss 2 Lan LED 3 WLAN LED 4 Power LED 5 Focus Ring 6 Reset Knopf 7 Netzteil Anschluss 8 RJ 45 Anschluss 9 Audioausgang 10 Internes Mikrofon 11 Stativgewinde 1 3 LED s LAN LED Aus Netzwerkkabel nicht a...

Страница 5: ...SMA Antennenanschluss 1 an Schie en Sie nun das 230V Netzeil an einer Steckdose und am Stromanschluss der Kamera 6 an Sollte das angezeigte Bild unscharf sein haben Sie die M glichkeit die Bildsch rf...

Страница 6: ...e IP Kamera korrekt mit dem PC verbunden ist und die IP Adresse eingestellt wurde haben Sie nun die M glichkeit die Kamera mit Hilfe des Internet Explorers zu konfigurieren oder zu verwenden Alternati...

Страница 7: ...s Livebild der Internet Kamera sehen Sollten w hrend der Installation Fehlermeldungen erscheinen oder nach der Installation kein Bild angezeigt werden wird empfohlen die aktuellsten Microsoft DirectX...

Страница 8: ...ie ein Video in dem im weisen Feld angezeigten Ordner auf dem PC Klicken Sie auf Aufnahme starten um mit der Aufnahme zu beginnen 2 3 Schwenken Neigen Zoomen 2 3 1 Allgemeines Kamera verf gt ber eine...

Страница 9: ...2 3 2 Tour mit eigenen Positionen Sie haben ebenfalls die M glichkeit eine Tour nach vorgegebenen Muster zu starten N heres hierzu unter Punkt 2 3 3 Tour nach vorgegebenen Muster Zu den Einstellungen...

Страница 10: ...stellungen bernehmen Sie anschlie end mit einem Klick auf Speichern Nachdem Sie die Einstellungen gespeichert haben k nnen Sie dieses Fenster schlie en Wenn Sie eine Position aus der Liste entfernen w...

Страница 11: ...ssen Sie den entsprechenden Port hinter die IP Adresse der IP Kamera schreiben um die Weboberfl che mit dem Internetexplorer ffnen zu k nnen Beispiel Port 90 IP Adresse 192 168 2 3 Adresse in Adressze...

Страница 12: ...r fen Sie bitte ob in Men Netzwerkaufgaben der Punkt Symbole f r Netzwerk UPnP Ger te ausblenden oder Symbole f r Netzwerk UPnP Ger te einblenden steht Sollte Symbole f r Netzwerk UPnP Ger te ausblend...

Страница 13: ...eispiel IP Adresse 192 168 2 3 Bildname test jpg Eingabe in Adresszeile http 192 168 2 3 test jpg 2 5 Wireless Lan Einstellungen 2 5 1 Allgemeines Wenn Sie die Kamera im Wireless Lan Modus betreiben w...

Страница 14: ...l sselung angegeben Sobald Sie einen Wireles Lan Router oder Access Point aus der Liste der verf gbaren Netzwerke w hlen wird automatisch die verwendete Verschl sselung des ausgew hlten Wireless Lans...

Страница 15: ...rnehmen Anschlie end ndert sich die Farbe des Kreises im Feld Connect des Netzwerkes mit dem die Kamera nun verbunden ist Rot Keine Verbindung falscher Schl ssel Pink Verbindung hergestellt Kamera ist...

Страница 16: ...oft das Kamerabild in der Sekunden aktualisiert werden soll MJPEG Video Aufl sung W hlen Sie zwischen SXGA 1280x1024 VGA 640x480 oder QVGA 320x240 Video Qualit t W hlen Sie hier die Bildqualit t in 5...

Страница 17: ...en Sie hier das zugeh rige Passwort ein Speichern Sie Ihre Einstellungen mit einem Klick auf bernehmen Nachdem die Einstellungen bernommen worden sind k nnen Sie nun eine Test E Mail an die angegebene...

Страница 18: ...Email Adresse Punkt 2 7 1 versendet werden W hlen Sie Ja wenn diese Funktion aktiviert werden soll E Mail Betreff Hier k nnen Sie einen speziellen Betreff f r die bei erkannter Bewegung versendete Ema...

Страница 19: ...a de eine aktualisierte Firmware zum Download angeboten wird k nnen Sie mit Hilfe dieses Tools die Kamera aktualisieren Klicken Sie auf Durchsuchen und w hlen Sie in dem nun erscheinenden Fenster die...

Страница 20: ...einem Klick auf Aktiv Benutzername W hlen Sie einen Benutzernamen f r dieses Konto Passwort W hlen Sie ein dem Benutzernamen zugeh riges Passwort Passwort best tigen Um Schreibfehler bei der Passwort...

Страница 21: ...Legen Sie die beiliegende Software CD in das CD Rom Laufwerk Ihres PC s ein Das Installations Men startet nach dem Einlegen der CD W hlen Sie nun die entsprechende Sprache aus Starten Sie nun die Inst...

Страница 22: ...ie den entsprechenden Speicherort f r das Programm aus und fahren Sie mit einem Klick auf Next fort Klicken Sie auf Install um mit der Installation zu beginnen Klicken Sie auf Finish um die Installati...

Страница 23: ...ig angezeigt werden Es ist au erdem M glich verschie dene andere Ansichten zu w hlen z B 4 Livebilder 1 Livebild gro 3 Livebilder klein 1 Beenden der Software 2 Software minimieren 3 Statusmonitor 4 A...

Страница 24: ...r ern des Kamerabildes 6 Steuerung f r die Schwenk und Neigefunktion der Kamera 3 3 Verbindungsaufbau Um eine Kamera in die Viewer Software einzubinden gehen Sie wie folgt vor Klicken Sie auf das Symb...

Страница 25: ...verwenden 3 5 Erweiterte Kameraeinstellungen 3 5 1 Allgemein Zu den allgemeinen Einstellungen gelangen Sie indem Sie auf das Symbol zur Kamerakonfiguration klicken und General Options ausw hlen Unter...

Страница 26: ...sendet werden soll SMTP Server Geben Sie hier die Adresse des SMTP Servers ein mit dessen Hilfe die Email versendet werden soll Falls Ihnen die Adresse des SMTP Servers nicht bekannt ist erfahren Sie...

Страница 27: ...huss Einen Schnappschuss des Livebildes der Kamera k nnen Sie mit einem klick auf folgendes Symbol in der Software machen Das gespeicherte JPEG Bild wird im Standartspeicherorder abgelegt 3 6 2 Sofort...

Страница 28: ...Zeitraum noch zu ver ndernd dies geschieht mit einem Klick auf Edit Mit einem Kick auf Delete l schen Sie den entsprechenden Zeitraum Sich wiederholdende Aufnahmen Klicken Sie auf New um einen Zeitrau...

Страница 29: ...iert sein gibt die Software bei erkannter Bewegung oder Ver nderung im Sichtfeld einen Warnton aus Send mail when motion is triggered Sollte diese Funktion aktiviert sein sended die Software bei erkan...

Страница 30: ...tes f hren 5 Kontakt und Supportinformationen Bei defekten Produkten Bitte wenden Sie sich bei Produktreklamationen an Ihren H ndler oder an die Hama Produktberatung Internet World Wide Web Produktun...

Страница 31: ...nformation 2 5 2 Establishing a connection 2 6 Audio Video 2 7 E mail and FTP 2 7 1 E mail settings 2 7 2 FTP settings 2 8 Motion detection 2 9 System settings 2 9 1 Camera information 2 9 2 Date and...

Страница 32: ...enna connection 2 LAN LED 3 WLAN LED 4 Power LED 5 Focus ring 6 Reset button 7 Connection for power supply unit 8 RJ 45 network port 9 Audio output 10 Internal microphone 11 Tripod mount 1 3 LEDs LAN...

Страница 33: ...he tripod using the tripod mount 9 on the back of the camera Attach the provided WLAN antenna to the SMA antenna connection 1 Then attach the 230 V power supply unit to a mains socket and to the camer...

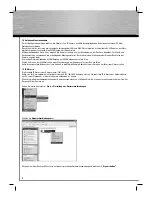
Страница 34: ...iguration 2 1 Logging in After you have correctly connected the IP camera with the PC and set the IP address you can use Internet Explorer to configure or use the camera Alternatively you can configur...

Страница 35: ...from the internet camera in the black section of the following image If the system displays error messages or if you cannot see any image after installation we recommend that you install the latest v...

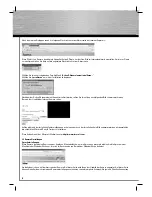
Страница 36: ...d Save a video to the folder displayed in the white field on the PC Click on Start recording to begin recording 2 3 Panning tilting zooming 2 3 1 General information The camera possesses functions for...

Страница 37: ...Further information is available in point 2 3 2 Tour with user defined sequence The system can also run a pre set camera tour Further information is available in point 2 3 3 Tour with pre selected se...

Страница 38: ...number corresponding to the position Confirm your settings by clicking Save You can then close this window If you want to delete a position from the list simply click Remove to the right of the posit...

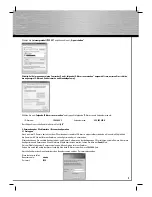
Страница 39: ...the port from 80 enter the port after the IP address of the IP camera so you can open the web interface using Internet Explorer Example Port 90 IP address 192 168 2 3 Address in address bar http 192...

Страница 40: ...the Network Tasks menu contains Hide icons for networked UPnP devices or Show icons for networked UPnP devices If it contains Hide icons for networked UPnP devices your PC has already been configured...

Страница 41: ...mple IP address 192 168 2 3 Image name test jpg Entry in address bar http 192 168 2 3 test jpg 2 5 Wireless LAN settings 2 5 1 General information If you want to use the camera in wireless LAN mode th...

Страница 42: ...K Encryption The encryption to be used is displayed here When you select a WLAN router or Access Point from the list of available networks the system automatically displays the encryption used by the...

Страница 43: ...ing Apply The system then changes the colour of the circle in the Connect field of the network that the camera is now connected to Red No connection incorrect key Pink Connection established but camer...

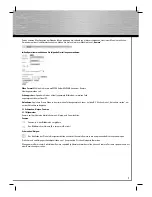
Страница 44: ...t how often in seconds the camera image is to be refreshed MJPEG Video resolution Choose between SXGA 1280x1024 VGA 640x480 or QVGA 320x240 Video quality Choose the image quality from one of five leve...

Страница 45: ...e mail account that is to be used to send the e mail Password Enter the password for this account Confirm your settings by clicking Apply After the system applies your settings you can send a test e...

Страница 46: ...ent by e mail to a preset address item 2 7 1 Select Yes to activate this function E mail subject Here you can enter a special subject for the e mail that is sent when motion is detected Upload video t...

Страница 47: ...ou e g firmware update or camera restart Update firmware If an updated firmware is available for downloading on www hama de you can use this tool to update the camera Click on Browse and select the fi...

Страница 48: ...e settings Click Active to activate a user account User name Enter a user name for this account Password Enter a password for this account Password confirmation As a precaution your new password must...

Страница 49: ...3 Camera viewer 3 1 Installation Insert the accompanying software driver CD in the CD ROM drive of your PC The installation menu starts automatically Select the required language Click Viewer to start...

Страница 50: ...k Next to begin installing Select where you want to save the program and click Next to continue Click Install to start the installation Click Finish to complete the installation process The installati...

Страница 51: ...eras can be displayed in this area You can also select other viewing options e g 4 live images 1 large live image 3 small live images etc 1 End software 2 Minimise software 3 Status monitor 4 Play rec...

Страница 52: ...the normal 5 Zoom in size of camera image is increased 6 Control of camera s panning and tilting functions 3 3 Establishing a connection Proceed as follows to integrate the camera with the viewer sof...

Страница 53: ...ia the control button 3 5 Advanced camera settings 3 5 1 General overview Click the icon for configuring the camera and then select General Options to access the general settings You can change the fo...

Страница 54: ...ount sending the mail SMTP Server Enter the address of the SMTP server that you use to send the e mail If you do not know the address of the SMTP server you can find it out from your e mail provider S...

Страница 55: ...ecording 3 6 1 Snapshot Click the following icon to take a snapshot of the live image displayed by the camera The jpeg image is saved in the default storage folder 3 6 2 Instant recording Click the fo...

Страница 56: ...n displays this time period in the One Time Schedules field You can alter this period by clicking Edit or remove it by clicking Delete Weekly Schedules Click New to add a time period Select the day of...

Страница 57: ...n Invoke alarm when motion is triggered When this function is activated the system sounds a warning when it detects a movement or change within the field of vision Send mail when motion is triggered W...

Страница 58: ...amage to the product 5 Support and Contact Information If products are defective Please contact your dealer or Hama Product Consulting if you have any product claims Internet World Wide Web Product su...

Страница 59: ...2 6 Audio vid o 2 7 E mail FTP 2 7 1 R glages e mail 2 7 2 R glages FTP 2 8 D tection de mouvements 2 9 R glages du syst me 2 9 1 Informations sur la cam ra 2 9 2 R glages de la date et de l heure 2...

Страница 60: ...2 DEL Lan 3 DEL WLAN 4 DEL Power 5 Bague focus 6 Bouton Reset 7 Prise pour le bloc secteur 8 Prise de r seau RJ 45 9 Sortie audio 10 Microphone interne 11 Filetage de pied 1 3 DEL DEL LAN Eteinte C b...

Страница 61: ...Branchez pr sent le bloc secteur 230V dans une prise de courant et la prise de la cam ra 6 Si la photo indiqu e n est pas nette vous avez la possibilit de r gler la nettet de l image en tournant la ba...

Страница 62: ...erface Web Configuration du butineur 2 1 Entr e en connexion Une fois la cam ra IP correctement reli e au PC et l adresse IP r gl e vous avez pr sent la possibilit de configurer ou d utiliser la cam r...

Страница 63: ...a zone noire de l image suivante Si des messages d erreurs apparaissent pendant l installation ou si aucune image n appara t apr s l installation il est recommand d installer les pilotes Microsoft Dir...

Страница 64: ...isque dur dans le dossier apparaissant dans un champ blanc Cliquez sur D marrer l enregistrement afin de lancer l enregistrement 2 3 Pivoter incliner zoomer 2 3 1 G n ralit s La cam ra dispose des fon...

Страница 65: ...es positions propres Vous avez galement la possibilit de d marrer un Tour selon l chantillon suivant Vous trouvez davantage de d tails dans le Point 2 3 3 Tour selon l chantillon affect Vous pouvez ac...

Страница 66: ...ndante Sauvegardez vos r glages ensuite en cliquant une fois sur Enregister Une fois les r glages enregistr s vous pouvez fermer cette fen tre Si vous souhaitez supprimer une position de la liste cliq...

Страница 67: ...t correspondant derri re l adresse IP de la cam ra IP afin de pouvoir ouvrir l interface Web avec Internet Explorer Exemple Port 90 Adresse IP 192 168 2 3 dresse dans la ligne d adresse http 192 168 2...

Страница 68: ...seau si le point Effacer les symboles pour les appareils de r seau UpnP ou Afficher l cran les symboles pour les appareils de r seau UPnP y figure Si Effacer les symboles pour les appareils de r seau...

Страница 69: ...e IP 192 168 2 3 Nom de l image test jpg Entr e dans la ligne d adresse http 192 168 2 3 test jpg 2 5 R glages Lan sans fil 2 5 1 G n ralit s Si vous souhaitez utiliser la cam ra dans le mode Lan sans...

Страница 70: ...SK Cryptage C est ici qu il faut rentrer le code utiliser D s que vous s lectionnez un routeur Lan sans fil ou un Point d acc s de la liste des r seaux disponibles le codage utillis du Lan sans fil ch...

Страница 71: ...uite la couleur du cercle dans le champ Connecter du r seau avec lequel la cam ra est reli e change Rouge Pas de connexion mauvais code Rose Connexion effectu e mais la cam ra est encore reli e avec u...

Страница 72: ...lectionnez ici la fr quence de r p tition de l actualisation de l image en une seconde MJPEG R solution vid o S lectionnez SXGA 1280x1024 VGA 640x480 ou QVGA 320x240 Qualit vid o S lectionnez la qual...

Страница 73: ...e passe Introduisez le mot de passe correspondant Enregistrez vos r glages en cliquant sur Accepter Une fois les r glages accomplis vous pouvez pr sent envoyer un test e mail l adresse e mail indiqu e...

Страница 74: ...possible d envoyer cette vid o par e mail l adresse param tr e point 2 7 1 S lectionnez Oui si vous d sirez activer cette fonction Objet de l e mail Vous pouvez ici d finir un objet sp cifique pour l...

Страница 75: ...iciel ou le nouveau d marrage de la cam ra sont votre disposition Mise jour du microprogramme Vous pouvez mettre jour le microprogramme de la cam ra en t l chargeant la mise jour ventuellement disponi...

Страница 76: ...Actif Nom d utilisateur S lectionnez un nom d utilisateur pour ce compte Mot de passe Choisissez un mot de passe correspondant au nom d utilisateur Confirmer le mot de passe Afin d viter des erreurs...

Страница 77: ...urveillance 3 1 Installation Ins rez le CD logiciel fourni dans le lecteur CD Rom de votre PC Le menu d installation d marre une fois le CD install S lectionnez pr sent la langue correspondante D marr...

Страница 78: ...installation commence Choisissez l emplacement de m moire pour le programme et poursuivez en cliquant sur Suivant Cliquez sur Installer pour d buter l installation Cliquez sur Finir pour achever l ins...

Страница 79: ...alis es en m me temps De plus il est possible de choisir d autres vues diff rentes par ex 4 images Live 1 grande image Live 3 petits images Live 1 Arr ter le logiciel 2 Minimiser le logiciel 3 Ecran d...

Страница 80: ...a cam ra 6 Commande pour la fonction de pivotement et d inclinaison de la cam ra 3 3 Etablissement de la liaison Afin d int grer une cam ra dans le logiciel Viewer proc dez comme suit Cliquez sur le s...

Страница 81: ...ge de commande 3 5 Autres r glages de la cam ra 3 5 1 G n ralit s Vous acc derez aux r glages g n raux en cliquant sur le symbole de la configuration de la cam ra et en s lectionnant Options g n rales...

Страница 82: ...t tre envoy Serveur SMTP Tapez ici l adresse du serveur SMTP l aide de laquelle le courriel doit tre envoy Si vous ne connaissez pas l adresse du serveur SMTP vous pourrez vous la procurer aupr s de v...

Страница 83: ...ouvez faire une photo instantan e de l image Live de la cam ra en cliquant sur le symbole suivant dans le logiciel L image JPEG m moris e est class e dans le r pertoire de m moire standard 3 6 2 Enreg...

Страница 84: ...cliquant sur Edit En cliquant une fois sur Delete vous effacez l espace de temps correspondant Enregistrements r p tition Cliquez sur New pour introduire un espace de temps Vous pouvez pr sent s lect...

Страница 85: ...cette fonction est activ e le logiciel envoie un signal acoustique lors d un mouvement ou un changement d tect dans le champ de vision Send mail when motion is triggered Si cette fonction est activ e...

Страница 86: ...Support technique et contact En cas d appareil d fectueux En cas de r clamation concernant le produit veuillez vous adresser votre revendeur ou au d partement conseil produits de Hama Internet World...

Страница 87: ...ilas usados contribuye Usted de forma importante a la protecci n de nuestro medio ambiente o Notitie aangaande de bescherming van het milieu Ten gevolge van de invoering van de Europese Richtlijn 2002...

Страница 88: ...st sujeito a estes regulamentos Reciclando reutilizando os materiais dos seus velhos aparelhos baterias esta a fazer uma enorme contribui o para a protec o do ambiente u 2002 96 EU 2006 66 EU t evre k...

Отзывы: