background image

17

F

 Mode d‘emploi

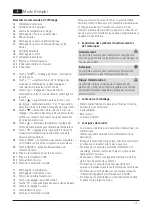
Éléments de commande et d'affichage

A1  Température extérieure

A2  Humidité de l'air extérieur

A3  Alarme de température et de gel

A4  Affichage de l’heure et du calendrier

A5  Phases lunaires

A6  Affichage de la pression atmosphérique 

A7   Affichage de la pression atmosphérique sur 24 

heures

A8  Humidité ambiante

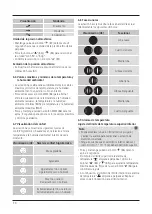
A9  Affichage de confort 

A10  Température ambiante

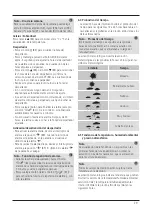
A11  Prévisions météorologiques

A12  Icône radio (station de mesure)

A13  Icône radio

B1   Touche  “ /  ” = éclairage de l’écran, interruption 

de la sonnerie

B2   Touche  “ ” = commutation entre l’affichage des 

secondes et l’affichage de la date / réglages / 

confirmation de la valeur sélectionnée

B3   Touche  “ ” = réglage de l'heure de réveil / 

commutation entre l’heure de réveil et l’affichage de 

la date

B4   Touche  “ ” = augmentation de la valeur en cours 

de réglage / commutation entre °C et °F / activation/

désactivation de la réception manuelle du signal radio

B5   Touche  “ ” = diminution de la valeur en cours de 

réglage / consultation des valeurs des capteurs radio 

extérieurs / recherche manuelle du signal provenant 

de la station de mesure

B6   Touche  “ ”- = alarme de température / réglage des 

limites de température pour l’alarme de température

B7   Touche  “ ” = réglage de la luminosité de l’écran (5 

niveaux) / modification de l’unité de mesure de la 

pression atmosphérique

B8   Touche “MEM” = consultation des valeurs maximales 

ou minimales en mémoire / suppression des valeurs

B9   Touche ON/OFF = activation/désactivation de 

l’alarme de réveil 

B10  Prise de raccordement pour le bloc secteur

B11  Prise de raccordement USB

B12  Compartiment à piles

B13  Fente pour installation murale

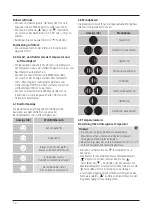
C1  Affichage de la température

C2  Affichage de l'humidité de l’air

C3  Témoin de contrôle transmission 

C4  Touche de réglage Celsius/Fahrenheit 

C5  Touche “TX” = connexion manuelle avec la station de base

C6  Touche de réglage du canal

C7  Compartiment à piles

C8  Fente pour installation murale

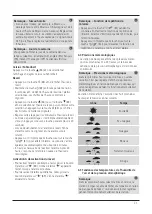
Nous vous remercions d’avoir choisi un produit Hama.

Veuillez prendre le temps de lire l‘ensemble des remarques 

et consignes suivantes. Veuillez conserver ce mode 

d‘emploi à portée de main afin de pouvoir le consulter en 

cas de besoin. Transmettez-le au nouveau propriétaire avec 

l’appareil le cas échéant.

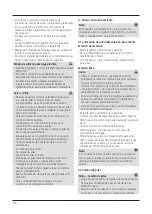
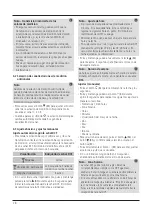
1.   Explication des symboles d‘avertissement et  

des remarques

Avertissement

Ce symbole est utilisé pour indiquer des consignes de 

sécurité ou pour attirer votre attention sur des dangers et 

risques particuliers.

Remarque

Ce symbole est utilisé pour indiquer des informations 

supplémentaires ou des remarques importantes.

Risque d’électrocution

Ce symbole indique un risque de contact avec des 

parties non isolées du produit susceptibles de conduire 

un courant électrique capable de provoquer un risque 

d‘électrocution.

2.  Contenu de l‘emballage


Station météo (station de base pour l'intérieur / station 

de mesure pour l'extérieur)


2 piles LR6/AA


Bloc secteur


• Ce mode d’emploi

3.  Consignes de sécurité


 Ce produit est destiné à une installation domestique non 

commerciale.


 Utilisez le produit exclusivement conformément à sa 

destination.


 Protégez le produit de toute saleté, humidité, surchauffe 

et utilisez-le uniquement dans des locaux secs.


 N’utilisez pas le produit à proximité immédiate d‘un 

chauffage, d’autres sources de chaleur ou exposé aux 

rayons directs du soleil.


 Cet appareil, comme tout appareil électrique, doit être 

gardé hors de portée des enfants !


 N‘utilisez pas le produit en dehors des limites de 

puissance indiquées dans les caractéristiques techniques.


 N‘utilisez pas le produit dans les zones dans lesquelles 

l‘utilisation d‘appareils électroniques est interdite.


 N‘utilisez pas le produit dans un environnement humide 

et évitez toute projection d‘eau.

Содержание Premium 00186380

Страница 1: ...nungsanleitung Mode d emploi Instrucciones de uso Istruzioni per l uso Gebruiksaanwijzing Instrukcja obs ugi Haszn lati tmutat N vod k pou it N vod na pou itie Manual de instru es Manual de utilizare...

Страница 2: ...A1 C1 C8 C4 C6 C7 C5 C2 C3 B2 B3 B4 B5 B6 B7 B8 B9 B1 B10 B11 B12 B13 A12 A13 A2 A3 A4 A5 A6 A7 A8 A10 A11 A9...

Страница 3: ...ctions in a safe place for future reference If you sell the device please pass these operating instructions on to the new owner 1 Explanation of Warning Symbols and Notes Warning This symbol is used t...

Страница 4: ...y compartment C7 and remove the contact breaker Then close the battery compartment cover Base station Warning Connect the product only to a socket that has been approved for the device The socket must...

Страница 5: ...station Use the base to position the base station on a level surface Alternatively you can install the base station on a wall using the opening B13 on the back 5 2 Measuring station You can also posi...

Страница 6: ...tween 1 00 a m and 5 00 a m If the signal is received successfully the manually set time and date are overwritten Press and hold the button B4 again for approx 3 seconds to stop the manual search Note...

Страница 7: ...except the button B1 to stop the snooze function and the alarm 6 4 Weather forecast Based on changes in the atmospheric pressure and the data saved the base station is able to make weather forecasts...

Страница 8: ...upper lower temperature limit Note You can define a lower and an upper limit value and activate an alarm for each channel and or connected measuring station Note that the lower limit value must be at...

Страница 9: ...and do not use aggressive cleaning agents Make sure that water does not get into the product Note Disconnect the device from the power supply before cleaning it or if it is not going to be used for a...

Страница 10: ...ich Zeit und lesen Sie die folgenden Anweisungen und Hinweise zun chst ganz durch Bewahren Sie diese Bedienungsanleitung anschlie end an einem sicheren Ort auf um bei Bedarf darin nachschlagen zu k nn...

Страница 11: ...gen verschlucken oder in die Umwelt gelangen lassen Sie k nnen giftige und umweltsch dliche Schwermetalle enthalten Entfernen und entsorgen Sie verbrauchte Batterien unverz glich aus dem Produkt Verme...

Страница 12: ...e k nnen das Produkt besch digen Pr fen Sie vor Montage die Eignung der vorgesehenen Wand f r das anzubringende Gewicht und vergewissern Sie sich dass sich an der Montagestelle in der Wand keine elekt...

Страница 13: ...alls dieser fehlschl gt wird die Suche beendet und zur n chsten vollen Stunde wiederholt Das Funksymbol A13 erlischt Sie k nnen w hrenddessen eine manuelle Einstellung von Uhrzeit und Datum vornehmen...

Страница 14: ...igt Um den t glichen Alarm zu deaktivieren schieben Sie den Alarm Schalter auf die Position B9 Das Alarmsymbol auf dem Display erlischt Hinweis Schlummerfunktion Dr cken Sie w hrend des Wecksignals di...

Страница 15: ...aktueller Raumtemperatur und luftfeuchtigkeit an Anzeige A9 Wohlf hlbereich Sehr angenehm Angenehm Etwas zu k hl oder warm Etwas zu trocken oder feucht Zu kalt oder warm Deutlich zu trocken oder feuch...

Страница 16: ...hreitet Beachten Sie die Hinweise in der Bedienungsanleitung Ihres Endger tes Hinweis Die Ladefunktion ist nur w hrend des Netzteilbetriebs m glich Verbinden Sie Ihr Endger t mithilfe eines passenden...

Страница 17: ...tur Luftfeuchtigkeit 0 1 C 0 2 F 1 0 1 C 1 Farbdisplay Ja Nein DCF Funkuhr Ja Nein Hygrometer Ja Ja Thermometer Ja Ja Barometer 600 hPa mb 1100 hPa mb 17 72 inHg 32 50 inHg Nein Weckfunktion Ja Nein M...

Страница 18: ...Celsius Fahrenheit C5 Touche TX connexion manuelle avec la station de base C6 Touche de r glage du canal C7 Compartiment piles C8 Fente pour installation murale Nous vous remercions d avoir choisi un...

Страница 19: ...e que des petits enfants ne les avalent pas Les piles sont susceptibles de contenir des m taux lourds toxiques et nocifs pour l environnement Retirez les piles usag es imm diatement du produit pour le...

Страница 20: ...illez contr ler que l emballage ne contienne aucune pi ce erron e ou endommag e N appliquez en aucun cas une force excessive lors de l installation Le produit pourrait en tre endommag Avertissement Av...

Страница 21: ...Aucun affichage Recherche inactive En cas de nouvel chec de r ception du signal maintenez la touche B4 enfonc e pendant env 3 secondes afin de lancer une recherche manuelle du signal DCF L ic ne radio...

Страница 22: ...t pas n cessaire de r activer l alarme Apr s 24 heures la sonnerie retentira nouveau l heure de r veil r gl e Activation d sactivation du r veil Pour activer l alarme quotidienne faites glisser le bou...

Страница 23: ...e l affichage de la temp rature et de l humidit de l air actuelles l affichage de la temp rature et de l humidit de l air minimales MIN ou maximales MAX Appuyez sur la touche MEM B8 et maintenez la en...

Страница 24: ...11 Fonction de charge Avertissement Connexion d appareils Avant de raccorder un appareil veuillez contr ler que le d bit de courant du chargeur est suffisant pour ce type d appareil Assurez vous que l...

Страница 25: ...re Temp rature Humidit de l air 0 1 C 0 2 F 1 0 1 C 1 cran couleurs oui non Horloge radio pilot e DCF oui non Hygrom tre oui oui Thermom tre oui oui Barom tre 600 hPa mb 1100 hPa mb 17 72 inHg 32 50 i...

Страница 26: ...n C4 Bot n de ajuste Celsius Fahrenheit C5 Bot n TX conexi n manual a la estaci n base C6 Bot n de ajuste de canal C7 Compartimento para pilas C8 Abertura para el montaje en pared Le agradecemos que...

Страница 27: ...xicos y da inos para el medioambiente Retire y deseche de inmediato las pilas gastadas del producto Evite el almacenamiento la carga y el uso en condiciones de temperatura extrema 4 Puesta en funcion...

Страница 28: ...adecuado en un comercio especializado para el montaje en la pared prevista Compruebe que no haya piezas deterioradas o defectuosas No ejerza nunca fuerza durante el montaje El producto podr a verse d...

Страница 29: ...pulsada la tecla B4 durante aprox 3 segundos para iniciar la b squeda manual de la se al DCF El s mbolo de radiofrecuencia A13 comienza a parpadear Nota Ajuste de hora El proceso de b squeda dura apro...

Страница 30: ...activar la alarma diaria deslice el interruptor de alarma a la posici n B9 El s mbolo de alarma de la pantalla se apaga Nota Funci n de repetici n de alarma Durante la se al del despertador pulse el b...

Страница 31: ...ndose en la relaci n entre la temperatura y la humedad ambiental interior de cada momento Visualizaci n A9 Nivel de confort higrot rmico Muy agradable Agradable Ligeramente fr o o c lido Ligeramente s...

Страница 32: ...no supere los 5 W Observe las indicaciones de las instrucciones de uso de su terminal Nota La funci n de carga solo es posible cuando funciona conectado a la fuente de alimentaci n Conecte el terminal...

Страница 33: ...Temperatura Humedad 0 1 C 0 2 F 1 0 1 C 1 Pantalla a color S No Radiorreloj DCF S No Higr metro S S Term metro S S Bar metro 600 hPa mb 1100 hPa mb 17 72 inHg 32 50 inHg No Funci n de despertador S No...

Страница 34: ...33 R A1 A2 A3 A4 A5 A6 A7 24 A8 A9 A10 A11 A12 A13 B1 B2 B3 B4 C F B5 B6 B7 5 B8 MEM B9 B10 B11 USB B12 B13 C1 C2 C3 C4 C5 C6 C7 C8 Hama 1 2 2 3...

Страница 35: ...34 4 4 1 C7 10 B12 4 2...

Страница 36: ...35 2 AA 2 C7 2 AA 2 B12 5 6 50 5 1 B13 5 2 C8 B13 C8 6 B4 B5 6 1 3 A12 A1 A2 A8 A10 3 B5 DCF WLAN...

Страница 37: ...36 6 2 3 B5 1 2 3 5 6 3 DCF DCF A13 DCF 3 B4 DCF A13 7 A13 DCF 01 00 05 00 3 B4 DTS B2 3 B2 12 24 B4 B5 B2 B2 20 DCF 3 3 DCF 3 GE EN FR IT SP DU DA B4 C F...

Страница 38: ...37 B3 3 B3 B4 B5 B3 20 B1 2 24 B9 B9 B1 5 B1 6 4 12 24 8 6 5 A1 A2 A10 A8 A6 B7 3 B4 B5 B7...

Страница 39: ...38 24 A7 6 6 MEM B8 MIN MAX MEM B8 3 6 7 A9 6 8 A5 A5 6 9 1 C 1 F B6 2 B4 B5 B6...

Страница 40: ...39 B6 3 ALERTS 3 B6 6 10 1 C 3 C 3 6 11 5 USB USB 11 USB 6 12 B1 15 7 8 Hama GmbH Co KG...

Страница 41: ...4 5 150 3 0 2 0 C 32 F AAA C 0 C 50 C 32 F 122 F 20 95 20 C 60 C 20 95 0 1 C 0 2 F 1 0 1 C 1 600 hPa mb 1100 hPa mb 17 72 inHg 32 50 inHg 3 60 m 10 Hama GmbH Co KG 00186380 2014 53 www hama com 001863...

Страница 42: ...asto impostazione canale C7 Vano batterie C8 Foro per montaggio a parete Grazie per avere acquistato un prodotto Hama Prima della messa in esercizio leggete attentamente le seguenti istruzioni e avver...

Страница 43: ...mbini Non aprire danneggiare ingerire o disperdere mai nell ambiente le batterie Possono contenere metalli pesanti dannosi e tossici Rimuovere e smaltire immediatamente le batterie scariche Evitare di...

Страница 44: ...e sia idonea per il peso da montare e accertarsi che nel punto della parete dove si desidera appendere l apparecchio non vi siano cavi elettrici n tubazioni di acqua gas o altro Attenzione Non montare...

Страница 45: ...pegne In questo lasso di tempo si pu effettuare un impostazione manuale di ora e data L orologio continua a cercare automaticamente ogni giorno tra l 1 00 e le 5 00 il segnale DCF Se il tentativo di r...

Страница 46: ...ne disattivata per 5 minuti quindi suona nuovamente Premere un tasto qualsiasi eccetto il tasto B1 per terminare la funzione di snooze quindi bloccare la sveglia 6 4 Previsioni del tempo Sulla base de...

Страница 47: ...atura Impostazione valore limite massimo e minimo temperatura Avvertenza possibile stabilire per ogni canale o stazione di misurazione collegata un valore limite inferiore o superiore e attivare l all...

Страница 48: ...a inumidito e non ricorrere a detergenti aggressivi Fare attenzione a non fare penetrare acqua nel prodotto Avvertenza Prima della pulizia e in un caso di lungo inutilizzo scollegare il dispositivo da...

Страница 49: ...ank dat u voor een product van Hama heeft gekozen Neem de tijd om de volgende aanwijzingen en instructies volledig door te lezen Berg deze gebruiksaanwijzing vervolgens op een goede plek op zodat u he...

Страница 50: ...t laten komen Zij kunnen giftige en zware metalen bevatten die schadelijk zijn voor het milieu Lege batterijen direct uit het product verwijderen en afvoeren Opbergen opladen en gebruik bij extreme te...

Страница 51: ...ialist aan voor de montage aan de daartoe bestemde wand Vergewis u ervan dat er geen defecte of beschadigde onderdelen worden gemonteerd Tijdens de montage nooit geweld of grote kracht gebruiken Dit k...

Страница 52: ...econden ingedrukt teneinde het handmatig zoeken naar het DCF signaal te starten Het zendsymbool 8 begint te knipperen Aanwijzing Instellen van de tijd Het zoeken duurt ca 7 minuten Indien dit mislukt...

Страница 53: ...symbool op de display weergegeven Om het dagelijkse alarm te deactiveren zet u de alarmschakelaar op de positie B9 Het alarmsymbool op de display gaat uit Aanwijzing Snooze functie Druk tijdens het we...

Страница 54: ...tvochtigheid binnen Weergave A9 Comfortzone Zeer aangenaam Aangenaam Iets te koud of te warm Iets te droog of te vochtig Te koud of te warm Duidelijk te droog of te vochtig Veel te koud of warm Veel t...

Страница 55: ...cties van uw eindapparaat in acht Aanwijzing De oplaadfunctie is alleen mogelijk als het apparaat op de voedingsadapter is aangesloten Sluit uw eindapparaat met behulp van een geschikte USB kabel op d...

Страница 56: ...stappen Temperatuur Luchtvochtigheid 0 1 C 0 2 F 1 0 1 C 1 Kleurendisplay Ja Nee Radiografisch bestuurde DCF klok Ja Nee Hygrometer Ja Ja Thermometer Ja Ja Barometer 600 hPa mb 1100 hPa mb 17 72 inHg...

Страница 57: ...56 J A1 A2 A3 A4 A5 A6 A7 24 A8 A9 A10 A11 A12 A13 B1 B2 B3 B4 C F B5 B6 B7 5 B8 MEM B9 ON OFF B10 B11 USB B12 B13 C1 C2 C3 C4 C5 TX C6 C7 C8 Hama 1 2 2 AA 3...

Страница 58: ...57 4 4 1 C7 B10 B12 AA 4 2...

Страница 59: ...58 2 2 AA 2 C7 2 AA 2 B12 5 6 50 m 1 25 m 4 5 1 B13 5 2 C8 B13 C8 6 B4 B5 6 1 3 A12 A1 A2 A8 A10 B5 3...

Страница 60: ...59 WLAN 6 2 B5 1 2 3 5 6 3 DCF DCF A13 DCF B4 3 DCF A13 Hinweis 7 A13 01 00 05 00 DCF B4 3 DTS B2 B2 3 12 24 B4 B5 B2 2 20...

Страница 61: ...60 DCF CET 3 3 3 DCF GE EN FR IT SP DU DA C F B4 B3 B3 3 B4 B5 B3 20 B1 2 24 B9 B9 B1 5 T B1 6 4 12 24 8 6 5...

Страница 62: ...61 A1 A2 A10 A8 A6 B7 3 B4 B5 mb hPa inHg B7 24 A7 6 6 MEM B8 MIN MAX MEM B8 3 6 7 A9 6 8 A5 A5...

Страница 63: ...62 6 9 1 C 1 F B6 2 B4 B5 B6 B6 A3 ALERTS A3 B6 6 10 1 C 3 C A3 6 11 5 W USB B11 USB USB 6 12 B1 15 7...

Страница 64: ...50 Hz 4 5 V 150 mA 3 0 V 2 x AAA 0 C 32 F AAA C 0 C 50 C 32 F 122 F 20 95 20 C 60 C 20 95 0 1 C 0 2 F 1 0 1 C 1 DCF 600 hPa mb 1100 hPa mb 17 72 inHg 32 50 inHg 3 60 m 10 Hama GmbH Co KG 00186380 201...

Страница 65: ...Przycisk TX r czne nawi zywanie po czenia ze stacj bazow C6 Przycisk ustawiania kana u C7 Schowek na baterie C8 Otw r do mocowania na cianie Dzi kujemy za zakup naszego produktu Przed pierwszym u ycie...

Страница 66: ...w o y najpierw baterie do stacji pomiarowej a nast pnie do stacji bazowej 4 1 Wk adanie baterii zasilanie elektryczne Stacja pomiarowa Usun foli ochronn na wy wietlaczu Otworzy schowek na baterie C7 i...

Страница 67: ...ne wodne gazowe b d inne przewody Nigdy nie montowa produktu w miejscach pod kt rymi mog przebywa ludzie 5 1 Stacja bazowa Za pomoc podp rki ustawi stacj bazow na r wnym pod o u Alternatywnie stacj ba...

Страница 68: ...t Zegar b dzie codziennie szuka automatycznie mi dzy godzin 01 00 i 05 00 sygna u DCF Po pomy lnym odbiorze sygna u r cznie ustawiona godzina i data s nadpisywane Ponownie nacisn i trzyma wci ni ty pr...

Страница 69: ...nie wyzwalany Aby zako czy funkcj drzemki i tym samym alarm nacisn dowolny przycisk z wyj tkiem przycisku B1 6 4 Prognoza pogody Na podstawie waha ci nienia atmosferycznego i zapisanych danych stacja...

Страница 70: ...ciep o troch za sucho lub za wilgotno Za zimno lub za ciep o wyra nie za sucho lub za wilgotno Zdecydowanie za zimno lub za gor co zdecydowanie za sucho lub za wilgotno 6 8 Fazy ksi yca Stacja bazowa...

Страница 71: ...zenia ko cowego sprawdzi czy b dzie ono dostatecznie zasilane pr dem wyj ciowym adowarki Zadba aby moc pod czonego urz dzenia ko cowego nie by a wy sza ni 5 W Uwzgl dni informacje w instrukcji obs ugi...

Страница 72: ...h zewn trznych baterii litowych typu AAA Zakres pomiarowy Temperatura C Wilgotno powietrza 0 C 50 C 32 F 122 F 20 95 20 C 60 C 20 95 Rozdzielczo pomiaru Temperatura Wilgotno powietrza 0 1 C 0 2 F 1 0...

Страница 73: ...falra szerel shez K sz nj k hogy ezt a Hama term ket v lasztotta K rj k hogy felszerel s el tt sz njon r id t s olvassa el v gig az al bbi tmutat t A k s bbiekben tartsa biztons gos helyen ezt a f ze...

Страница 74: ...le vagy juttassa a k rnyezetbe M rgez s k rnyezetre k ros neh zf meket tartalmazhatnak Halad ktalanul t vol tsa el a lemer lt elemeket a term kb l majd rtalmatlan tsa ket Ker lje a t rol st a t lt st...

Страница 75: ...szerel s hely n nem tal lhat ak a falban villamoss gi v z g z vagy egy b vezet kek Sohasem szerelje fel a term ket olyan helyen amely alatt szem lyek tart zkodhatnak 5 1 B zis llom s ll tsa a b zis l...

Страница 76: ...a k zzel be ll tott id pontot s d tumot Tartsa nyomva jra a gombot B4 kb 3 m sodpercig a k zi keres s befejez s hez Hivatkoz s Ny ri id sz m t s Az ra automatikusan t ll ny ri id sz m t sra Am g a ny...

Страница 77: ...undi funkci t Az breszt jel 5 percre megszakad majd ezut n ism t megsz lal Nyomjon meg egy tetsz leges gombot a gombot B1 kiv ve a szund t s funkci s ezzel a riaszt s befejez s hez 6 4 Id j r s el rej...

Страница 78: ...leg kiss t l sz raz vagy p r s t l hideg vagy meleg egy rtelm en t l sz raz vagy p r s t ls gosan hideg vagy meleg t ls gosan sz raz vagy p r s 6 8 Hold f zisai Az ra az al bbi szimb lumokkal mutatja...

Страница 79: ...hogy az a t lt k sz l k ltal leadott rammal elegend en t pl lhat e Bizonyosodjon meg r la hogy a csatlakoztatott v gberendez s teljes tm nye nem haladja meg a 5 W ot Vegye figyelembe a v gberendez se...

Страница 80: ...pus l tium elemeket M r si tartom ny H m rs klet C P ratartalom 0 C 50 C 32 F 122 F 20 95 20 C 60 C 20 95 M r si l p sk z k H m rs klet P ratartalom 0 1 C 0 2 F 1 0 1 C 1 Sz nes kijelz Igen Nem DCF r...

Страница 81: ...te tento text pro p padn budouc pou it Pokud v robek prod te p edejte tento text nov mu majiteli 1 Vysv tlen v stra n ch symbol a pokyn Upozorn n Tento symbol ozna uje bezpe nostn upozorn n kter pouka...

Страница 82: ...V robek provozujte pouze p ipojen ke schv len z suvce Z suvka se mus nach zet v bl zkosti v robku a mus b t snadno p stupn V robek odpojte od s t pomoc sp na e vyp na e Pokud tento nen k dispozici vy...

Страница 83: ...bezpe n a pevn namontovat na venkovn zdi pomoc otvoru C8 Upevn te hmo dinku roub h eb k apod v ur en zdi Zav ste na ni zakl dn m ic stanici za otvor k tomu ur en B13 C8 6 Provoz Pozn mka Zad n Pro ry...

Страница 84: ...en hodnoty stiskn te p mo tla tko B2 Pokud po dobu 20 sekund nedojde k dn mu zad n nastavovac re im se automaticky ukon Pozn mka asov p smo Sign l DCF m e b t p ij m n ve velk m rozsahu ale v dy odpov...

Страница 85: ...A2 vnit n teplotu vlhkost vzduchu A10 A8 a tlak vzduchu A6 tendenci jak se tyto hodnoty budou pravd podobn vyv jet v p t ch hodin ch Anzeige Tendenz Steigend Best ndig Fallend Jednotka tlaku vzduchu S...

Страница 86: ...n hranice teplotn ho rozsahu zazn v stra n sign l Rozblik se indikace ALERTS a zobrazen teploty A3 Pro ukon en v stra n ho sign lu stiskn te libovoln tla tko Pokud vzroste teplota nad hodnotu nastaven...

Страница 87: ...nick daje Z kladn stanice M ic stanice Nap jen 3 0 V 2 x baterie typu AA Nap jec zdroj In 230 240 V max 0 1 A 50 Hz Out 4 5 V max 150 mA 3 0 V 2 x baterie typu AAA P i venkovn ch teplot ch pod 0 C 32...

Страница 88: ...dlo na nastavenie kan lu C7 Priehradka na bat rie C8 Otvor na n stenn mont akujeme e ste sa rozhodli pre v robok Hama Pre tajte si v etky nasleduj ce pokyny a inform cie Uchovajte tento n vod na pou i...

Страница 89: ...ne 4 1 Vlo enie bat ri Nap janie Meracia stanica Odstr te ochrann f liu z displeja Otvorte bat riov priehradku C7 a odstr te preru ova kontaktov Zatvorte potom kryt bat riovej priehradky Z klad ov sta...

Страница 90: ...ebo in vedenie V robok nikdy nein talujte na miestach pod ktor mi by sa mohli nach dza osoby 5 1 Z kladn stanica Postavte z kladn stanicu pomocou stojana na rovn plochu Alternat vne m ete z kladn stan...

Страница 91: ...a stla te a na cca 3 sekundy podr te tla idlo B4 Pozn mka letn as Prestavenie na letn as prebieha automaticky Pokia je akt vny letn as zobrazuje sa na displeji DTS Manu lne nastavenia Na prepnutie med...

Страница 92: ...na 5 min t a potom sa znova aktivuje Na ukon enie funkcie odlo en ho budenia a t m aj alarmu stla te ubovo n tla idlo okrem tla idla B1 6 4 Predpove po asia Na z klade zmien atmosf rick ho tlaku a ulo...

Страница 93: ...teplo Pomerne sucho alebo vlhko Pr li chladno alebo teplo V razne sucho alebo vlhko Ve mi chladno alebo hor co Ve mi sucho alebo vlhko 6 8 F zy mesiaca Z kladn stanica zobrazuje aktu lnu f zu mesiaca...

Страница 94: ...oncov ho zariadenia neprekra uje 5 W Dodr iavajte pokyny uveden v n vode na pou vanie v ho koncov ho zariadenia Pozn mka Funkcia nab jania je mo n len pri nap jan zo siete Pripojte va e koncov zariade...

Страница 95: ...ky merania Teplota Vlhkos vzduchu 0 1 C 0 2 F 1 0 1 C 1 Farebn displej no Nie Hodiny riaden r diov m sign lom DCF no Nie Vlhkomer no no Teplomer no no Barometer 600 hPa mb 1100 hPa mb 17 72 inHg 32 50...

Страница 96: ...o das pilhas C8 Abertura para montagem na parede Agradecemos que se tenha decidido por este produto Hama Antes de utilizar o produto leia completamente estas indica es e informa es Guarde depois estas...

Страница 97: ...egar e utilizar a bateria sob temperaturas extremas 4 Coloca o em funcionamento Nota Tenha em aten o que para a coloca o em funcionamento deve colocar primeiro as pilhas na esta o de medi o e depois n...

Страница 98: ...que a adequa o da parede relativamente ao peso a aplicar e certifique se de que no local de montagem na parede n o existem cabos el tricos tubos de gua ou g s ou outras tubagens Aviso N o instale o pr...

Страница 99: ...aso este falhe a procura terminada e repetida na hora certa seguinte O s mbolo de r dio A13 apaga se Entretanto pode efetuar uma defini o manual da data e hora O rel gio continua a procurar automatica...

Страница 100: ...de alarme para a posi o B9 O ecr deixa de exibir o s mbolo de alarme Nota Fun o snooze Enquanto o sinal de despertar estiver a tocar prima o bot o B1 para ativar a fun o snooze O sinal de despertar i...

Страница 101: ...temperatura e humidade do ar ambiente atuais Indica o A9 N vel de conforto Muito agrad vel Agrad vel Um pouco frio ou quente um pouco seco ou h mido Muito frio ou quente muito seco ou h mido Demasiad...

Страница 102: ...as indica es apresentadas no manual de instru es do dispositivo Nota A fun o de carregamento s poss vel durante o funcionamento com fonte de alimenta o Com a ajuda de um cabo USB adequado ligue o seu...

Страница 103: ...ura Humidade do ar 0 1 C 0 2 F 1 0 1 C 1 Visor a cores Sim N o Rel gio DCF por radiofrequ ncia Sim N o Higr metro Sim Sim Term metro Sim Sim Bar metro 600 hPa mb 1100 hPa mb 17 72 inHg 32 50 inHg N o...

Страница 104: ...n caz de nevoie n caz de nstr inare a aparatului v rug m s preda i i acest manual noului proprietar 1 Explicarea simbolurilor de avertizare i indica ii Avertizare Se folose te la marcarea instruc iuni...

Страница 105: ...a n func iune Instruc iune Ave i ca grij ca la punerea n func iune s introduce i mai nt i bateriile n sta ia de m surare iar pe urm n sta ia de baz 4 1 Introducerea bateriilor alimentarea cu curent St...

Страница 106: ...uz de for Acestea pot produce deterior ri ale produsului nainte de montaj verifica i dac peretele prev zut este potrivit pentru greutatea respectiv i asigura i v ca la locul montajului s nu fie fire e...

Страница 107: ...aceasta e ueaz c utarea se ncheie i se repet la urm toarea or fix Simbolul semnalului radio A13 dispare ntre timp pute i efectua setarea manual a orei i datei Ceasul caut n continuare automat zilnic n...

Страница 108: ...ul de de teptare se ntrerupe pentru 5 minute i este redeclan at ulterior Pentru oprirea func iei de repetare a alarmei i astfel i alarma ap sa i orice tast cu excep ia tastei B1 6 4 Prognoza meteo Pe...

Страница 109: ...ld Pu in prea uscat sau umed Prea frig sau cald Clar prea uscat sau umed Mult prea frig sau foarte cald Mult prea uscat sau umed 6 8 Faze lun Sta ia de baz afi eaz faza zilnic a lunii A5 cu ajutorul u...

Страница 110: ...conectat s nu dep easc 5 W V rug m s respecta i indica iile din manualul de utilizare al aparatului final Instruc iune Func ia de nc rcare este posibil numai la func ionare cu element de re ea Cu ajut...

Страница 111: ...surare Temperatura Umiditatea aerului 0 1 C 0 2 F 1 0 1 C 1 Display color Da Nu Ceas radio DCF Da Nu Higrometru Da Da Termometru Da Da Barometru 600 hPa mb 1100 hPa mb 17 72 inHg 32 50 inHg Nu Func i...

Страница 112: ...s ker plats f r att kunna titta i den n r det beh vs Om du g r dig av med apparaten ska du l mna bruksanvisningen till den nya garen 1 F rklaring av varningssymboler och h nvisningar Varning Anv nds...

Страница 113: ...et C7 och ta bort kontaktsp rren St ng sedan locket till batterifacket Basstation Varning Anslut bara apparaten till ett godk nt uttag Eluttaget m ste sitta i n rheten av produkten och vara l tt att n...

Страница 114: ...n utomhusv gg C8 F st pluggar skruvar spikar och dylikt i den avsedda v ggen H ng sedan upp bas m tstationen i det f r ndam let avsedda urtaget B13 C8 6 Anv ndning H nvisning Inmatning H ll knappen B4...

Страница 115: ...en B2 f r att verta det visade inst llningsv rdet eller hoppa ver det Om ingen inmatning sker p 20 sekunder l mnar enheten automatiskt inst llningsl get H nvisning Tidszon DCF signalen kan tas emot p...

Страница 116: ...nsindikering p grund av databrist och indikeringen sparas f rst efter hand som enheten r i drift H nvisning Alla m tv rden omfattas av en viss m ttolerans V derstationen anger en tendens f r hur utomh...

Страница 117: ...t bekr fta inst llningen D refter b rjar symbolen f r temperaturlarmets nedre gr ns att blinka Upprepa inmatningsproceduren f r den nedre gr nsen Aktivering av temperaturlarm Tryck p knappen B6 f r at...

Страница 118: ...svar eller garanti f r skador som beror p ol mplig installation montering och ol mplig produktanv ndning eller p att bruksanvisningen och eller s kerhetsh nvisningarna inte f ljs 9 Tekniska data Basst...

Страница 119: ...ksen aukko Suurkiitos ett valitsit Hama tuotteen Varaa aikaa ja lue seuraavat ohjeet ensin kokonaan l pi S ilyt sen j lkeen t m k ytt ohje varmassa paikassa jotta voit tarvittaessa tarkistaa siit eri...

Страница 120: ...stot tuotteesta ja h vit ne viipym tt V lt s ilytyst lataamista ja k ytt rimm isiss l mp tiloissa 4 K ytt notto Ohje Huomaa ett k ytt noton yhteydess on ensin asetettava sis n mittausaseman paristot j...

Страница 121: ...van painon ja varmista ettei sein ss ole asennuskohdassa s hk johtoja tai vesi kaasu tai muita putkia l koskaan asenna tuotetta paikkaan jonka alapuolella voi oleskella ihmisi 5 1 Perusasema Pystyt pe...

Страница 122: ...staanotetaan n in saatu kellonaika korvaa manuaalisesti asetetun kellonajan ja p iv yksen Paina ja pid painiketta B4 uudelleen painettuna n kolmen sekunnin ajan manuaalisen haun lopettamiseksi Ohje Ke...

Страница 123: ...elleen Paina mit vain painiketta paitsi painiketta torkkutoiminnon ja siten h lytyksen lopettamiseksi 6 4 S ennuste Anhand von atmosph rischen Luftdruckver nderungen und der gespeicherten Daten kann d...

Страница 124: ...liian kuiva tai kostea Liian kylm tai l mmin selke sti liian kuiva tai kostea Aivan liian kylm tai kuuma aivan liian kuiva tai kostea 6 8 Kuun vaiheet Perusasema n ytt sen hetkisen kuun vaiheen A5 seu...

Страница 125: ...t kun haluat keskeytt lataamisen ja tai kun p telaite on ladattu t yteen 6 12 Taustavalaistus Kun painiketta painetaan n ytt valaistaan Paristok yt ss n ytt valaistaan n 15 sekunnin ajaksi Ohje jatkuv...

Страница 126: ...olaitetyyppi 00186380 on direktiivin 2014 53 EU mukainen EU vaatimustenmukaisuusvakuutuksen t ysimittainen teksti on saatavilla seuraavassa internetosoitteessa www hama com 00186380 Downloads Radiotaa...

Страница 127: ...126 B A1 A2 A3 A4 A5 A6 A7 24 A8 A9 A10 A11 A12 A13 B1 B2 B3 B4 C F B5 B6 B7 5 B8 MEM B9 ON OFF B10 B11 USB B12 B13 C1 C2 C3 C4 C5 TX C6 C7 C8 Hama 1 2 2 AA 3...

Страница 128: ...127 AC 4 4 1 C7 10 12 AAA 4 2...

Страница 129: ...128 AA 2 7 AA AA 2 12 AA 5 6 50 1 25 4 5 1 B13 5 2 C8 B13 C8 6 B4 B5 6 1 3 12 A1 A2 A8 A10 B5 3...

Страница 130: ...129 Wi Fi 6 2 5 1 2 3 5 6 3 DCF DCF A13 DCF B4 3 DCF A13 7 A13 01 00 05 00 DCF B4 3 DTS B2 2 3 12 24 4 5 2 2 20 DCF 3 3 DCF 3...

Страница 131: ...130 GE EN FR IT SP DU DA B4 C F 3 3 3 4 5 3 20 1 2 24 Alarm B9 Alarm B9 1 5 1 6 4 12 24 8 6 5 A1 A2 A10 A8 A6...

Страница 132: ...131 B7 3 B4 B5 mb hPa inHg B7 24 A7 6 6 MEM 8 24 MIN MAX MEM 8 3 6 7 A9 6 8 5 A5 6 9 1 C 1 F 2 6 B4 B5 B6...

Страница 133: ...132 B6 A3 ALERTS A3 B6 6 10 1 C 3 C A3 6 11 5 W USB USB 11 USB 6 12 1 15 7 8...

Страница 134: ...5 V 150 mA 3 0 V 2 AAA 0 C 32 F AAA C 0 C 50 C 32 F 122 F 20 95 20 C 60 C 20 95 0 1 C 0 2 F 1 0 1 C 1 DCF 600 hPa mb 1100 hPa mb 17 72 inHg 32 50 inHg 3 60 m 10 Hama GmbH Co KG 00186380 2014 53 www ha...

Страница 135: ...ding companies Errors and omissions excepted and subject to technical changes Our general terms of delivery and payment are applied www hama com nep Service Support www hama com 49 9091 502 115 DG 001...

Отзывы: