7.
TROUBLESHOOTING
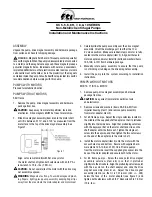
Sensor (White: 100 - 127V)
(Blue: 220 - 240V)
Heater (Red)
*At 23℃/73°F,
Normal heater resistance value: 35 Ω (100 - 127 V models) 160 Ω (220 - 240 V models)
Normal sensor resistance value: 50 Ω (100 - 127 V, 220 - 240 V models)
NOTE:
Use of the tool when the nozzle, heating core, or filter is clogged may cause the pump to
lock up and render operation impossible. Clean or otherwise eliminate the blockage before
attempting to use the tool.
Repairs
When repair becomes necessary, check the following and then bring the desoldering tool
to a HAKKO sales outlet or HAKKO dealer.
1. Is the nozzle or heating core clogged?
2. Is the valve plate cracked or missing?
3. Is the front holder or filter holder warped or cracked?
4. Is the pre-filter or ceramic paper filter dirty or warped?
Detailed information can be found in manuals available
at the HAKKO Document Portal.
Please download and make use of them.
https://doc.hakko.com
Calibrating the temperature
1. Install a new nozzle. The nozzle being used may have already
started to wear, so use a new nozzle.
2. Insert the power plug into the outlet.
3. Set the temperature to 400 °C/750 °F.
4. Wait for about 1 minute until the nozzle will melt solder, then
apply a generous coating of your solder to the end of the nozzle.
When the iron temperature reaches the set temperature, the
LED lamp will flash.
5. Use a soldering iron tip thermometer (optional accessory) to
measure the temperature at the tip of the nozzle. Do not apply
suction, as this will cause the temperature to drop.
6. Adjust CAL until the temperature is 400 °C/750 °F. Turn CAL
clockwise to increase the temperature.
• It may take several minutes for the nozzle temperature to
stabilize after CAL is adjusted.
• During CAL adjustment, make sure the set temperature does not go above 500℃/930°F,
as this may damage the desoldering tool.
Problem cause
Procedure
Tool does not
heat up
Tool is not connected properly
to power outlet
Connect properly
Heating element burnout*
Replace heating element
Sensor is broken*
Temperature is
low
Temperature is set too low
Reset
Temperature has not been
calibrated properly
Calibrate properly
Nozzle is worn out
Replace nozzle
Pump does not
operate
Nozzle or heating core (in heating
element) is clogged
Clean
Too much solder or flux has
collected in the filter
Replace filter
Suction force is
weak
Too much solder or flux has
collected in the filter or inner hose
Replace filter or inner hose
Vacuum leakage
Inspect nozzle, area around filter
and pump hose
Pump valve or diaphragm is broken Replace valve or diaphragm
*Heater lead (Sensor lead)
Low
High
Use a flathead screwdriver
to adjust