4
Heater lamp
B. Connections
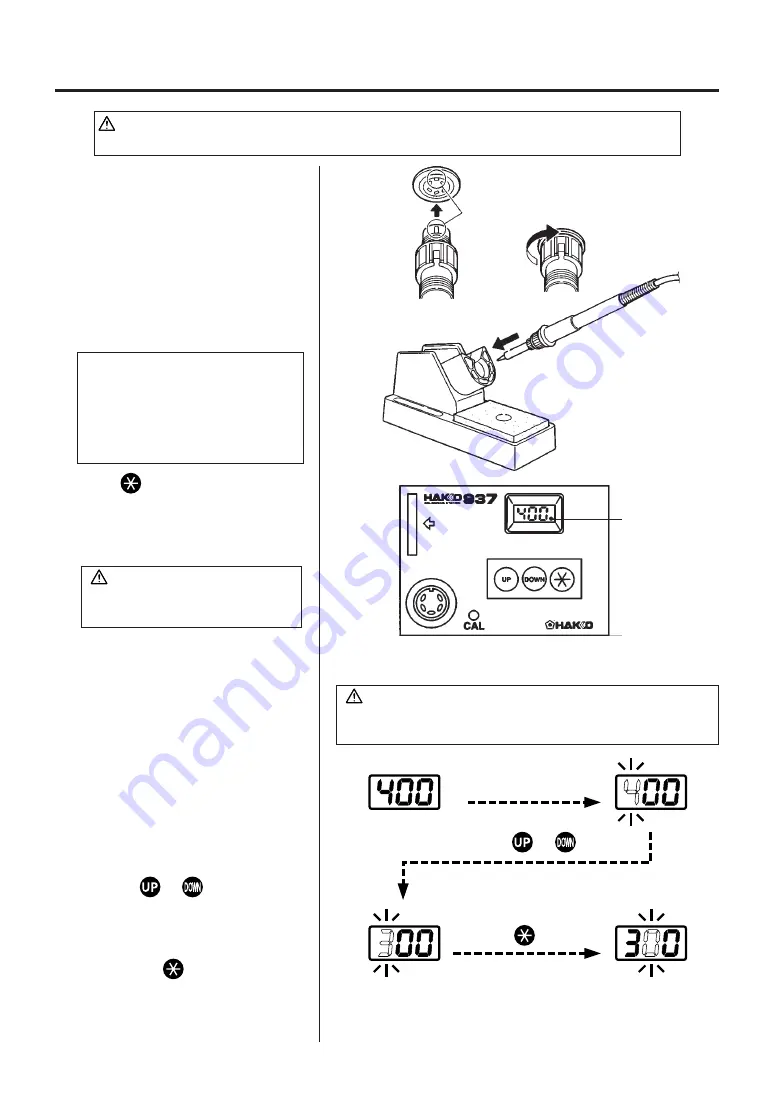
1. Connect the cord assembly to
the receptacle.
2. Place the soldering iron in the
iron holder.
3. Plug the power cord into the
power supply. Be sure to ground
the unit.
4. Turn the power switch to ON.
NOTE:
The temperature is preset at 400
°
C
at the factory. (The No.937-4, -5,
and -6, are preset at 750
°
F.) The
heater lamp will flicker when the
temperature has stabilized.
5. Press
to display the preset
temperature. It will be displayed
for two seconds.
CAUTION : Be sure to turn off the power switch before connecting or disconnecting the
soldering iron. Failure to do so may damage to the Station.
Receptacle
Align the grooves and pins.
And push straight in.
Turn clockwise
firmly.
CAUTION
Be sure to insert the correct end of the card into the card slot.
While setting the temperature, the heating element is off.
Press
or
Insert the card
Press
once
C. Set the temperature
Example: Change the temperature from
400
°
C to 350
°
C.
1. Insert the card into the card slot on
the front panel of the station. The
left-most digit in the display (the
100’s digit) will begin flashing,
indicating that the station is in the
temperature setting mode and that
the 100’s digit can be adjusted.
2. Using the
or
button to
increase or decrease the value,
select the desired value for the 100’s
digit. The 100’s digit can be set to 2,
3, or 4. Press
when the desired
value is displayed. This will cause
the middle digit (the 10’s digit) in the
display to begin flashing.
CAUTION
The soldering iron must be placed
in the iron holder when not in use.


