19
Installation procedure
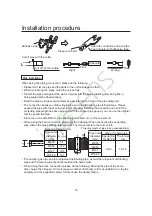
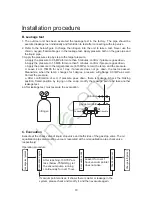
Because the unit is with refrigerant R410A, the below issues should be paid attention:
• To prevent the different oil into the pipe, please use the special tool for R410A, especially for
gauge manifold and charging hose.
• To prevent the compressor oil into the refrigerant cycle, please use the anti-counter-
fl
ow
adapter.
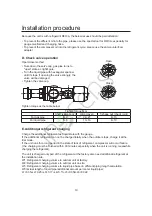
• Take down the valve cap, gas pipe turns to
"open" state as right
fi
gure.
• Turn the liquid pipe with hexangular spanner
until it stops. If opening the valve strongly, the
valve will be damaged.
• Tighten the valve cap.
D. Check valve operation
E. Additional refrigerant charging
Open/close method:
Tighten torque as the table below:
Tighten torque N·m
Shaft (valve body)
Cap (cover)
T-shape nut (check joint)
For gas pipe
8~9
22~27
8~10
For liquid pipe
5~6
13~16
8~10
Charge the additional refrigerant as liquid state with the gauge.
If the additional refrigerant can not be charged totally when the outdoor stops, charge it at the
trial mode.
If the unit runs for a long period in the state of lack of refrigerant, compressor will occur failure.
( the charging must be
fi
nished within 30 minutes especially when the unit is running, meanwhile
charging the refrigerant).
The unit is charged only part of the refrigerant at the factory, also need additional refrigerant at
the installation site.
W1: Refrigerant charging volume to outdoor unit at factory.
W2: Refrigerant charging volume to outdoor unit on site.
W3: Refrigerant charging volume to liquid pipe base on different piping length calculation.
W3=actual length of liquid pipe×additional amount per meter liquid pipe=
L1×0.35+L2×0.25+L3×0.17+L4×0.11+L5×0.054+L6×0.022
Open
Close

