INSTALLATION
PAGE 9
ENGLISH
SE
C
TION A
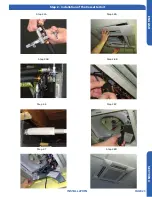
Step 3.3
Step 3.4A
Step 3.5A
Step 3.6
Step 3.4B
Step 3.5B
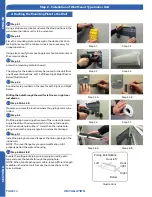
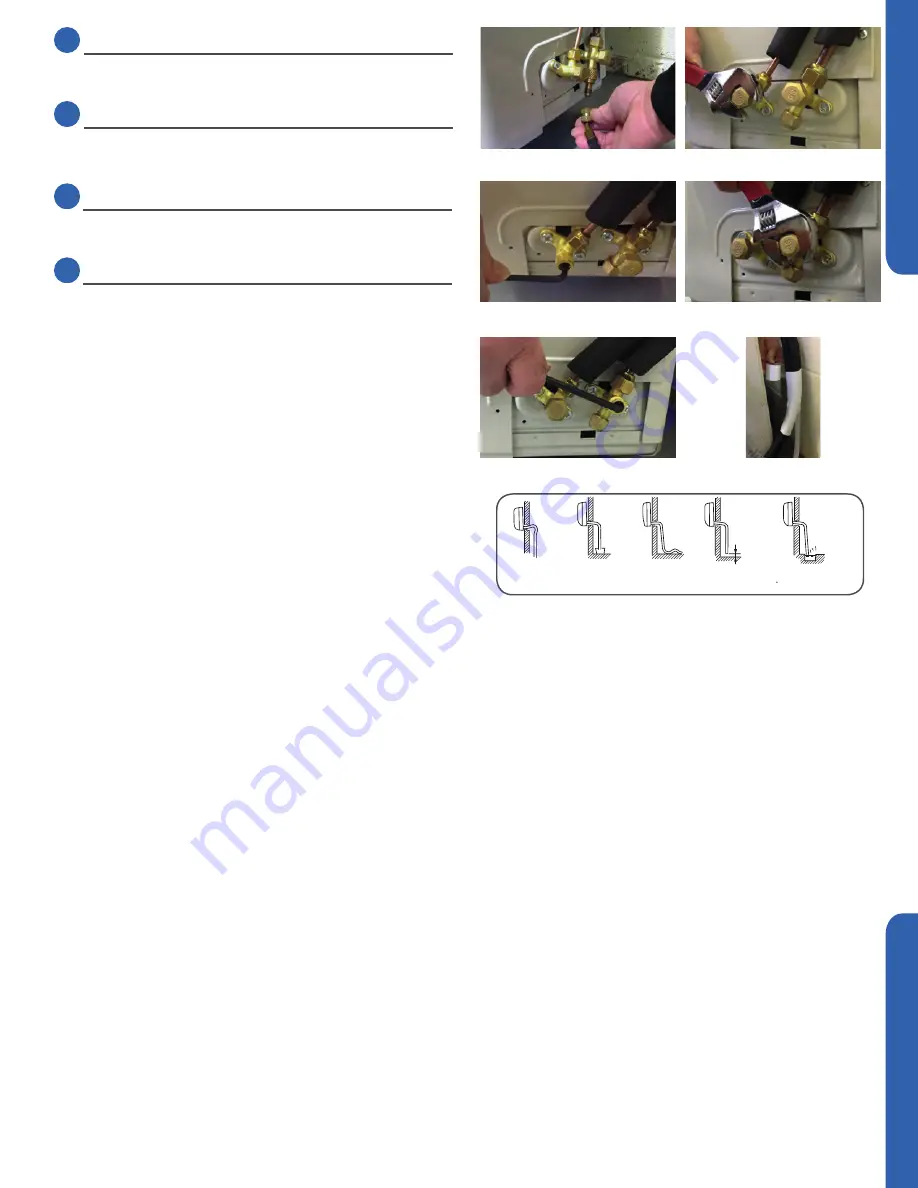
3.3
Step - 3.3
Remove the adapter and hose connection from the suction
line port, and replace the cap.
3.4
Step - 3.4A & 3.4B
Remove the cap from the liquid line valve. Using the hex
wrench, open the valve, then replace and tighten the cap.
Illustration 6
It becomes
high midway.
The gap with the
ground is too small
There is the bad
smell from a sewer
It waves.
The end is imm-
ersed in water.
Less than
5cm
3.5
Step - 3.5A & 3.5B
Remove the cap from the suction line valve. Using the hex
wrench, open the valve, then replace and tighten the cap.
3.6
Step - 3.6
Wrap the lineset, drain line, and wiring starting at the bottom
of the bundle with an overlap type wrap, concluding at the
piping hole. Use a sealant to seal the piping hole opening
to prevent weather elements from entering the building.
(Illustration 6)
Verify the condensate drain line has a constant pitch
downward for proper water flow. There should be no kinks
or rises in the tubing which may cause a trapping effect
resulting in the failure of the condensate to exit the piping.
Содержание 1U12LC2VHA
Страница 6: ... This page intentionally left blank ...
Страница 12: ... This page intentionally left blank ...
Страница 16: ... This page intentionally left blank ...
Страница 36: ... This page intentionally left blank ...
Страница 41: ... This page intentionally left blank ...


