


INSTALLATION
PAGE 20
ENGLISH
SE
C
TION C
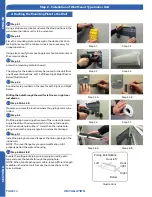
Step By Step Guide To Cassette Installation
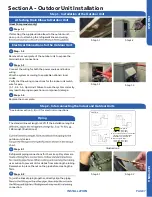
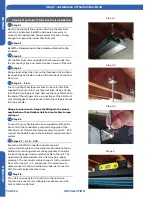
Step 2 - Installation of the Cassette Unit
2.1
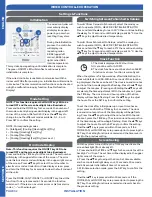
Step 2.1
Use cardboard template to locate center point of cassette for
mounting. Use a plumb bob and string to position cassette
by referencing center hole of template. Mark the mounting
positions of the threaded rods using the guides on the
cardboard template.
2.2
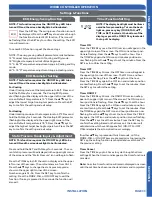
Step 2.2
Install threaded rods to structure using appropriate
fasteners.
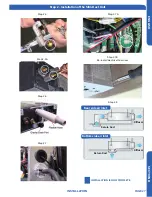
2.3
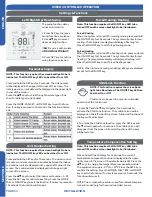
Step 2.3
Lift the cassette and position the threaded rods into the 4
mounting clips on each corner of the cassette unit.
2.4
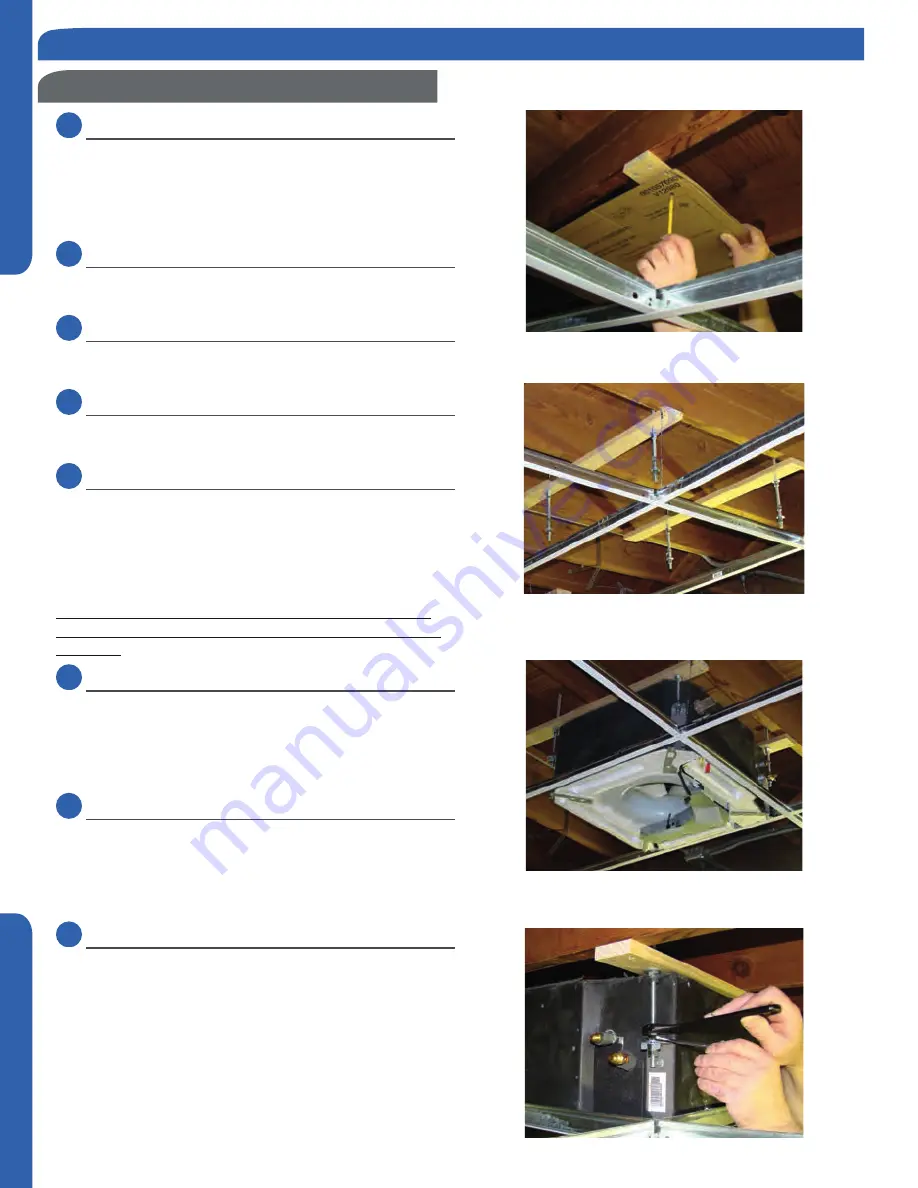
Step 2.4
Using a level, adjust the nuts on the threaded rods to obtain a
level reading across the bottom of the cassette unit.
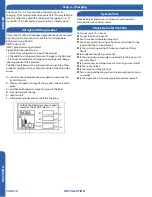
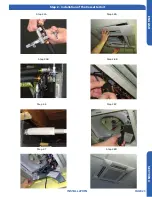
2.5
Step 2.5A & 2.5B
Prior to routing the refrigerant lines to the unit, install the
supplied flare nuts onto the refrigerant lines. Using a flaring
tool, flare the refrigerant lines. Remove the caps attached to
the ends of the refrigerant line connections at the cassette.
Holding gas should leak out.
Using a torque wrench, torque the fittings to the proper
specifications. (See Outdoor Unit Section for flare torque
settings.)
2.6
Step 2.6
Connect the grey flexible drain hose supplied with the
cassette unit to the condensate pump discharge pipe of
the cassette. Tighten the clamp securely. Using 3/4 “ PVC,
connect the flexible hose to the building’s condensate drain
system.
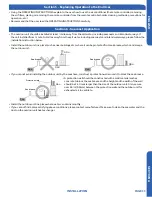
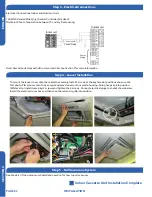
2.7
Step 2.7
Remove the electrical box cover. Remove the rubber
grommet and insert a 1/2 inch electrical connector and
reducing washer. Route electrical wiring into cassette unit.
Connect to wire terminas as indicated in schematic drawing.
(USE 14 AWG Stranded wire only.)
2.8
Step 2.8A & 2.8B ,C, D
Connect Louver assembly to cassette assembly. Connect
wires from louver to the harness on the cassette assembly.
There are two wire connections. (See photo for connections.)
Secure louver with four screws.
Reinstall electrical box cover.
Install return air grille into louver assembly.
Installation is now complete.
Step 2.1
Step 2.3
Step 2.2
Step 2.4
Содержание 1U12LC2VHA
Страница 6: ... This page intentionally left blank ...
Страница 12: ... This page intentionally left blank ...
Страница 16: ... This page intentionally left blank ...
Страница 36: ... This page intentionally left blank ...
Страница 41: ... This page intentionally left blank ...


