


IoT Controller TJA560
Installer Manual
32
-
Click
Add lamp
to add the lamps of your choice in the configuration group
-
Click
Quick Config
to create links with the group addresses
o
Click
Select
for the desired command
o
Select the group
address by clicking
Add
o
Click
Save
to confirm
-
Click
Identify
to physically find the concerned lamp
-
Click
Delete Lamp
to remove the lamp from the project
5.3.4
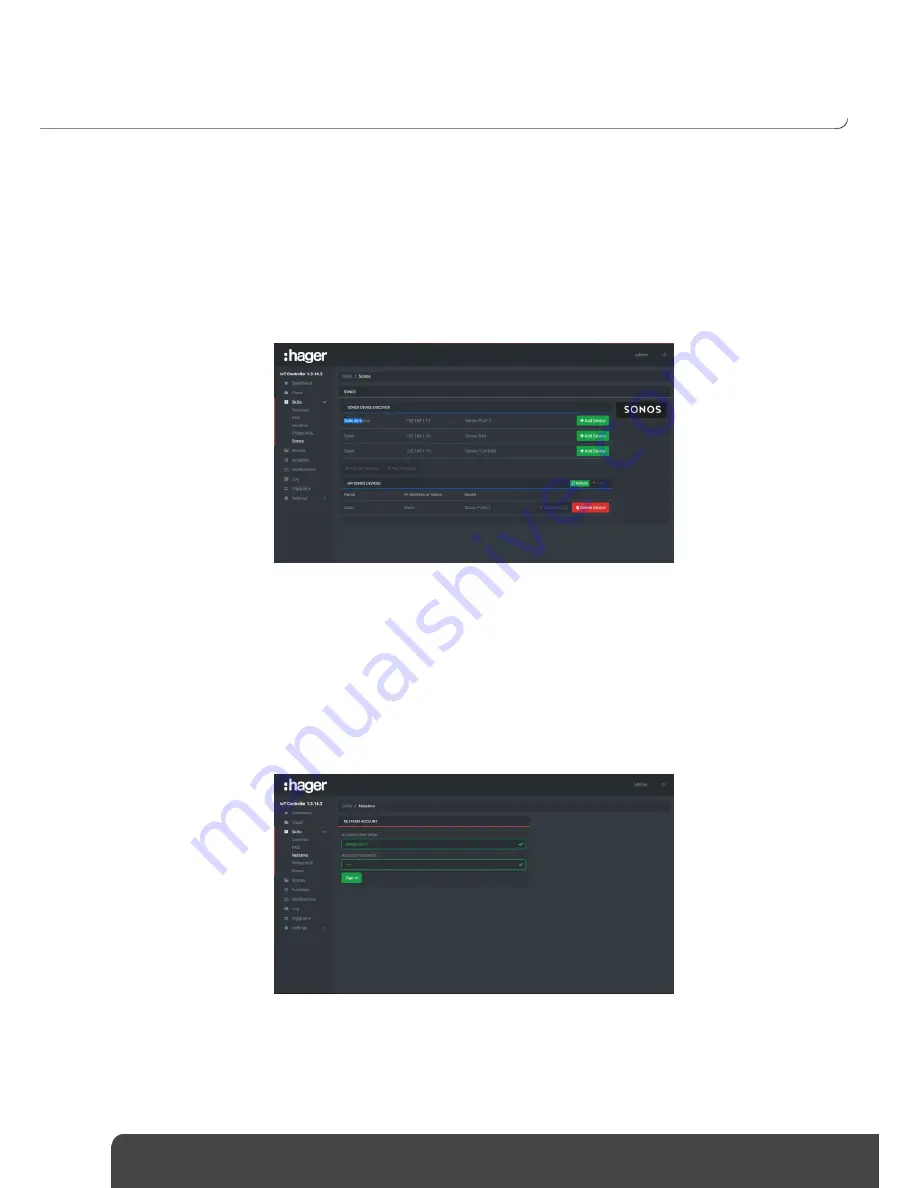
SONOS
This section configures the various Sonos peripherals.
-
Click
Add Device
to add the peripherals of your choice in the configuration group
Click
Quick Config
to create links with the group addresses
o
Click
Select
for the desired command
o
Select the group
address by clicking
Add
o
Click
Save
to confirm
-
Click
Delete Device
to remove the lamp from the group
5.3.5
NETATMO WEATHER STATION
This section sets up the various modules configured in your Netatmo account.
-
Enter the Netatmo account username and password
Содержание TJA560
Страница 1: ...01 2018 6LE005108C TJA560 IoT Controller Installer Manual ...
Страница 3: ...3 LIMITATIONS 41 5 9 LIST OF DATAPOINTS 41 5 10 LIST OF ALEXA VOCAL COMMANDS 42 5 11 ...
Страница 43: ...Hager Controls S A S 33 Rue Saint Nicolas B P 10140 67703 SAVERNE CEDEX France www hager fr 01 2018 6LE005108C ...


