SECURING PLANER TO
A TABLE OR WORKBENCH
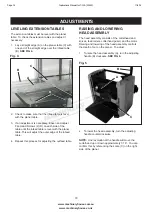
During operation, if there is any tendency for the planer
to tip over, slide or walk, the planer MUST be secured
to a supporting surface such as a workbench or table.
Four holes are provided (2 are shown at (A)) to secure-
ly mount the planer. The surface you are mounting the
planer to should be perfectly flat. SEE FIG 3.
Fig. 3
A
12
ASSEMBLY
ATTACHING DEPTH
ADJUSTMENT HANDLE
MAKE CERTAIN THAT THE MACHINE IS DISCON-
NECTED FROM THE POWER SOURCE.
WARNING
!
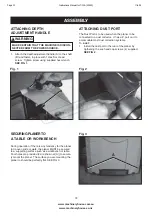
1. Attach the depth adjustment handle (A) to the shaft
(B) and fasten in place with 1 Hex Soc Head
screw. Tighten screw using supplied hex wrench.
SEE FIG 1.
Fig. 1
Fig. 2
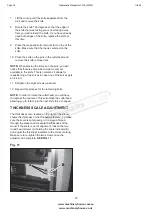
ATTACHING DUST PORT
The Dust Port is to be used when the planer to be
connected to a dust collector. It has a 4” port on it to
accomodate most dust collection systems.
To install:
1. Install the dust port in the rear of the planer by
tigthening the soc head cap screws. (4) supplied.
SEE
FIG
2.
A
B
www.machineryhouse.com.au
www.machineryhouse.co.nz
Page 13
Instructions Manual for T-13A (W813)
1
1/9/19
Содержание T-13A
Страница 23: ...NOTES 22 www machineryhouse com au www machineryhouse co nz Page 23 Instructions Manual for T 13A W813 11 9 19 ...
Страница 24: ...23 www machineryhouse com au www machineryhouse co nz PARTS Page 24 Instructions Manual for T 13A W813 11 9 19 ...
Страница 25: ...24 www machineryhouse com au www machineryhouse co nz Page 25 Instructions Manual for T 13A W813 11 9 19 ...


