17
Ensuring machine is not connected to power
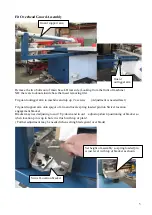
Set measurement of tape on rear fence
Bring the fence 100mm away from blade measuring it with a tape measure as shown.
Loosen the tape adjustment screw found under the RH end on the alloy extrusion the tape is set in
Slide the tape in the extrusion to show 100mm under the fence and then tighten the screw again.
Final adjustment can be done after taking a test cut and re-measuring at a later date
# Setting of overhead guard
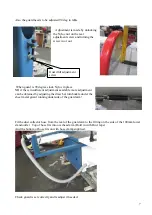
The blade guard MUST always be in place over the blades when machine is in use
Final adjustment of positioning of the guard may need to be done again as per directions explained
previously.
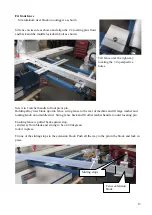
The height of the blade guard must always be set with the bottom of the guard down to the thickness
of the material being cut.
This is adjusted by releasing the lock nut on the rear upright of the blade arm assembly and turning
the socket head cap screw as needed
UP (anti clockwise) to move the guard closer to the table and DOWN (clockwise) to lift the blade
guard up higher
When set correctly ensure the screw is locked in place by locking the nut.
Always ensure the rear cover of the blade guard is
fitted correctly to suit the cut being used
Clear straight one for 90 deg cuts
Blue fiberglass one for cuts to 45 degrees
Blade Guard height Setting Screw
(Shown with lock nut loose)


