background image

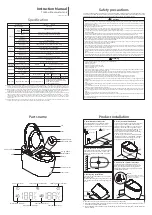
INSTALLATION FINISHING

Install the seat & cover according to seat & 

cover installation manual

 Apply a silicone putty along the intersecting 

 edge of the toilet base and floor, ensuring a 

 complete seal. 

Attach the plastic window cap push to side toilet.

(as figures show) 

- 6 -

10

11

PLASTIC WINDOW SIDE CAP  INSTALLATION

CARE AND MAINTENANCE 

Do not use harsh abrasives or caustic clean fixture surface. A mild detergent, warm water, and a soft cloth will remove

Notice

Do not use cleaners in tank. Products containing chlorine(calcium hydrochlorite) can seriously damage fitings in the tank.

normal dirt and soap accumulations from fittings and surfaces. Rinse thoroughly after cleaning and polish with a soft dry

cloth to restore original luster of material.

This damage can cause leakage and property damage. 

GROHE shall not be responsible or liable for any tank fitting

damage caused by the use of cleaners containing chlorine (calcium hydrochlorite)

Nov.2015

Rev.03

Содержание 39315000

Страница 1: ...Nov 2015 Rev 03 39315000 99 0567 031 ECN 235920 11 15...

Страница 2: ...Nov 2015 Rev 03...

Страница 3: ...122 40 150 Nov 2015 Rev 03...

Страница 4: ...180 Nov 2015 Rev 03...

Страница 5: ...5 7 180 190 5 190 5 7 3 7 1 7 2 7 1 7 2 PVC 318 45 8 9 Nov 2015 Rev 03...

Страница 6: ...Nov 2015 Rev 03...

Страница 7: ......

Страница 8: ...S Thank you for selecting our products which have been the benchmarks of fine quality for years To help ensure that the installation process will proceed smoothly please read these instructions carefu...

Страница 9: ...on the specified location The figure show side view of the hole depth To drill the specified location of the strut plate in the wall Unit mm PIPING PREPARATION AND CONNECTING WASTE PIPE AND WATER SUPP...

Страница 10: ...et properly the VC on the floor r o o l f e h t o t n i e l o h g n i x i f e h t k r a m Remove connector parts before cutting CUTTING GUIDE ROUGHING IN MM A Length to trap way dimension to the wall...

Страница 11: ...d from wall to tank Rubber Plastic Cover It shows the connector before cutting The figures showns the rod and strut after installation 4 5 6 B C 14 mm 190 mm 305 mm 180 mm 210 mm 305 mm 250 mm It show...

Страница 12: ...plied around the end tip of plastic connector to be fitted with the waste pipe to strengthen the connection joint between waste pipe and plastic connector Note Drain out water from pipe before fixing...

Страница 13: ...ixture surface A mild detergent warm water and a soft cloth will remove Notice Do not use cleaners in tank Products containing chlorine calcium hydrochlorite can seriously damage fitings in the tank n...

Страница 14: ...com 99 412 497 09 74 info az grohe com CDN info grohe ca CH info grohe ch 357 22 465200 info grome com grohe cz grohe com grohe grohe dk grohe grohe es grohe grohe ee marketing fr grohe com FIN 358 10...

Страница 15: ...2700DV A 703 5 T 93V A 703 4 655 300 110 4 2 class 3 TCVN 20 390 780 140 470 240 100 39316000 99 0567 031 ECN 235920 11 15 1 4 6L 3 GB 25502 2010 3 4 4 1 12 13 110 300 1 2 1 3 110 110 300 4 2 8 4 3 5...

Страница 16: ...9 grohe bulgaria grohe com 99 412 497 09 74 info az grohe com CDN info grohe ca CH info grohe ch 357 22 465200 info grome com grohe cz grohe com grohe grohe dk grohe grohe es grohe grohe ee marketing...

Страница 17: ...e cerment 4 3 To cover white cement or mortar around the drainage pipe place trap over then fix the trap with floor by the screws 5 Install the rubber gasket into P trap After the trap has been fixed...

Страница 18: ...he de A 43 1 68060 info at grohe com AUS Sydney 02 8394 5800 Argent Melbourne 03 9682 1231 B 32 16 230660 info be grohe com BG 359 2 9719959 grohe bulgaria grohe co m 99 412 497 09 74 info az grohe co...

Отзывы: