-24-
Model T32002 (Mfd. Since 02/20)
Below are some quick tips for getting the most out
of your buffing wheel. Remember, there is no sub-
stitute for experience. Learning how to hold the
workpiece, how much pressure to apply, and how
to move the workpiece against the wheel requires
a certain amount of trial-and-error.
•
Thoroughly clean all parts you plan to buff.
Dirt, oil, rust, paint, or other film must be
removed chemically or with water. Make sure
to dry off parts with a rag after cleaning.
Buffing
•
To begin buffing, slowly feed workpiece into
buffing wheel. Hold workpiece tightly at all
times while buffing. Placing one hand near
contact point will give you better control.
•
Wear safety equipment when buffing. If buffer
forces workpiece out of your hand, be pre-
pared for it to come flying at you! Wear safety
glasses or a face shield and a heavy leather
apron. Also, wear a dust mask to protect your
lungs from microscopic particulate that will be
flying off wheel.
Use caution when polishing plated metals;
there is a chance that thinly-plated materials
could be damaged. Light pressure is all that
is needed for quality work.
To install/remove buffing wheel:
1. DISCONNECT MACHINE FROM POWER!
This machine has a long spindle shaft that allows
for mounting many buffing accessories, depend-
ing on your application.
Installing/Removing
Buffing Wheel
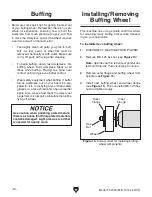
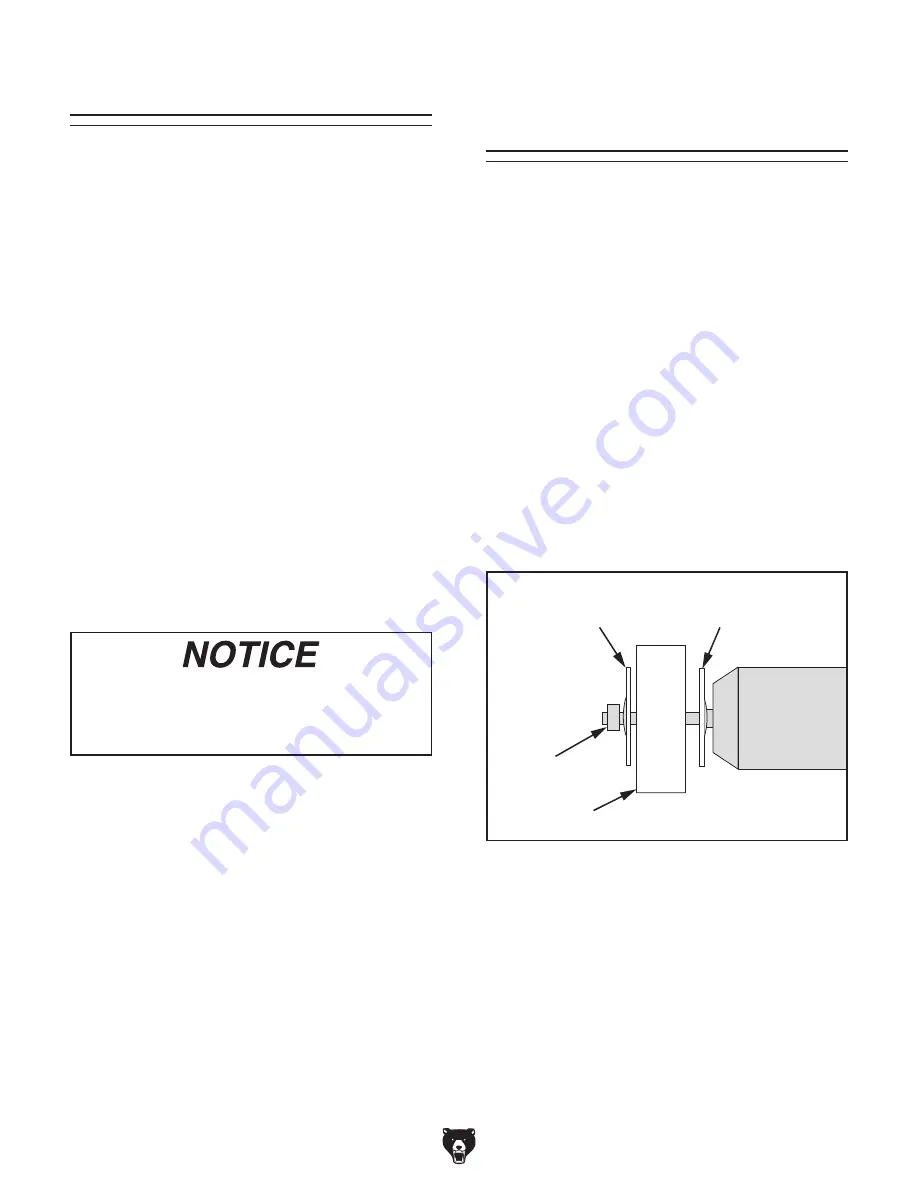
Figure 15. Correct order for installing buffing
wheel components.
Hex
Nut
Wheel
Inner
Flange
Outer
Flange
2. Remove M8-1.25 hex nut (see Figure 15).
Note: Spindle shaft on left side of grinder has
left-hand threads. Turn clockwise to loosen.
3. Remove outer flange and buffing wheel from
spindle (see
Figure 15).
4. Install new buffing wheel and wheel flange
(see
Figure 15). Then re-install M8-1.25 hex
nut and tighten snugly.
Содержание T32002
Страница 36: ......

