


C3 Auto Whip Clad Cable Cutter
Greenlee Tools, Inc.
4455 Boeing Dr. • Rockford, IL 61109-2988 USA • 815-397-7070
23
Operation
(con’t)
2. Click the green
OPEN FILE
button.
3. Navigate through the file browser to find your
previously saved Cable Material File.
4. Double click on the desired file and it will open in
the application.
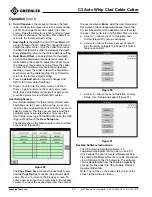
5. To edit the values in the table click on the box you
would like to change, enter the new value and then
press enter on the keyboard.
6. To add a new row type your desired Cable
parameters
(Manufacturer, Conductor
Construction, Size/Count, Armor Type and Notch
Depth)
for the new cable into the blue header box
and then click the
ADD
button to add the cable
material to the table.
7. When you are finished adding rows and making
changes to the Cable Material File click the
Save
File
button to save the file. By default it will save as
the file you opened, if you would like to save your
edits as a new file, change the text in the
File Name
text box and then click
Save File.
8. When you are finished using the software click the
MAIN MENU
button and then click the
EXIT
button.
You can also simply hit the
X
in the top right corner
of the window. Be sure all work is saved before
exiting.
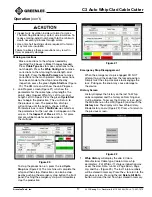
Import Cable Type from USB
1. The USB port on the front panel can be used to
import cable types. Note: The file transfer from
the USB will overwrite all (48) Cable Types stored
in the HMI with the new cable types and will enter
zero in any remaining cable types. To import cable
types, install the USB flash drive and perform the
following:
a. Touch
Operation
on the Main Menu
(Figure 9)
b. Touch
Cable Type
on the Specify Cable Type
and Whip Parameters screen (Figure 10).
c. Touch
Import From USB
on the Cable Type
screen (see figure 11).
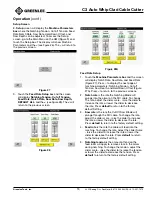
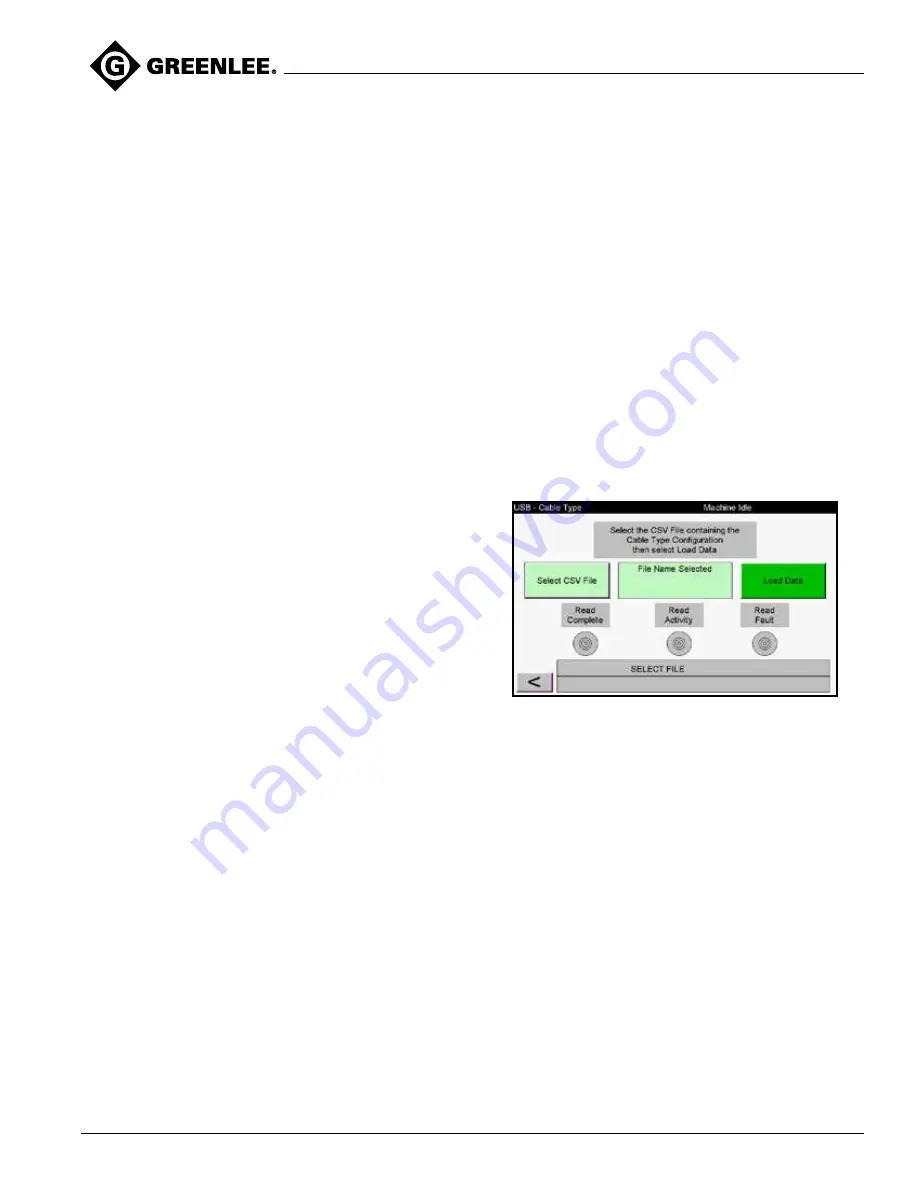
d. The display will show the USB Data Import –
Cable Type screen (Figure 39). Touch the light
green
Select CSV File
box.
e. The display will show the CSV files stored in the
flash drive. Select the desired CSV file and press
Enter
. After confirming your selection, the CSV
file name will appear in the light green
File Name
Selected
box.
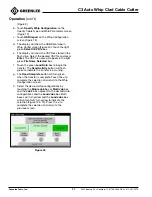
f. Touch the green
Load Data
box to begin the
transfer. The
Read Activity
button will flash
green to indicate the transfer is occurring.
g. The
Read Complete
button will turn green
when the transfer is complete. Touch the
<
to
complete the selection and return to the Cable
Type screen.
h. Touch the
Cable #
box adjacent to the desired
cable type and press
Load Selection
. The
Cable #
box will turn yellow and the
Load
Selection
box will momentarily turn yellow to
indicate the selection. Press the
<
to complete
the selection and return to the previous screen.
Note: if the Select CSV file box is red then the USB
drive was not recognized by the unit. Be sure the
USB drive is securely inserted into the machine
and has the CSV file saved in the correct format.
If trouble persists, check to see that the USB drive
functions correctly in another device and recopy the
.CSV file to the device.
Figure 39
Import Whip Configuration from USB
2. The USB port on the front panel can be used
to import Whip Configurations. Note: the file
transfer from the USB will overwrite all 96 Whip
Configurations stored in the HMI with the new whip
configurations and will enter zero in any remaining
configurations. To import whip configurations, install
the USB flash drive and perform the following:
a. Touch
Operation
on the Main Menu