


15
❏
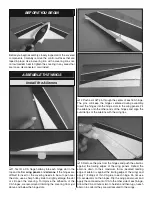
5. Trim the covering from the interplane strut slots on
the underside of the top wing. Repeat step #4 for the top
interplane strut slots.
Read all of steps 6-9. Test fi t all parts together (without glue)
before proceeding.
❏
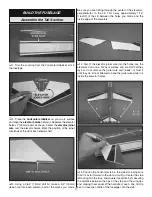
6. Test fi t everything fi rst, then glue the interplane struts
perpendicular to the bottom wing using medium or thick CA.
❏
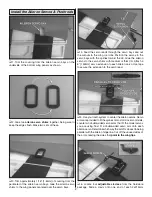
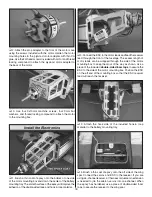
7. Assemble the cabane struts using four 2x5mm machine
screws, four 2mm nuts, and thread locking compound. Be
sure to make a left and right strut.
❏
8. Test fi t the cabane struts into the underside of the top
wing. The strut ends should slide into the slots all the way
to the top surface of the wing. If they cannot, epoxy has
probably gathered in the slots. Use a hobby knife to clean
out the slots until the struts can fi t properly.
❏
9. It is recommended to use 30-minute epoxy for this
step (the extra working time is benefi cial). Coat the top and
bottom ends of the cabane struts with epoxy and insert them
into the slots in the top wing. Put a bead of thick CA glue onto
the top edges of the interplane struts and onto the sides of
the interplane strut tabs. Fit one of the interplane struts into
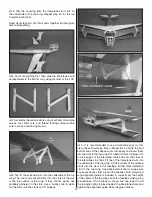
the underside of the top wing. Fit the bottoms of the cabane
struts into the slots in the fuselage. Fit the other interplane
strut to the top wing. Use denatured alcohol to wipe away
any excess epoxy from around the cabane struts. A plywood
wing alignment guide is included to correctly set the height
of the center of the top wing above the fuselage when gluing
the cabanes. Fit it in place as shown and use tape to hold
the top wing tightly in place against the interplane struts and
against the alignment guide while the glue hardens.


