❏ ❏
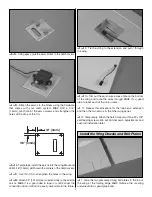
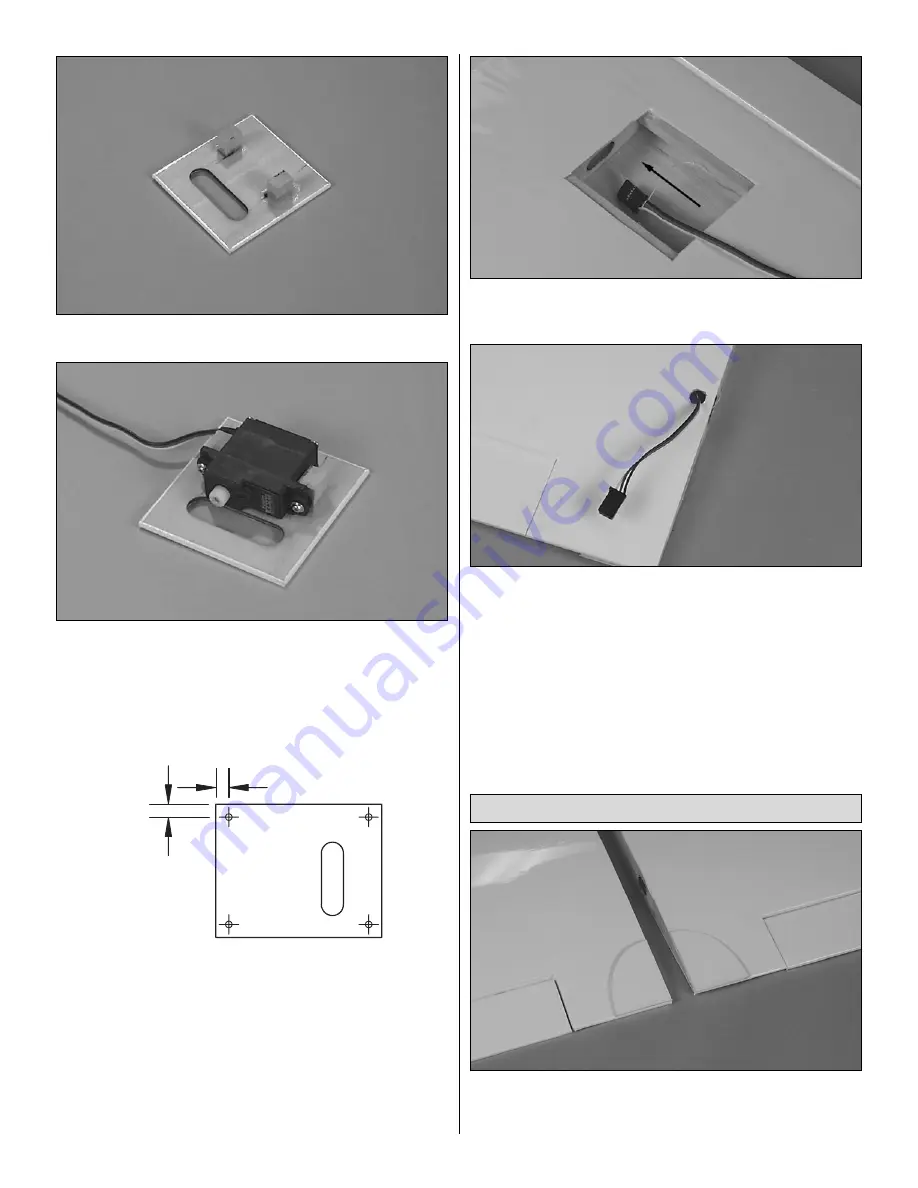
4. Using epoxy, glue the servo blocks to the hatch covers.
❏ ❏
5. Attach the servos to the blocks using the hardware
that comes with your radio system.
Hint:
Drill a 1/16"
[1.5mm] pilot hole for the servo screws and strengthen the
holes with a drop of thin CA.
❏ ❏
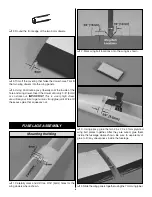
6. Temporarily install the servos into the wing. Mark and
drill a1/16" [1.5mm] pilot hole in the corners of the hatch covers.
❏ ❏
7. Use thin CA to strengthen the holes in the wing.
❏ ❏
8. Attach 24" [101mm] servo extensions to the aileron
servos.
Hint:
It is a good idea to tape (or shrink wrap) the
connection since it will not be easily accessible in the future.
❏ ❏
9. Tie the string to the extension and pull it through
the wing.
❏ ❏
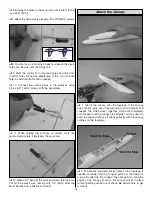
10. Trim out the servo wire access hole on the bottom
of the wing and route the wires through.
Hint:
It's a good
idea to label each of the servo wires.
❏
11. Repeat this procedure for the flap servo extension
and then the two servos in the other wing panel.
❏
12. Temporarily, attach the hatch covers with the #2 x 3/8"
self-tapping screws. We will do final servo adjustments and
pushrod installation later.
❏
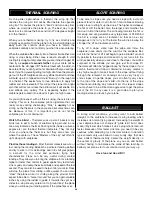
1. Glue the two precovered wing bolt plates to the top of
the wing at the trailing edge.
Hint:
Remove the covering
underneath for a good glue bond.
Install the Wing Dowels and Bolt Plates
1/8" [3mm]
1/8" [3mm]
7


