4
❏
Electric Power Drill
❏
Drill Bits: 1/16", 1/8", 3/16", 5/32", 13/64", 9/64", 1/4"
❏
Monofilament line for aligning wing and stabilizer
❏
Screwdrivers (Phillips and Flat Blade)
❏
HobbyLite
™
Balsa Filler (HCAR3401)
❏
Sealing Iron (TOPR2100)
❏
Bar Sander or Sanding Block and Sandpaper (coarse,
medium, fine grit)
❏
CG Machine
™
(GPMR2400)
❏
AccuThrow
®
Deflection Meter (GPMR2405)
❏
Great Planes Dead Center
™
Engine Mount Hole
Locator (GPMP8130)
❏
CA Applicator Tips (HCAR3780)
❏
Epoxy Brushes (GPMR8060)
❏
Epoxy Mixing Sticks (GPMR8055, Qty. 50)
❏
CA Debonder (GPMR6039)
❏
Clevis Installation Tool (GPMR8030)
❏
Hot Sock
™
(TOPR2175)
❏
Trim Seal Tool (TOPR2200)
❏
Heat Gun (TOPR2000)
❏
Single Edge Razor Blades (HCAR0312, 100 Qty.)
❏
Razor Plane (MASR1510)
❏
36" Non-Slip Straightedge (HCAR0475)
❏
Denatured or Isopropyl Alcohol (for epoxy clean-up)
❏
Dremel
®
Moto-Tool
™
or similar w/Sanding Drum, Cutting
Burr, Cut-off Wheel
❏
Curved-Tip Canopy Scissors (HCAR0667)
❏
Servo Horn Drill (HCAR0698)
❏
Top Flite Precision Magnetic Prop Balancer
™
(TOPQ5700)
❏
Great Planes Fingertip Balancer (GPMQ5000)
There are two types of screws used in this kit:
Sheet metal screws are designated by a number and
a length.
For example #6 x 3/4"
Machine screws are designated by a number, threads per
inch and a length.
For example 4-40 x 3/4"
When you see the term “test fit” in the instructions, it
means you should first position the part on the assembly
without using any glue, then slightly modify or “custom fit”
the part as necessary for the best fit. Do not glue until told
to do so.
When you see the term “fit and glue” in the instructions, it
means you should first position the part on the assembly
without using any glue, then modify or “custom fit” the
part as necessary for the best fit. Glue when you are
satisfied with the fit.
Whenever just “epoxy” is specified you may use either
30-minute epoxy or 6-minute epoxy. When 30-minute
epoxy is specified it is highly recommended that you use
only 30-minute epoxy because you will need the working
time and/or the additional strength.
Where you see the term “glue”, it is at your option to select
the thickness of CA with which you are most comfortable. If
the step indicates a particular thickness of glue, be sure to
use the thickness recommended for strength, penetration
and/or working time.
Several times during construction we refer to the “top” or
“bottom” of the model or a part of the model. For example,
during construction we tell you to “glue the top main spar” or
“trim the bottom of the former.” It is understood that the “top” or
“bottom” of the model is as it would be when the airplane is
right-side-up and will be referred to as the “top” even if the
model is being worked on upside-down. I.E. the “top” is always
the “top”, even when the fuse is being built upside-down.
Building Notes
Optional Supplies and Tools
GPMR6169 Hand Sander-5.5"
GPMR6170 Bar Sander-11"
GPMR6172 Bar Sander-22"
GPMR6174 Bar Sander-33"
GPMR6176 Bar Sander-44"
GPMR6190 Multi-Sander-11"
GPMR6191 Multi-Sander-22"
GPMR6180
80-Grit Sandpaper-12' roll
GPMR6183 150-Grit Sandpaper-12' roll
GPMR6184 180-Grit Sandpaper-12' roll
GPMR6185 220-Grit Sandpaper-12' roll
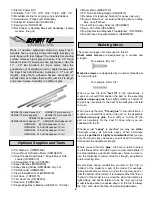
Made of durable, lightweight aluminum, Easy-Touch
™
Sanders have a uniquely contoured handle that lets you
work longer with less fatigue! The incredibly flat sanding
surface removes high spots with ease. The 5.5" Hand
Sander is ideal for small parts and tight spaces. Use the
11" - 44" Bar Sanders for larger areas. Take the
guesswork out of sanding curved or angled shapes with
the Easy-Touch Multi-Sander. Available in 11" and 22"
lengths. Easy-Touch adhesive-backed sandpaper is
already trimmed to these tools’ width...just cut it to length
and press in place. Available in 4 different grits.
Содержание SlowPoke
Страница 6: ...6 DIE CUT PATTERNS...
Страница 32: ...TWO VIEW...


