❏
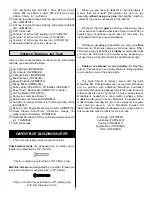
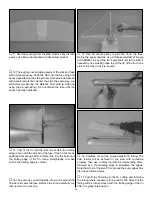
11. Peel the covering from the stab. Remove any ink with
a piece of a tissue dampened with denatured alcohol.
❏
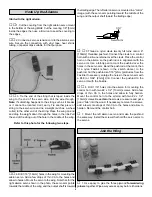
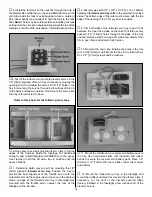
12. Thoroughly coat all joining areas of the stab and fuse
with 30-minute epoxy. Slide the stab into the fuse. Wipe off
epoxy deposited on the stab with several tissues dampened
with denatured alcohol. Center the stab the same way you
did before (measuring the distance from side to side and
using the pin-and-string). Do not disturb the fuse until the
epoxy has fully hardened.
❏
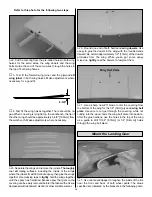
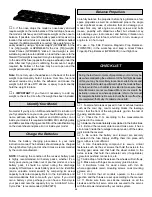
13. Test fit the fin into the fuse. Be certain the trailing
edge is even with the aft end of the fuse. If the fin cannot be
positioned far enough aft to achieve this, trim the bottom of
the trailing edge of the fin. Use a straightedge to make
certain the trailing edge is vertical.
❏
14. The same as you did the stab, draw a line around the
fin where it meets the fuse. Remove the fin and carefully cut,
then remove the covering.
❏
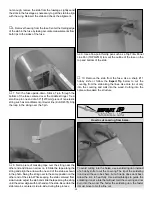
15. Use 30-minute epoxy to glue the fin to the fuse.
Before the epoxy hardens, use a Hobbico
®
Builder's Triangle
(HCAR0480) to see if the fin is perpendicular to the stab. If
necessary, use masking tape to pull the tip of the fin to one
side or the other until it is “square.”
❏
16. Carefully cut out the molded plastic fin fairing. The
best results will be achieved if you start with curved-tip
scissors, then use a rotary tool with a small sanding drum,
followed by a thin sanding block to straighten the edges.
Note that most of the small “rim” around the outer edges has
also been trimmed away.
❏
17. Test fit the fin fairing to the fin, cutting and trimming
the fairing where necessary for a good fit. The aft end of the
fairing will be trimmed even with the trailing edge of the fin
after it is glued into position.
14


