


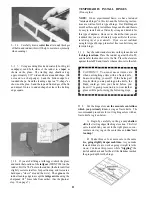


Make sure everything is seated properly and apply thin CA
to all of the joints starling at former Fl and working your
way to the rear. At the rear of the fuse glue the two sides
together. Do one former/section at a time and hold
everything lightly together while the glue cures. This
structure is self-aligning and can be done right in your lap,
it docs not need to be done on a flat surface. Apply med/
thick CA to all the joints.
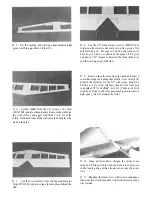
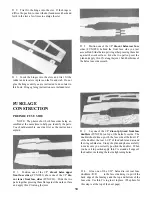
D 3. Glue the 1/4" x 2" x 2-5/8" plywood landing
gear plate (FLJN1F13) in place with med/thick CA or
epoxy. It goes in the forward position behind former F2
for taildraggcrs and in the rear position behind former F3
for tricycle gear. OPTIONAL: If you want to you can cut
an extra landing gear plate and glue one in each position
and so you can switch from one style of landing gear to the
other.
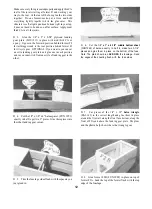
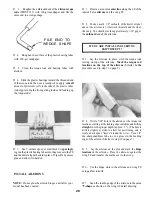
D 6. Cut the 1/8" x 3" x 6-1/2" middle bottom sheet
(FUN1F22) of balsa exactly in half to make two 3-1/4"
pieces and glue them in place on the bottom of the fuse.
Note: The grain should run ACROSS the fuselage. Sand
the edges of the sheeting flush with the fuse sides.
D 4. Cut the 1/8" x 1/8" x 4" balsa spacer (FUN 1F21)
exactly in half to get two 2" pieces. Glue these pieces into
the other landing gear cutout.
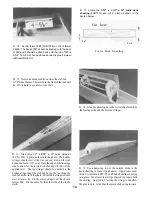
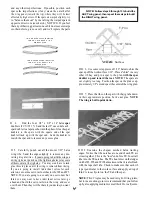
D 7. Cut pieces of the 1/4" x 30" balsa triangle
(BAL143) to the correct length and glue them in place
around the firewall, along the front fuse bottom, along the
front of F2A and above the landing gear plate. The plans
and the photos help show where ihe triangle goes.
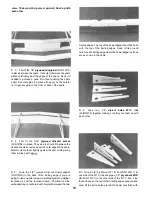
D 5. Trim the fuselage sides flush with the spacers you
just glued in.
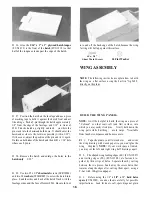
D 8. Glue former F2B (FUN1F09) in place on top of
former F2A. Sand the lop of the former flush with the top
edge of the fuselage.
12
Содержание FUN-ONE
Страница 5: ...5...


