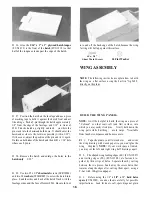
pressure to hold the sheeting down until the glue has set.
D 10. Install the top 1/16" wing sheeting using the same
procedure.
D 11. Cut a hole in the lop sheeting above each wing
bolt hole big enough to get the wing bolts in and out.
INSTALL AILERON SERVOS
IF YOU ARE GOING TO INSTALL TWO
AILERON SERVOS SKIP
AHEAD TO STEP 3.
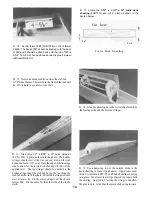
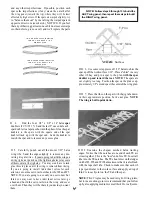
D 7. Trim the root end of the sheeting even with the
center of the wing over the spar, and flush with rib W3 in
front of the spar. Trim and sand the sheeting at the tip of
the wing flush with rib W10.
D 8. Install the other panel wing sheeting.
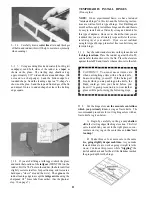
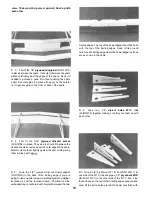
D 1. Cut two 1/4" x 3/8" x 3-1/4" basswood aileron
servo rails (FUN1W16) to fit between the Wl rib assem-
blies (approx. 1-1/4" long). Use a servo to determine the
positioning of the rails and tack glue them in place in the
bottom of the notches with med/thick CA. Try to keep the
servo as low in the wing as possible. Be sure to allow
enough space between the rails to get the servo in and out.
Add more glue to securely hold the rails in place.
D 9. Cut the jig tabs off of each rib using the embossed
line as a guide and sand the ribs smooth.
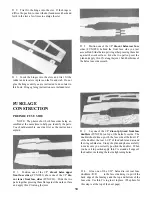
D 2. Position the servo in place on the rails and mark
through the mounting holes where to drill. Remove the
servo and use a 1 /16" drill bit to drill holes where you made
the marks.
IF YOU ARE ONLY INSTALLING ONE
AILERON SERVO SKIP AHEAD TO
ADD THE CENTER SHEET.
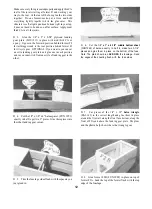
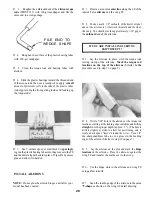
D 3. If you arc installing two aileron (flaperon) servos
test fit the two 1/4" x 3/8" x 3-1/4" basswood aileron
servo rails (FUN1W16) in place in the bottom of the
notches in ribs W4 and W5. Check the fit of the aileron
servo between these rails and adjust if necessary. Se-
curely glue the rails in place with med/thick CA.
23
Содержание FUN-ONE
Страница 5: ...5...

