


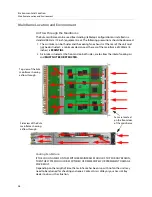


25
Kula
Installation Manual
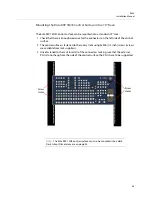
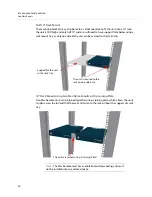
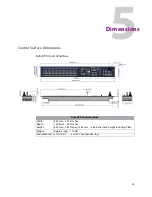
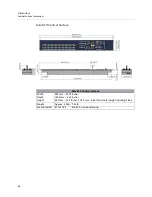
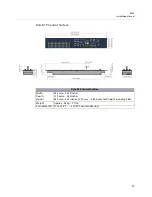
Mounting the Kula K5P 1M/E Control Surface into a 19” Rack
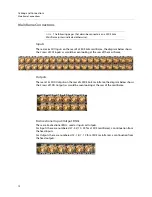
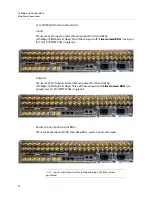
The Kula K5P 1M/E Control Surface can be mounted into a standards 19” rack.
1 Check that there is enough clearance for the connectors on the left side of the control
surface.
2 The control surface is fastened to the rack system using 4x M6 (1/4 inch) screws (screws
are available from rack suppliers).
3 Once fastened to the rack insert all of the connectors making sure that the external
PSUs do not hang from the side of the control surface, the PSUs have to be supported.
Note:
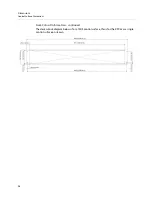
The Kula K5P 1M/E control surface can also be mounted into a desk.
Desk Cutout Dimensions are on page 43.
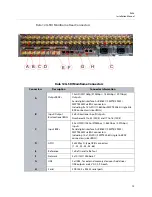
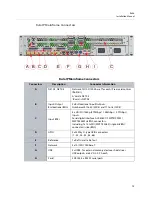
Screw
Holes
Screw
Holes
Содержание KULA
Страница 1: ...Installation Manual Issue 5 Rev 1 2020 10 29 KULA PRODUCTION SWITCHER ...
Страница 16: ...xvi Notices ...
Страница 20: ...2 Introduction About this Manual ...
Страница 40: ...22 Cabling and Connections Mainframe Connections ...
Страница 50: ...32 Environment and Location Ancillary Panels ...
Страница 61: ...43 Kula Installation Manual Desk Cutout Dimensions for K5P 1M E 19 Control Surface ...


