13
STEP T
W
O
2.7
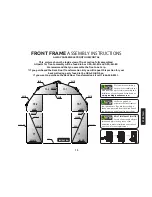
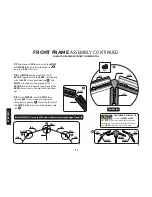
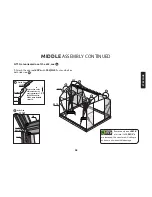
View diagrams and attach the (2) 604’s and (2)
601A’s to the 619. Note the orientation of the 604’s,
there are 4 different 601A’s (2) for the front and (2) for
the back with different hole placements. See diagram on
this page. The 601-FR and the 601-FL will have a hole
at the top side and will face forward.
shows where the corner pieces attach to 619.
shows where the door frame attaches to the 619.
*If assemblling the back door you will need to drill 1/4
inch holes in 601-B’s to match the front wall, these holes
should face the ground during assembly.
S04
ML01
604-R
619
INSIDE DOOR FRAME
TIP:
If necessary
you may use a screwdriver to wedge behind the
bolt head. This prevents bolt from falling into the track.
S04
601A-FR
ML01
619
INSIDE
Inside View
GRANDIO
T I P
Note the larger holes on
601A-FR and 601A-FL
front pieces need to face the
top front of the greenhouse.
GRANDIO
T I P
BOLT INSTALLATION TIP:
Locate all nuts and bolts, pre
thread and place in the groove of the
extrusion to make installation easier. Move
up or down for exact placement.
601A-FL
601A-FR
604-R
604-L
619
INSIDE
OUTSIDE
INSIDE
OUTSIDE
INSIDE
OUTSIDE
OUTSIDE
INSIDE
Inside View
FRONT FRAME ASSEMBLY CONTINUED
ALWAYS ASSEMBLE FRONT HORIZONTAL


