© Gebr.Graef Mai 2002
Technische Änderungen vorbehalten
38
* Tip the end piece holder up.
* Press the snap holder of the end piece holder plate together.
* Pull off the end piece holder plate.
5.6
Bottom plate
The slicing machines have been fitted with a removable bottom plate, which
can be removed from the machine for cleaning by pulling it towards the
operator.
5.7
Cleaning the machine
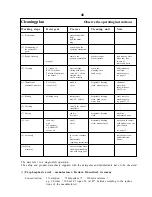
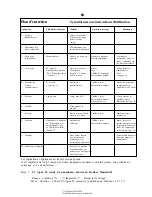
Clean removable and non-removable parts according to the cleaning sched-
ule.
Warning !
Danger of injury ! Wear protective gloves !
Important !
Do not place the parts on top of each other. Risk of
damage.
Use a linen cloth to carefully clean the knife on the inside and outside.
The space between the knife and knife protection ring is cleaned best of all
as follows::
Take a single piece or several pieces (approx. 20 x 20 mm) of a beer mat,
depending on the wear of the knife. Moisturise this piece. Place this piece in
the space between the knife and the stop. Switch the machine on, and
permit the piece of beer mat to run through several times. Clean all surfaces
of the machine.
Warning !
Hold the tilted carriage when cleaning the carriage
profile. The carriage may drop back down.
59
5
Nettoyage
La machine doit être nettoyée à fond au moins une fois par jour.
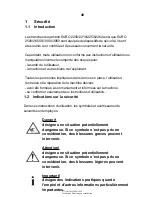
Attention !
Couteau rotatif! Peut couper les doigts.
Eteindre la machine avant de la nettoyer. Retirer la
fiche secteur. Lors des travaux de nettoyage du
couteau, porter des gants de protection avec
protection du pouls.
Important !
Lors du nettoyage respectez l’ordre des opérations
indiqué (voir 12). N’utilisez pas de poudres abrasives
pour nettoyer la machine. Celles-ci rayent les surfaces
métalliques et une hygiène suffisante n’est plus
assurée. Utilisez exclusivement les produits de
nettoyage et d’hygiène usuels. Après le nettoyage,
neutralisez les produits de nettoyage et d’hygiène
aggressifs. Ne jamais nettoyer la machine avec un
nettoyeur à haute pression.
La non-observation des impératifs ci-dessus exclut toute garantie
de notre part.
5.1
Mesures préliminaires au nettoyage
* Appuyez sur le bouton rouge (Arrêt).
* Retirez la fiche secteur de la prise murale.
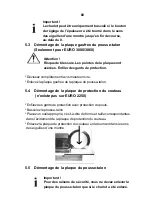
* Tournez le bouton de réglage de l’épaisseur dans le sens des aiguilles
d’une montre jusqu’en fin de course, au-delà du 0. Ainsi le tranchant
du couteau est recouvert.
5.2
Basculer le chariot
Tirez le chariot complètement vers l’avant, au-delà du point de poussée du
ressort et basculez-le ensuite sur le côté.
Содержание EURO 2200
Страница 21: ... Gebr Graef Mai 2002 Technische Änderungen vorbehalten 21 ...
Страница 44: ...44 ...
Страница 67: ... Gebr Graef Mai 2002 Technische Änderungen vorbehalten 67 ...
Страница 90: ...90 ...


