8
307–959
SPRAYER REPAIR
WARNING
These repair procedures should be performed only
by qualified repair personnel with an electrical
background, using the proper tools. Failure to do
the procedures correctly can result in electric
shock, or other serious injury and damage to the
pump.
WARNING
Pressure Relief Procedure
To reduce the risk of serious bodily injury, including
injury from moving parts or electric shock, always
follow this procedure whenever you shut of f the
system, when checking or servicing any part of the
system, and whenever you stop spraying.
1. Turn the ON/OFF switch to OFF.
2. Unplug the power supply cord.
3. Trigger the roller valve to relieve pressure.
If you suspect that pressure is not fully relieved af-
ter following the steps above, open the priming
valve two turns counterclockwise.
NOTE:
For all electrical repair, follow the
Pressure Re-
lief Procedure W arning
above, and then re-
move the pump base cover (42). When reinstall-
ing the cover, make sure all wires are tucked in
neatly before checking or operating the system.
Fuse
(See Fig 4)
1. Pull the old fuse out of the fuse holder (65). Install a
new fuse (67). Use only a 3AG fuse, rated at 1-1/4
amps.
Rectifier
(See Fig 5)
1. Disconnect the four leads from the rectifier.
2. Remove the rectifier (39).
3. Install a new rectifier so the positive terminal (+) is
closest to the fuse holder (65) and then install the
screw (33b).
4. Connect the power white lead to an unmarked termi-
nal, and the pressure switch lead to the other un-
marked terminal. Connect the black motor lead to the
negative (–) terminal, and the red motor lead to the
positive (+) terminal.
ON/OFF Switch
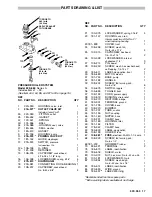
1. Remove the outlet adapter (2a) from the pump hous-
ing (9). See Fig 6. Remove the screws (28), handle
(32) and shield (79). Refer to the Parts Drawing.
Be very careful not to let the ball drop into the pres-
sure switch cavity (12). If that happens, and the
outlet fitting (2a) is screwed into the pump, the
switch will be permanently damaged.
CAUTION
2. Disconnect the two leads from the ON/OFF switch.
See Fig 5.
3. Remove the boot (36). Pull the switch (34) out of the
base. Remvoe the nut (34a). Remove the ground
wire (84). See Fig 4.
4. Remove the top nut (34a) from the new switch. Place
the connector of the ground wire (84) on the switch
and reinstall the nut. Install the new switch, aligning
the tab in the base with the slot in the switch. See Fig
4. Install the boot.
5. Connect a pressure switch lead to the power out ter-
minal, and a jumper wire lead to the power-in termi-
nal.
6. Reinstall the shield, handle and screws, and the out-
let adapter. Refer to the
CAUTION
to the left.
65
Fig 4
Fig 5
80
81
26
41
26
82
33
25
28
33b
43
33
42
67
68
34
37
38
34a 84
36
31
34
37 38
65
33 25
82,81,80
PRESSURE
SWITCH
LEADS (2)
JUMPER WIRE
GREEN WIRE
MOTOR
LEADS
WHITE
OUT
IN
RED
39
33


