


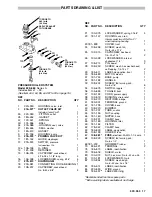


4
307–959
Motor
The motor drives the connecting rod which moves
the diaphragm.
Pressure Switch
The pressure switch at the pump outlet turns the
motor on and off to control material pressure.
Diaphragm
Driven by the connecting rod and motor, the move-
ment of the diaphragm draws material from the suc-
tion tube and through to the outlet valve.
Priming Valve
The priming valve assists in priming the pump
during startup.
Outlet Valve
The outlet valve has a ball check which pre-
vents material from flowing backwards into the
pump. This helps keep an even supply of mate-
rial each time you trigger the spray valve.
Inlet Valve
As the diaphragm draws material from the suction
tube, the material passes through the inlet valve
which opens to allow material into the pump.
Outlet Hose
The hoses have swivel–type couplings for easy as-
sembly. A larger diameter outlet hose and chemi-
cal–resistant outlet and suction hoses are avail-
able. See
ACCESSORIES
on page 18.
Spray Valve
The spray valve controls material flow by triggering
it on and off.
SETUP
1. Remove all parts from the boxes and assemble them
as shown in Fig 1, following the notes on the drawing.
2. Prepare the material according to the manufactur-
er’s recommendations. Remove any skin that may
have formed on the top of the material. If necessary,
thin the material.
3. Plug the power supply cord into a properly grounded,
120 V electrical outlet. See Fig 2. Do not use an
adapter. All extension cords must have three wires.
Use the chart at the right for selecting the appropriate
wire gauge for the extension cord.
WARNING
Never remove the grounding pin of the power supply
cord plug. Be sure the outlet is properly grounded. In
the event of an electrical short circuit, grounding re-
duces the risk of an electric shock by providing an es-
cape wire for the electric current.
Inspect the power supply cord and extension cord be-
fore each use. Be sure they are in good condition and
have undamaged three-pin plugs. Replace immedi-
ately if either cord shows signs of wear or damage.
Fig 2
Extension Cord Chart
Cord Length
Gauge
Feet
Meters
1 – 100
100–200
200–300
1–30
30–61
61–92
18
16
14
PRIMING
VALVE
STRAINER
TWO 25 FT (15 M) HOSES.
JOIN WITH THE 3/8NPT NIP-
PLE SUPPLIED
SUCTION TUBE
PRIMING TUBE
INLET VALVE
ON/OFF
SWITCH
SPRAY VALVE
SPRAY WAND
Fig 1
POSITION ABOUT
15 IN. (380 MM)
FROM STRAINER
SYSTEM DESCRIPTION


