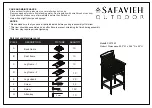
3
•
PLEASE SAVE OWNER’S
MANUAL FOR FUTURE USE.
•
ONLY USE PRODUCT AS
INSTRUCTED.
•
FOLLOW ASSEMBLY
INSTRUCTIONS CAREFULLY.
If you experience any
difficulties, please contact the
Customer Service Department.
•
ADULT ASSEMBLY
REQUIRED.
• This product is not intended to
be used with any other
accessories. Use only
components provided in
original package.
• Always follow recommended
use for each product modes.
• Seat recline is only used in
highchair mode. DO NOT
recline seat in any other use
modes.
• DO NOT remove seat from
frame with child in it.
•
DO NOT FORCE TRAY
against
child. Use only the four
adjustment positions. Be sure
both adjustment fingers are
engaged in armrest slots.
•
NEVER
allow a child to push
away from table.
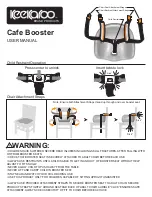
HIGHCHAIR:
•
FALL HAZARD:
Children have
suffered severe head injuries
including skull fractures when
falling from high chairs. Falls
can happen suddenly if child is
not restrained properly.
• Always use restraints, and
adjust to fit snugly.
• Tray is not designed to hold
child in chair.
•
STAY NEAR AND WATCH
CHILD DURING USE.
Always keep your child in
view.
•
It is recommended that the
high chair be used in the
upright position only by
children capable of sitting
upright unassisted.
•
NEVER
allow a child to push
away from table.
Failure to follow these warnings and the assembly instructions
could result in serious injury or death. Read all instructions
before use.
Содержание Made2Grow
Страница 47: ...47 Notes Notas...