General Repair Information
8
3A2247A
General Repair Information
•
Keep all screws, nuts, washers, gaskets, and electri-
cal fittings removed during repair procedures. These
parts are not normally provided with replacement
assemblies.
•
Test repair after problem is corrected.
•
If sprayer does not operate properly, review repair
procedure to verify procedure was done correctly. If
necessary, see
Troubleshooting
, page 10, for
other possible solutions.
•
Install belt guard before operation of sprayer and
replace if damaged. Belt guard reduces risk of
pinching and loss of fingers; see preceding warning.
•
Install hydraulic motor shield before operation and
replace if damaged. Hydraulic motor shield reduces
risk of pinching and loss of fingers; see preceding
warning.
Grounding
Ground sprayer with grounding clamp to earth ground
for safe sprayer operation.
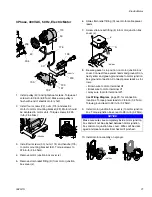
SAE O-Ring Installation
1.
Unscrew lock nut to touch fitting.
2.
Lubricate o-ring (A).
3.
Screw in fitting hand tight.
4.
Unscrew fitting until oriented properly.
5.
Tighten lock nut to indicated torque. (Make sure
washer is seated properly without pinching o-ring).
DA
HIGH VOLTAGE ELECTRIC SHOCK HAZARD
This equipment uses high voltage power. Improper
contact with high voltage equipment will cause death or
serious injury.
•
Turn off and disconnect power cord before
servicing equipment.
•
This equipment must be grounded. Connect only to
grounded power source.
•
Use only 3-wire extension cords for 240V and
single phase models.
•
Use only 5-wire extension cords for 400 AC and
three phase models.
•
Ensure ground prongs are intact on power and
extension cords.
•
Do not expose to rain. Store indoors.
•
All electrical wiring must be done by a qualified
electrician and comply with all local codes and
regulations.
To reduce risk of serious injury, do not touch moving
parts with fingers or tools while testing repair. Shut
off sprayer when repairing. Install all covers,
gaskets, screws and washers before operating
sprayer.
6250
A
ti5414a
ti5415a
ti5416a
ti5417a
DANGER


