


19
EN
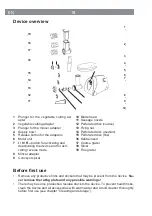
Use
PLEASE NOTE!
■
The device should only be used if it has been completely and correctly assembled!
Make sure that the mincing attachment is engaged correctly and all accessories are
inserted correctly.
■
Never move the
I / 0 / R
button to the
R
(Reverse) position while the device is opera-
ting. Always move the button to the
0
(Off) position
fi
rst and wait until the motor has
come to a complete standstill before the button is moved to the
R
(Reverse) position.
■
Do not attempt to force food down the feed chute; this may damage the device!
■
Pull the mains plug from the plug socket before swapping inserts to prevent the de-
vice from being switched on accidentally!
■
The device is not suitable for constant operation. Operate it for no more than 10
minutes without a pause and then let it cool down for a few minutes.
■
Do not operate the device for a lengthy period without food.
■
The device is equipped with overload protection; the device switches off if it is over-
loaded. In this case, pull the mains plug out of the plug socket and allow the device
to cool down for approx. 10 minutes. It is then ready to be used again.
• For the best results, we recommend that before processing food you cut it
up roughly and remove bones and tendons from meat.
• If food is blocking the device, move the
I / 0 / R
button to the
R
(Reverse)
position for a few seconds so that the food causing the blockage can be
dislodged. Then switch off the device and pull the mains plug from the plug
socket before any food residues which are stuck are removed.
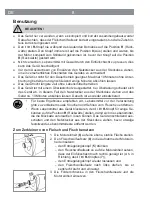
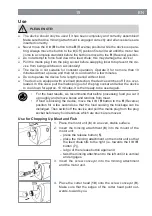
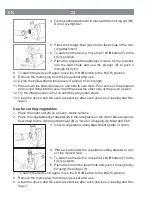
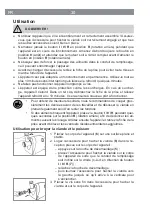
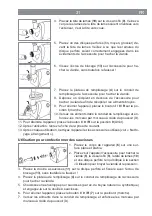
Use for Chopping Up Meat and Fish
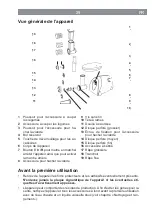
1. Place the motor unit (
6
) on an even, stable surface.
2. Insert the mincing attachment (
8
) into the mount of the
motor unit:
–
press the release button (
5
),
–
place the mincing attachment on the motor unit so that
the feed chute tilts to the right (i.e. towards the
I / 0 / R
button (
7
)),
–
let go of the release button again and
–
twist the mincing attachment to the left until it is vertical
and engages.
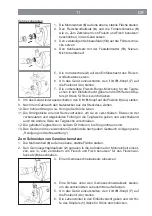
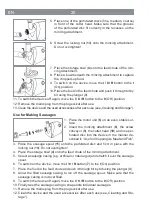
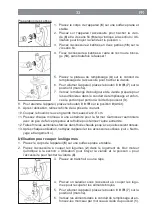
3. Insert the screw conveyor into the mincing attachment
and the motor unit.
4. Place the cutter head (
10
) onto the screw conveyor (
9
).
Make sure that the edges of the cutter head point out-
wards, towards you.