background image

17

Chapter V: EzLogger Pro Data Upload and Function Configuration

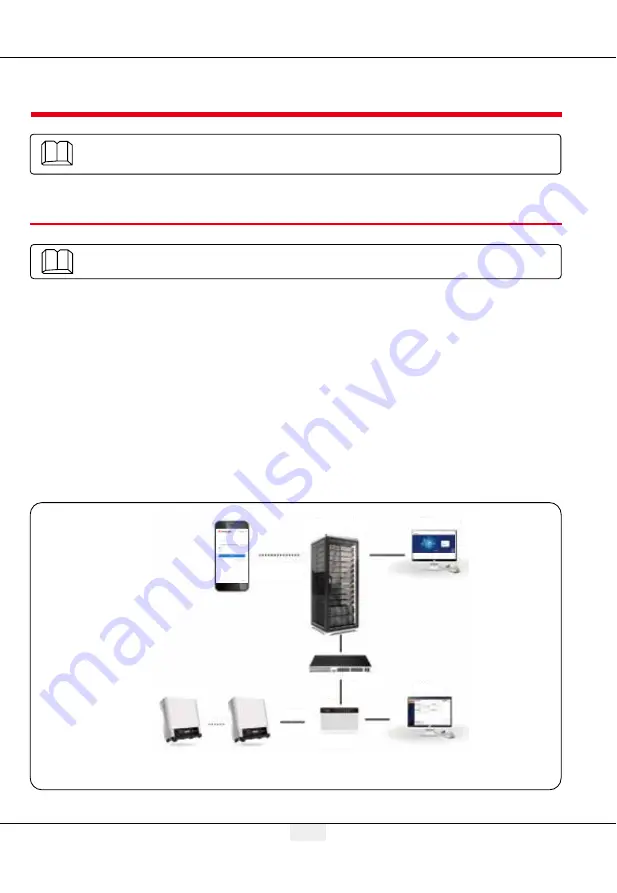
Master Web Server

Internet

Available for

iOS/Android

Internet

Internet

Ethernet

ProMate

EzLogger Pro

RS 485

Router

Internet

Internet Explorer

SEMS Portal

5.1 How to Use LAN EzLogger Pro

Introduce LAN EzLogger Pro monitoring data transmission.

Chapter V: LAN EzLogger Pro Data Upload and Function Configuration

Introduce LAN EzLogger Pro monitoring data transmission and the configuration 

method.

After  EzLogger  Pro  is  connected  to  the  collected  data,  one  should  connect  EzLogger  Pro  to  the 
Internet, so that EzLogger Pro can upload the collected data to the server. Dynamic IP (DHCP) is a 
default function for EzLogger Pro.
If  the  user’s  network  equipment  is  available  with  the  dynamic  IP  (DHCP),  such  as  router, 
EzLogger  Pro  can  be  connected  to  the  Internet  in  a  plug-and-play  way  simply  through  direct 
connection of the NET port of EzLogger Pro to the LAN port of the router and the enabling of the  
dynamic IP (DHCP) function of the router. The collected Data will be automatically uploaded.
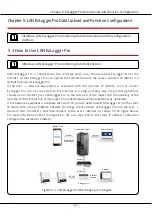
If the network equipment is available with static IP, you will need to switch EzLogger Pro to the static 
IP mode, then use our ProMate software to change the IP address of EzLogger Pro into the user’s 
desired static IP address, and then connect to the user's Internet, as shown in the figure below. 
For more information about configuration, the user may refer to the static IP address connection 
configuration method of ProMate.

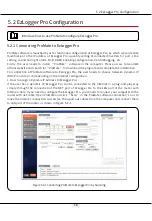
Figure 5.1-1  LAN EzLogger Pro Monitoring System Diagram

Содержание EzLogger Pro

Страница 1: ...nited Kingdom enquiries goodwe co uk service goodwe co uk GOODWE Netherlands sales goodwe com cn service nl goodwe com cn Note The above contact details are subject to change without notice Please vis...

Страница 2: ...8 Chapter IV Electrical Connection 10 4 1 Port Description 10 4 2 Connection to the Inverter 11 4 3 Connection to the Environmental Monitor and Meter 13 4 4 Connection to the Computer 14 4 5 Connectio...

Страница 3: ...Table of Contents Chapter VII Technical Specifications 31 Chapter VIII Certificationand Warranty 32 8 1 Certification Mark 32 8 2 Warranty Certificate 32 8 3 Warranty Conditions 32 8 4 Disclaimer 32...

Страница 4: ...e operator and third party 1 Prevent children from approaching EzLogger Pro 2 Do not open the upper cover unauthorized touching or replacement of components may cause personal injury and damage to EzL...

Страница 5: ...ogger Pro is a dedicated device for the photovoltaic power generation system monitoring and management platform which achieves interface aggregation data acquisition data storage centralized monitorin...

Страница 6: ...box Figure 2 2 2 Front View of EzLogger Pro Box Figure 2 2 3 Side View of EzLogger Pro Box W 118mm L 190mm No Port Port Description 1 ANT Reserved Port 2 Sound alarm Buzzer sound hole 3 Micro SD SD me...

Страница 7: ...ance Description Back of the box Top surface of the box Figure 2 2 4 Back View of EzLogger Pro Box Figure 2 2 5 Top View of EzLogger Pro Box 1 Reserved Slot 1 Wall mounting hole 2 Rail clip 3 Cooling...

Страница 8: ...Ethernet port 3 DI DRED or RCR function port 4 NC Function reserved 5 COM1 RS485 communication port 1 for inverter 6 COM2 RS485 communication port 2 for inverter 7 COM3 RS485 communication port 3 for...

Страница 9: ...flashes 1s On and 3s Off alternately Number of inverters to be acquired according to EzLogger Pro the parameter setting is not set Blue light Off No inverter data acquired by EzLogger Pro COM2 Blue li...

Страница 10: ...the accessories are complete and there is any apparent damage If there is any damage or certain items are missing please contact your dealer Delivery diagram of accessories EzLogger Pro x1 Expansion s...

Страница 11: ...e of 20 60 3 2 2 Install EzLogger Pro There are three installation methods for EzLogger Pro namely table surface mounting wall mounting and rail mounting Installation method 1 Table surface mounting I...

Страница 12: ...ce between the two circular holes is 100mm the hole diameter is 8mm and the hole depth is 40mm Figure 3 2 2 2 Schematic Diagram of Rail Mounting Figure 3 2 2 3 Schematic Diagram of Installation of Ezl...

Страница 13: ...surface of EzLogger Pro is as follows The ports on the bottom surface of EzLogger Pro are described as follows Figure 4 1 1 Schematic Diagram of Ports on the Bottom Surface of Ezlogger Pro 8 7 6 5 4...

Страница 14: ...fferential signal Figure 4 1 2 Schematic Diagram of Ezlogger Pro DI Ports 1 2 3 4 DI REF1 REF2 REF1 1 2 3 4 REF2 RCR 5V D_IN1 D_IN2 D_IN3 D_IN4 5V DRED RefGen DRM1 5 DRM2 6 DRM3 7 DRM4 8 Com DRM0 4 2...

Страница 15: ...to inverter please refer to the meaning of RS485 port of inverter Note that COM A of Ezlogger Pro connect to the RS485 A of inverter COM B of Ezlogger Pro connect to the RS485 B of inverter 1 RS485 c...

Страница 16: ...verters connected to a single COM port shall not exceed 20 When EzLogger Pro is connected to the environment monitor meter and other devices COM4 port shall be used Schematic diagram of COM4 port is a...

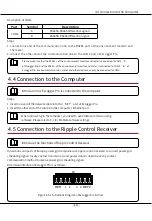
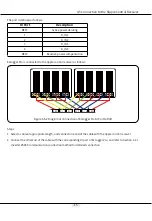
Страница 17: ...eduling signals DI terminal interface of EzLogger Pro is as follows Figure 4 5 1 Schematic Diagram of EzLogger Pro DI Port Please make sure that the RS485 of the environmental monitor and meter is con...

Страница 18: ...lect a cable of appropriate length and connect one end of the cable with the ripple control receiver 2 Connect the other end of the cable with the corresponding DI port of EzLogger Pro and refer to Se...

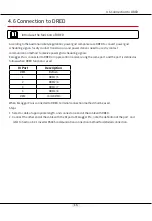
Страница 19: ...RED or ripple control receiver using the same port and the port is defined as follows when DRED function is used When EzLogger Pro is connected to DRED terminal connection method shall be used Steps 1...

Страница 20: ...on for EzLogger Pro If the user s network equipment is available with the dynamic IP DHCP such as router EzLogger Pro can be connected to the Internet in a plug and play way simply through direct conn...

Страница 21: ...e installation For connection of ProMate software to EzLogger Pro the user needs to choose between dynamic IP DHCP and static IP depending on the Internet configuration 1 How to Assign a Dynamic IP Ad...

Страница 22: ...hed to static IP mode default IP 192 168 1 200 then modify the computer s IP address take WIN7 as an example the steps are as below The user can find the methods from the Internet for modifying IP add...

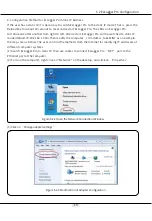
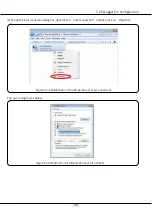
Страница 23: ...ialog box as below 4 Pop up the local connection dialog box right click on Local Connection and then click on Properties Figure 5 2 4 Modification of the Properties of Local Connections Figure 5 2 5 M...

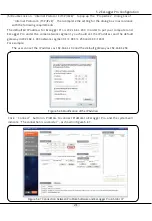
Страница 24: ...nd EzLogger Pro under the same network segment you should set the IP address and the default gateway in 192 168 1 XXX network segment 1 XXX 250 and XXX 200 For example The user can set the IP address...

Страница 25: ...of EzLogger Pro has been modified as the configuration as required by the user and physical connection between EzLogger Pro and ProMate can be disconnected after the configuration is completed Then t...

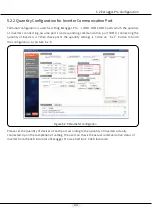
Страница 26: ...f inverters is 7 then check port 1 the quantity settings is 7 click on Set button to finish the configuration As picture 5 2 9 Please set the quantity of devices of each port according to the quantity...

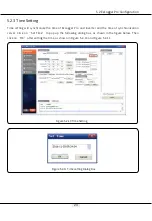
Страница 27: ...he time of synchronization server Click on Set Time to pop up the following dialog box as shown in the figure below Then click on OK after setting the time as shown in Figure 5 2 10 and Figure 5 2 11...

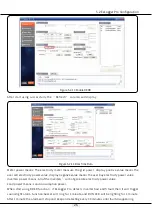
Страница 28: ...rding to power grid control signal only apply to Australia and New Zealand Before start using DRED function it will have to connect electricity meter well first and set inverter s safety country then...

Страница 29: ...e inverters sum of generate electricity power value Load power means Load consumption power When start using DRED function if EzLogger Pro detects inverter had earth fault then it will trigger sound l...

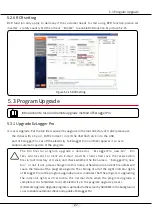
Страница 30: ...pgrade method of EzLogger Pro The bin files for program upgrade is named as EzLoggerPro_new bin Bin files will be sent to client via E mail And the client shall save the received bin files in root dir...

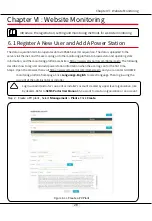
Страница 31: ...me Login The following describes how to register and add power station information when the user logs on for the first time Step 1 Open the browser then visit https www semsportal com Home Login and y...

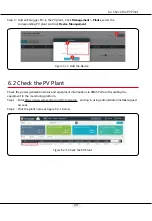
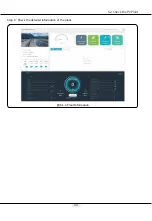
Страница 32: ...ick Device Management Check the power generation status and equipment information via SEMS Portal after adding the equipment to the monitoring platform 6 2 Check the PV Plant Step 1 Enter https www se...

Страница 33: ...30 6 2 Check the PV Plant Step 3 Check the detailed information of the plant 6 1 3 Plant Information...

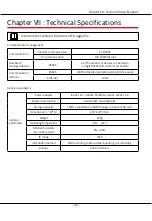
Страница 34: ...e RS485 port shall not exceed 20 Communication distance RS485 1000m shielded twisted pair wire shall be used Ethernet 100m General parameters Power adapter Input 100 240Vac 50 60Hz output 12Vdc 1 5A P...

Страница 35: ...continued products it is allowed to replace with the product of equivalent value 8 4 Disclaimer The following circumstances are not covered by the warranty 1 Product or parts have been beyond the warr...

Отзывы: