


Using the Clock and Timer
15
06
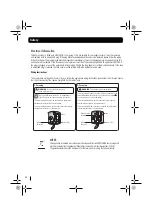
Setting the timer
DON’T FORGET!
You need to use the remote
control to use this function.
In
STANDBY
mode press the
TIMER
button.”ON TIME”
will be shown and the hour digits will begin to flash.
Adjust the hour by pressing the
>> / <<
buttons.
1
The timer is used to switch the system ON and OFF
at a specified time. It enables you to listen to the
DAB/FM radio, CD or AUX device.
Press the
TIMER
button to confirm and the minute digits
will begin to flash. Adjust the minutes by pressing
the
>> / <<
buttons.
2
Press the
TIMER
button to confirm and “OFF TIME” will
be shown. Follow the same procedure as in steps 1
and 2 to set the Timer OFF time, then press the
TIMER
button to confirm.
3
The function mode will cycle as below :
Select the desired source by pressing the
>> / <<
buttons and press the
TIMER
button to confirm.
4
The volume level will be shown. Select the level
by pressing the
>> / <<
buttons and press the
TIMER
button to confirm.
5
DAB FM CD AUX
Содержание MICRO1112DAB
Страница 21: ......


