


Using the radio
10
04
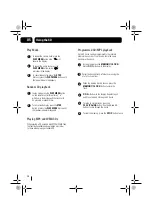
Basic operation
RDS
Press the
STANDBY
button on the main
unit to power on.
Press the
FUNCTION
button on the unit
to select Tuner mode.
Tune to the station you want by pressing
the
>>/<<
buttons.
1
2
3
4
1
2
3
4
Antenna
Preset stations
Select
TUNER
mode.
Tune to the desired radio station by
pressing the
PLAY/SCAN
or the
<< / >>
buttons.
You can store up to a total of 20 radio stations
in the memory (10-FM)
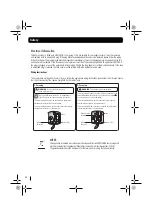
DON’T FORGET!
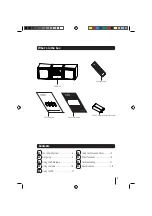
There is a built-in antenna wire on the
back of the unit. Move the wire around to
get the best reception. For best DAB
reception stretch the wire vertically.
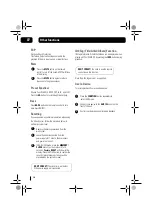
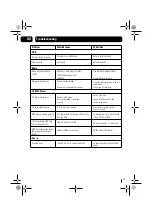
To display data information:
1. Whilst listening to a station repeatedly press
the
INFO
button to select the data information
required, the display will show the data
information in the bottom line of the LCD
display.
The following LCD display screens show typical examples
of data information which is shown in the bottom line of
each screen:
This is scrolling text information supplied by the FM station.
It may show information on music titles or details of the
programme and is provided by the broadcaster. “NO RT”
will be shown if FM station with RDS is not available.
This is a description of the type of programme provided by
the FM station and is provided by the broadcaster.
“NO PTY” will be shown if an FM station with RDS is not
available.
This displays the time and date and is provided by the
broadcaster, so will always be accurate. “NO CT” will be
shown if an FM station with RDS is not available.
This displays the transmission frequency.
Program name
Program type
Current time and date
Scrolling text information
Frequency
Displaying data information
Radio Text - Sc
r
olling Text:
Program Type
Time and Date
Frequency
To automatically scan to the next available
station, press the
PLAY/SCAN
button.
Press and hold the desired number
button on the remote control to store
the radio station, for example button
number 4. After 2 seconds the display
will show "Preset 4 saved".
To recall a preset station in preset 4,
briefly press the 4 button on the
remote control.
The radio will switch to the desired
station. If no preset station has been
assigned to preset memory 4, the
display will show "Empty preset".
Содержание MICRO1112DAB
Страница 21: ......


