11
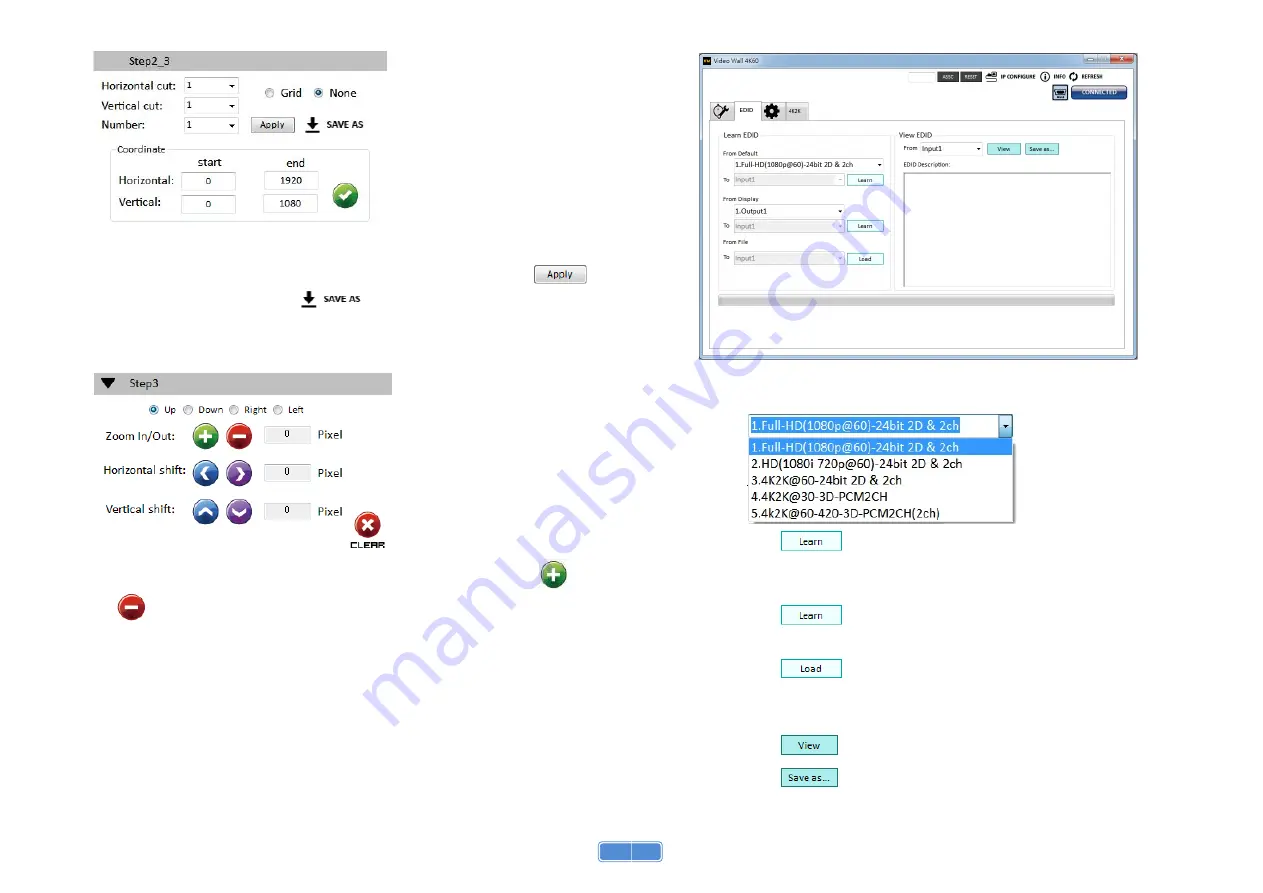
(5) Step 2-3: custom define
In Custom define mode, you can define how to cut in both directions and the part you want to
show on output TV. If you want to understand or estimate which part you may select, you can
select the Grid button to show grid on the graph. After the setting, please click the
button. Besides, you also can click the
button to save the configuration for future
usage. You can adjust the output position by setting coordinates.
(6) Step 3: adjust image
Zoom In/Out: You can change pixel size from the edge of image by clicking
and
button (the edge of image has four directions). After adjusting the image, the rest of
this image will be auto-scaled to fulfill the screen.
Horizontal shift/ Vertical shift: You can arbitrarily move the image on each screen in
horizontal direction or vertical direction. Move one pixel at a time.
12
3.
EDID (Extended Display Identification Data)
(1) Learn EDID from the default
Select Default EDID (1-5 default EDID).
Click
button to learn default EDID.
(2) Learn EDID from Display
Select the Output.
Click
button to learn display EDID.
(3) Learn EDID from File
Click
button to select the EDID file and write it into input.
(4) View EDID content
Select the EDID input source (Input, Output or From File).
Click
button to read the EDID description and analysis.
Click
button to save the EDID as a file in the connected computer.


